this is your guide to 3D printing
#
support material we'll cover how to use
#
it efficiently as well as how to tweak
#

your slicer to get it to peel off
#
perfectly
#
[Music]
#
personally I don't really like using
#
support material in fact I designed my
#
plants to try and avoid it but sometimes
#
it just can't be avoided and in those
#
cases I want it to be as easy to use as
#
possible my patrons requested a video on
#
this topic so here we are covering
#
multiple scenarios as well as multiple
#

slicers let's start from the beginning
#

by asking what is support material and
#

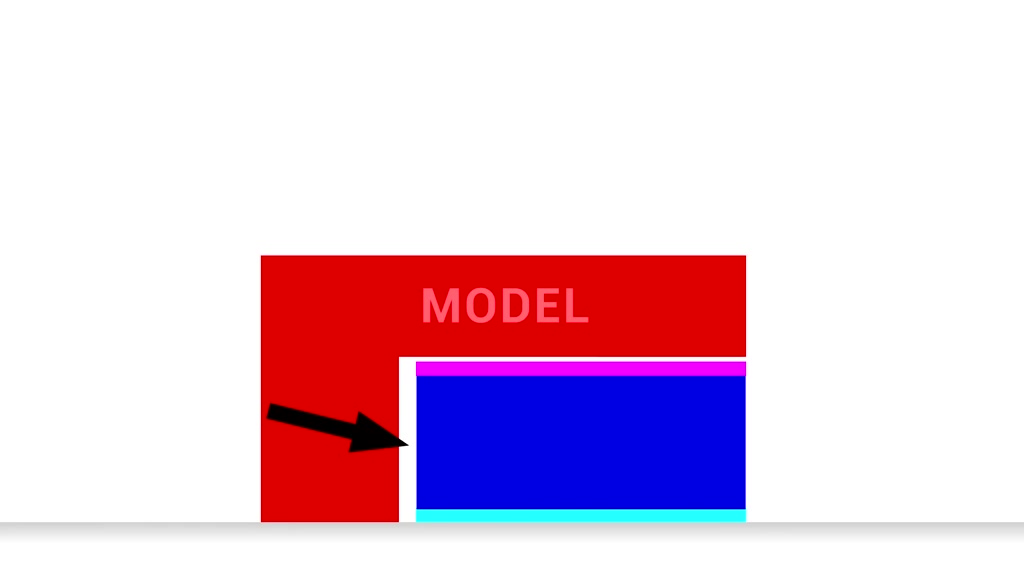
why and when do we need it here is a
#
simple test piece to show what a 3D
#

printer can and can't achieve when
#
building up layer by layer on the left
#
we have an overhang in this example 45
#
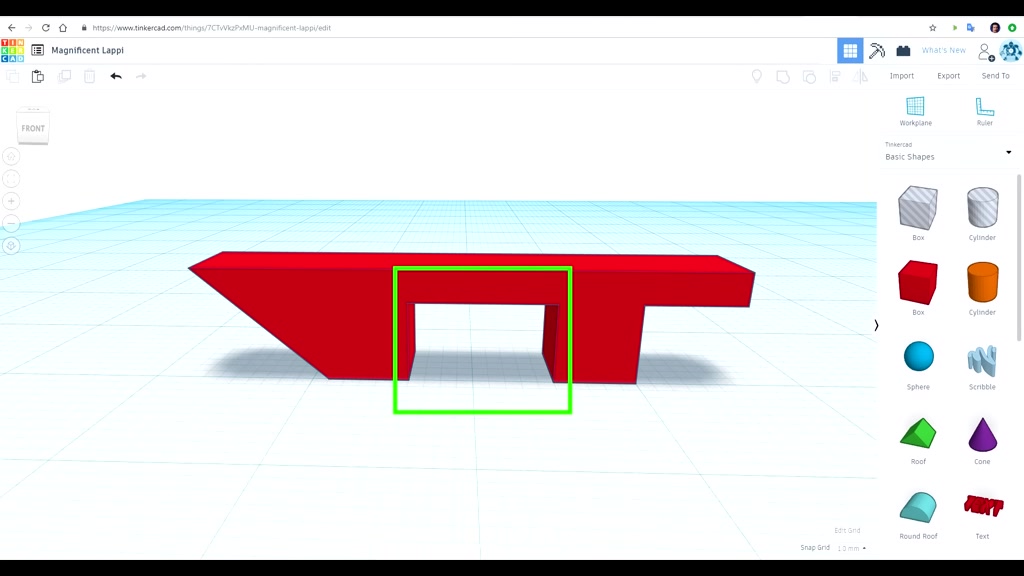
degrees in the middle we have a bridge
#
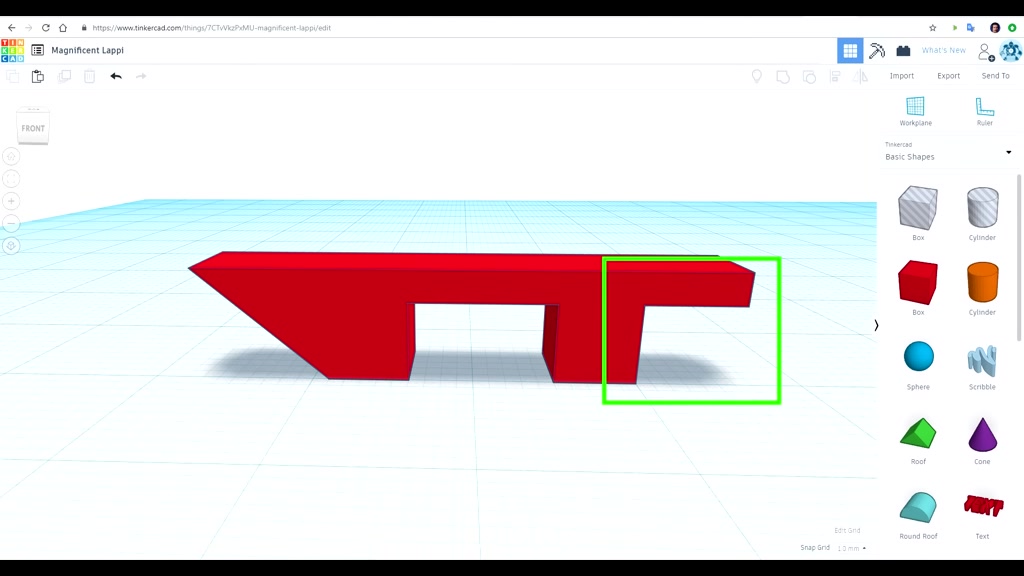
supported on both sides and then on the
#

right we have an unsupported section
#
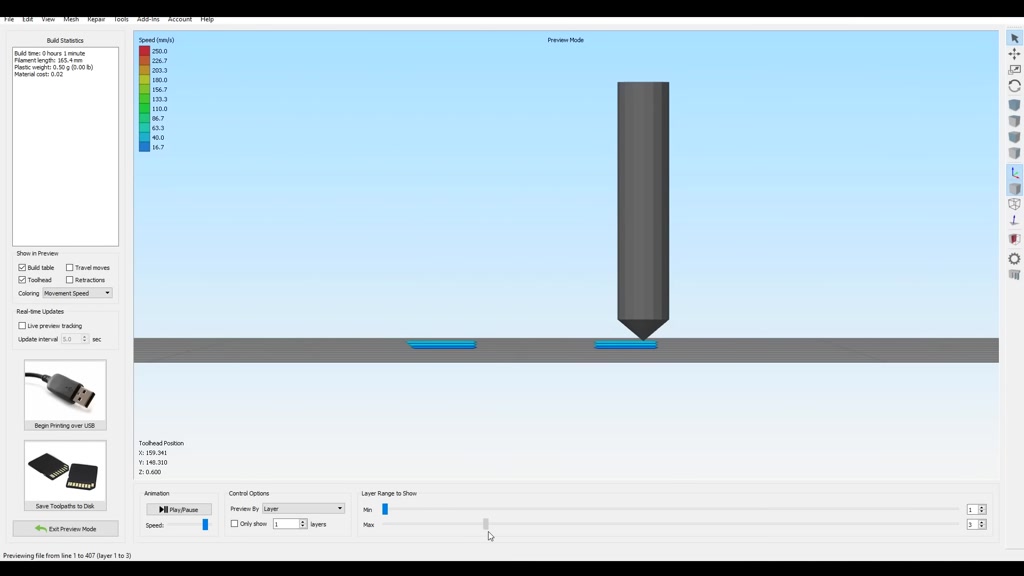
cantilevered let's preview this print
#
and see that in the earlier stages our
#

angled overhang is in effect we can see
#
on the left at the 45 degree overhang
#
prints really without any trouble at all
#
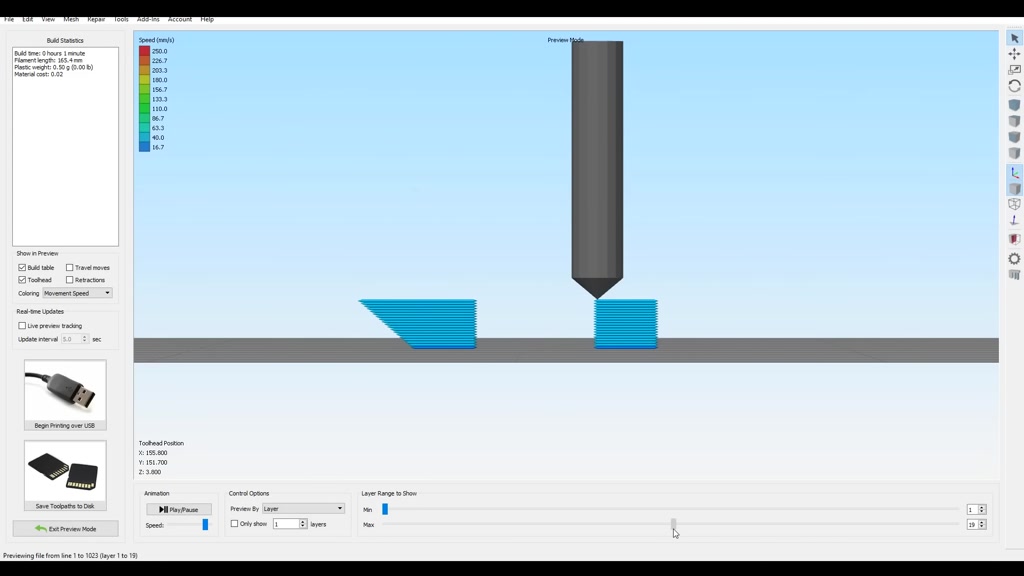
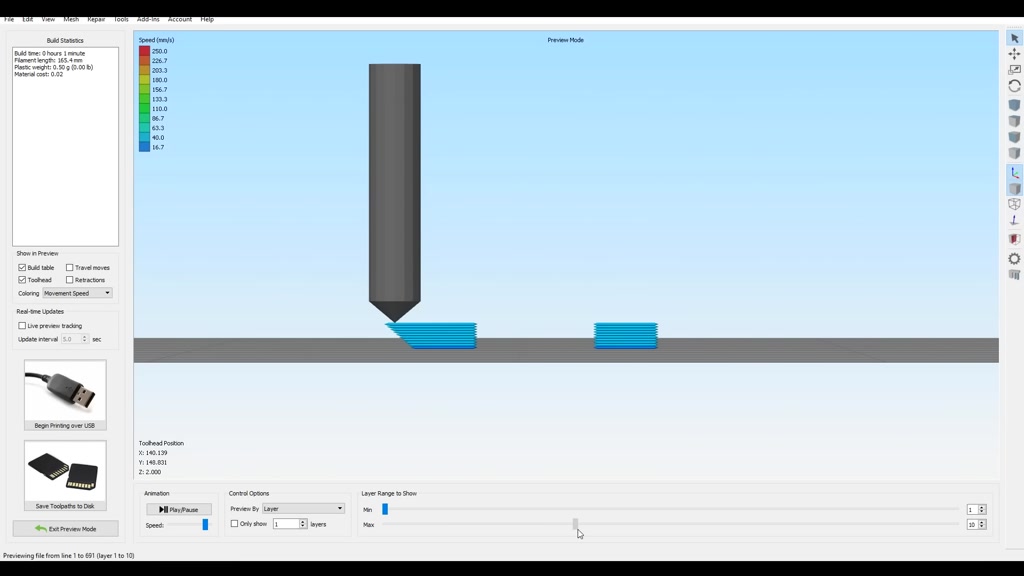
and as the print progresses a little
#
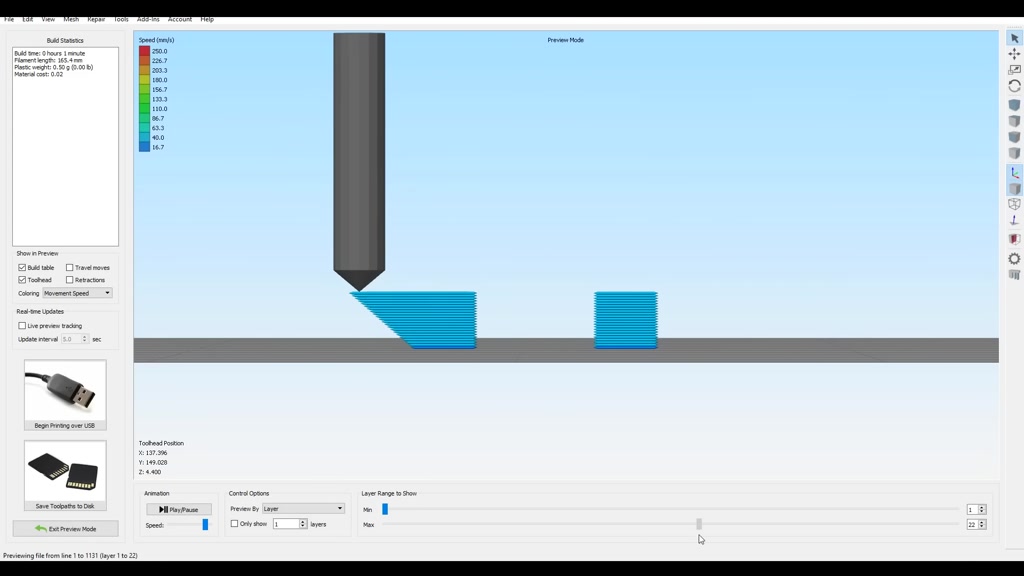
further we can see that we're going to
#

have our bridge in the middle as well as
#
a are cantilevered unsupported section
#
on the right if you're new to 3D
#
printing you might be amazed just how
#
good they are at bridging despite being
#
a molten material the part cooling fan
#
will solidify the plastic in mid-air
#
however on the right the overhang
#

supported on only one side is drooping
#
badly because there's not enough support
#

there to hold up the extruded plastic
#

amazingly it doesn't recover quite well
#

by the end of the print but in other
#
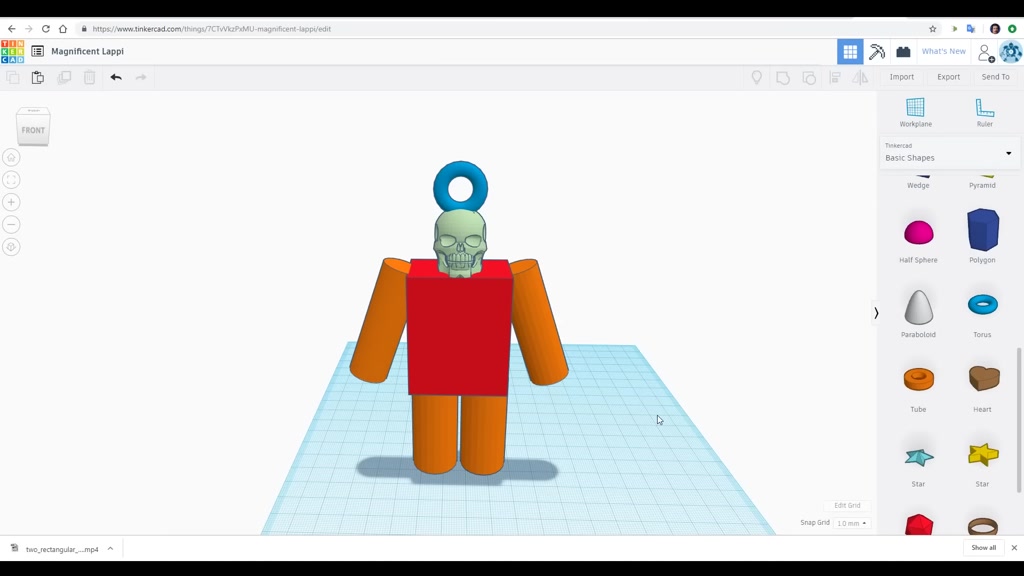
cases such as this key ring we won't be
#
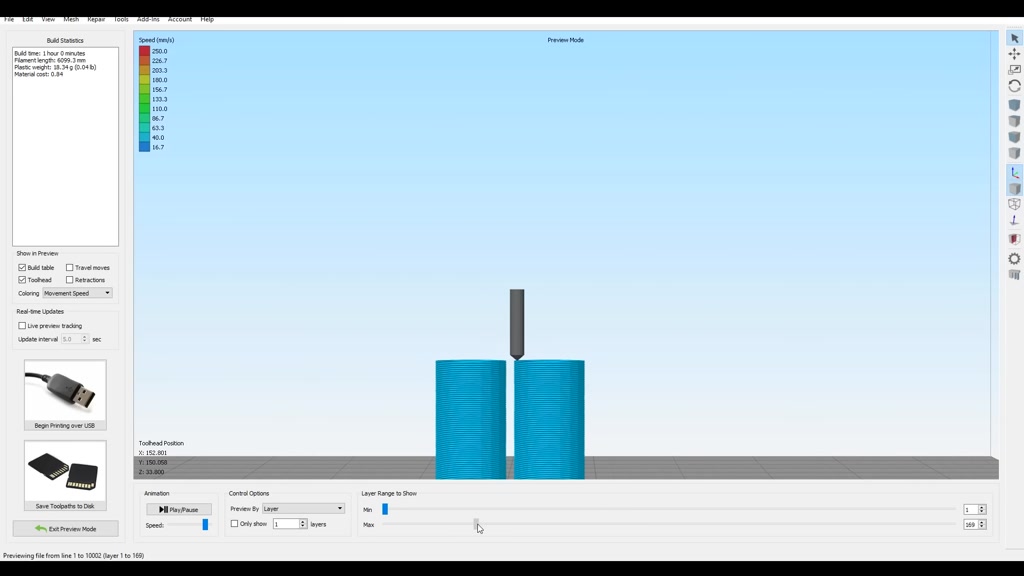
so fortunate previewing layer by layer
#

we can see that legs will be fine but as
#
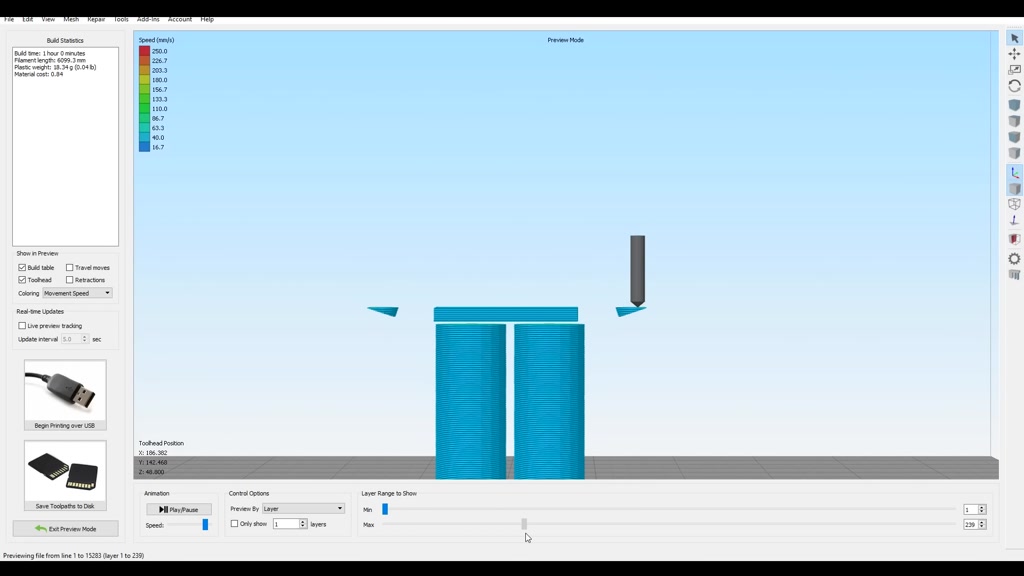
soon as these arms are introduced the
#

tip of them will be printing in mid-air
#
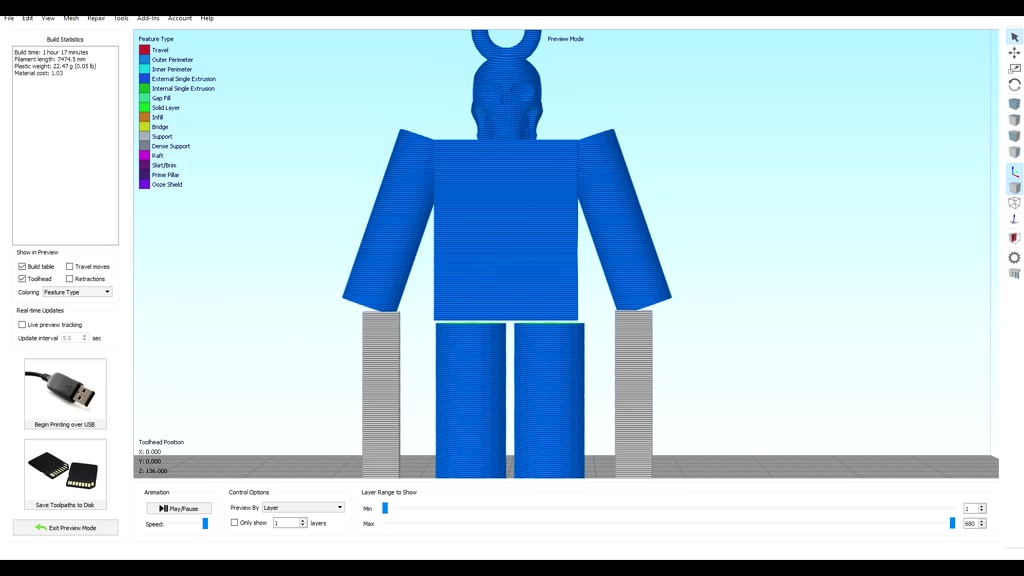
so to stop this from being unsupported
#
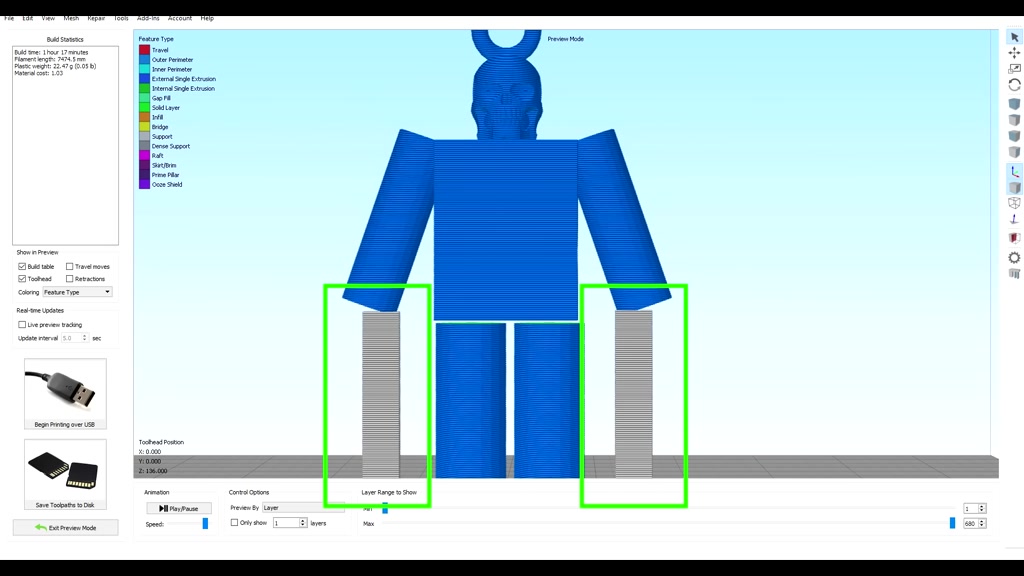
we introduce support material shown here
#

in Gray you can think of support
#

material like scaffolding on a building
#
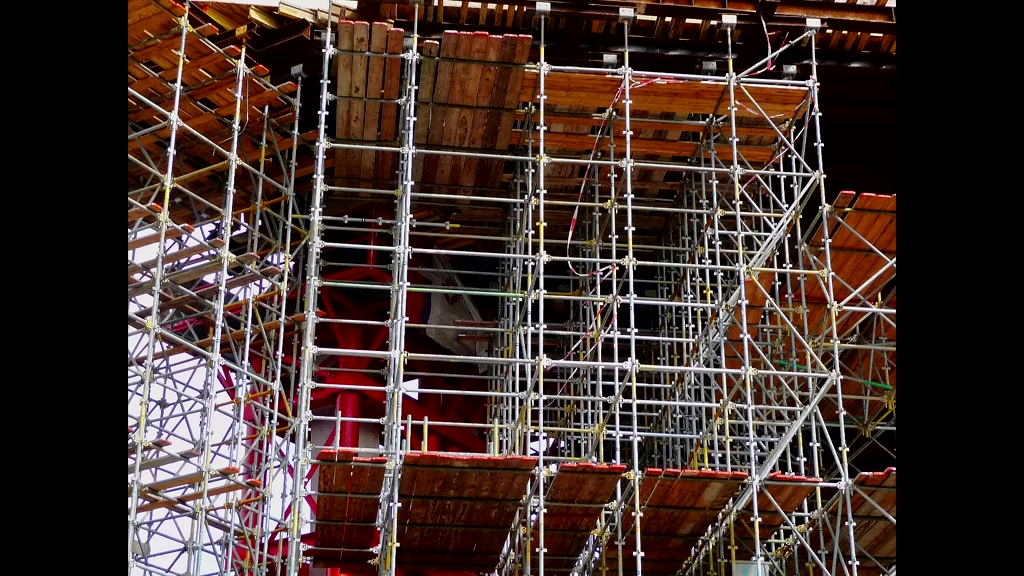
a temporary structure designed to hold
#

pieces from falling to the ground until
#

the rest of the structure is completed
#
and once the structure is complete just
#
like building scaffolding we can remove
#
it as it's no longer needed this means
#
that there 3D printing support material
#
is sacrificial and therefore will use up
#

extra time and filament so coming back
#

to our original questions support
#

material is additional sacrificial
#

plastic that we add to the print to
#

support sections that would otherwise
#

droop down and possibly cause the print
#

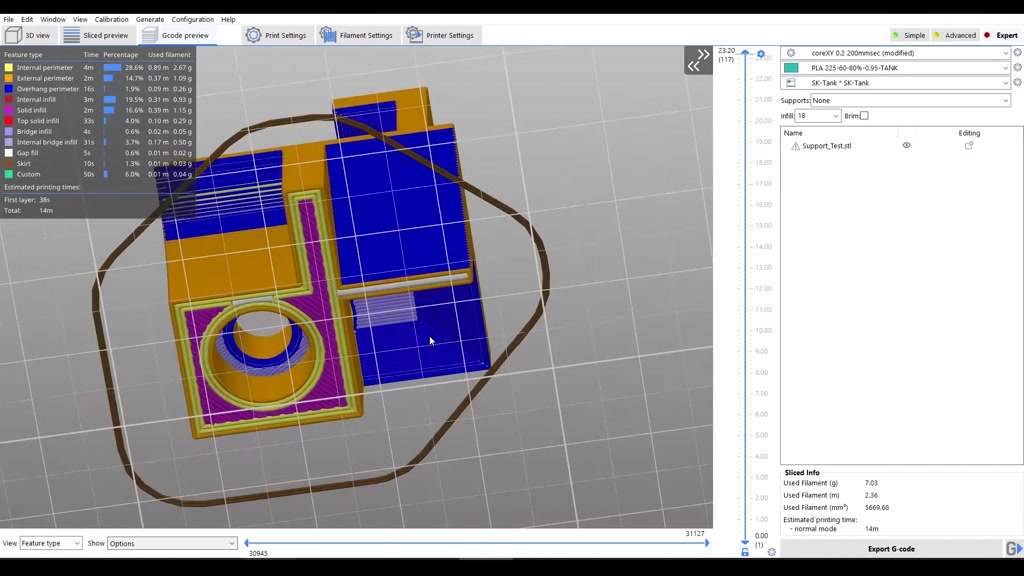
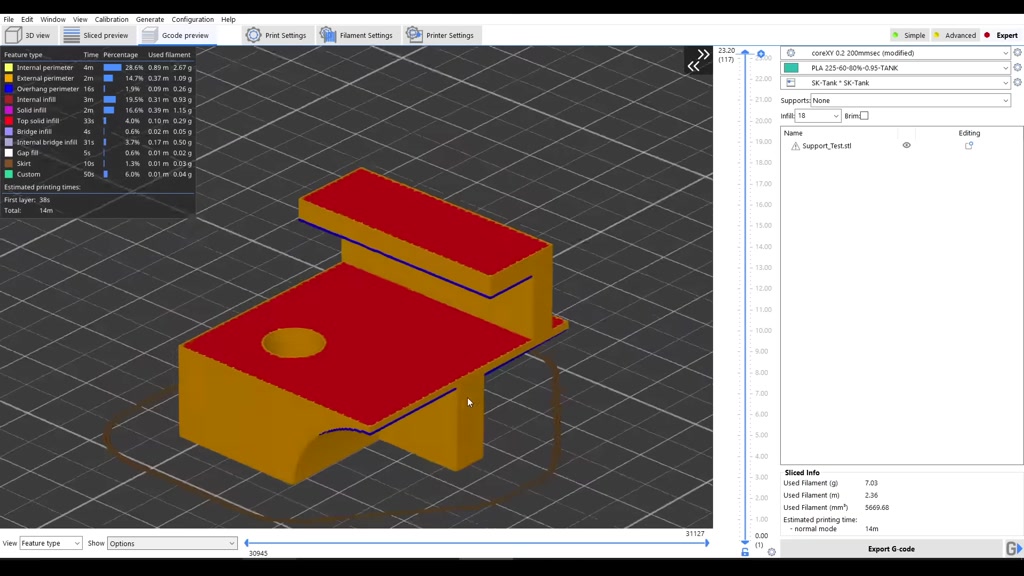
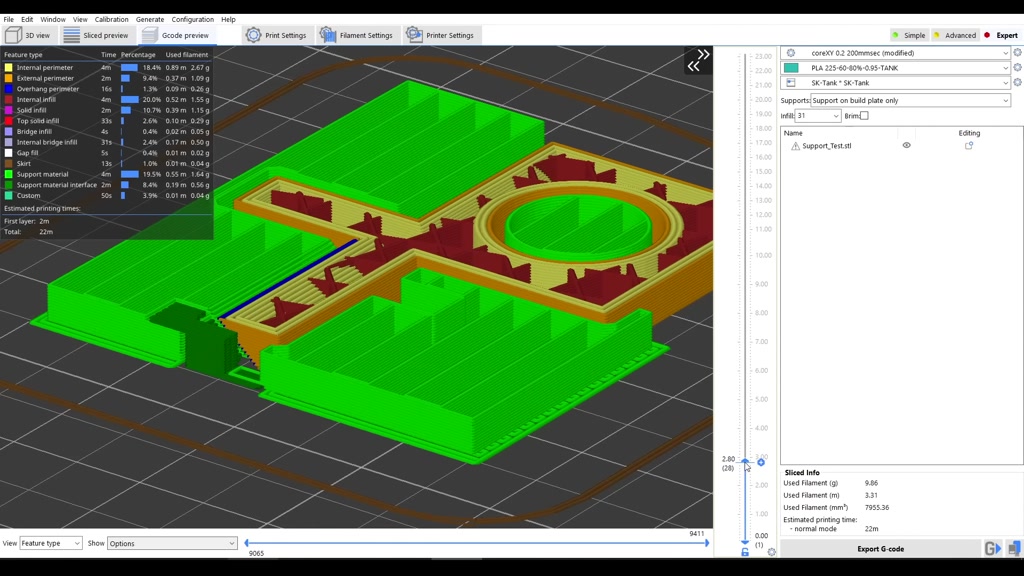
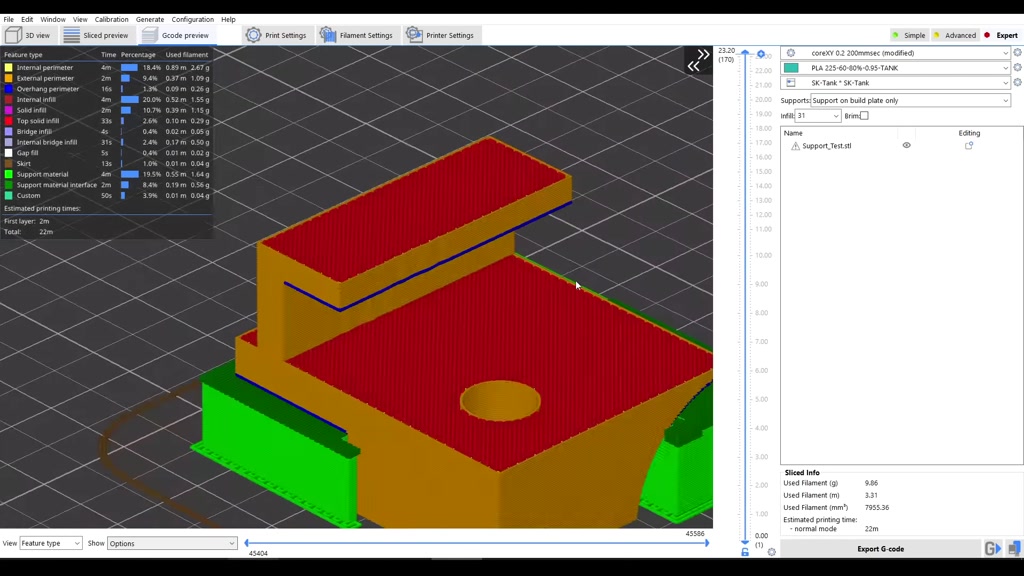
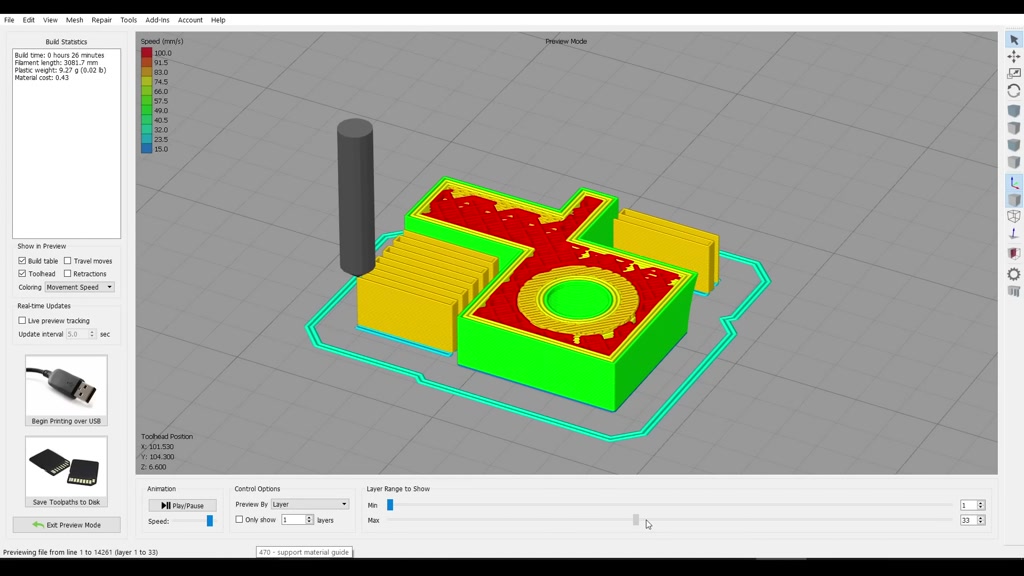
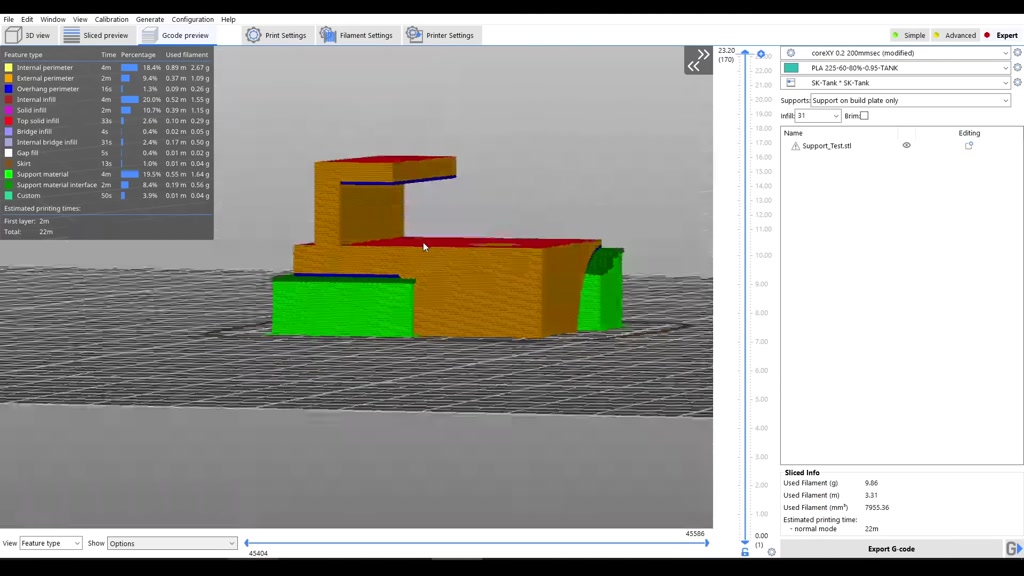
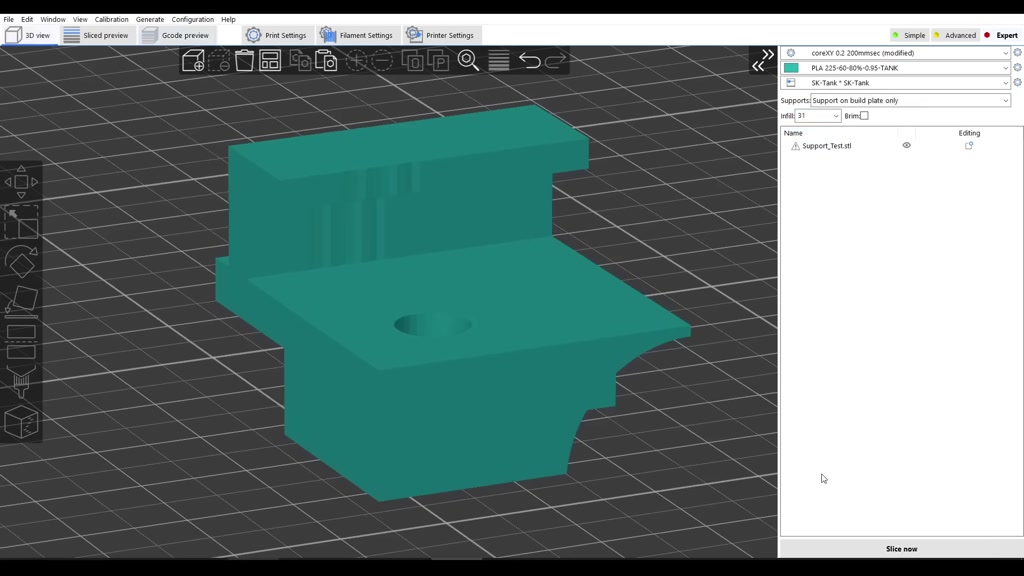
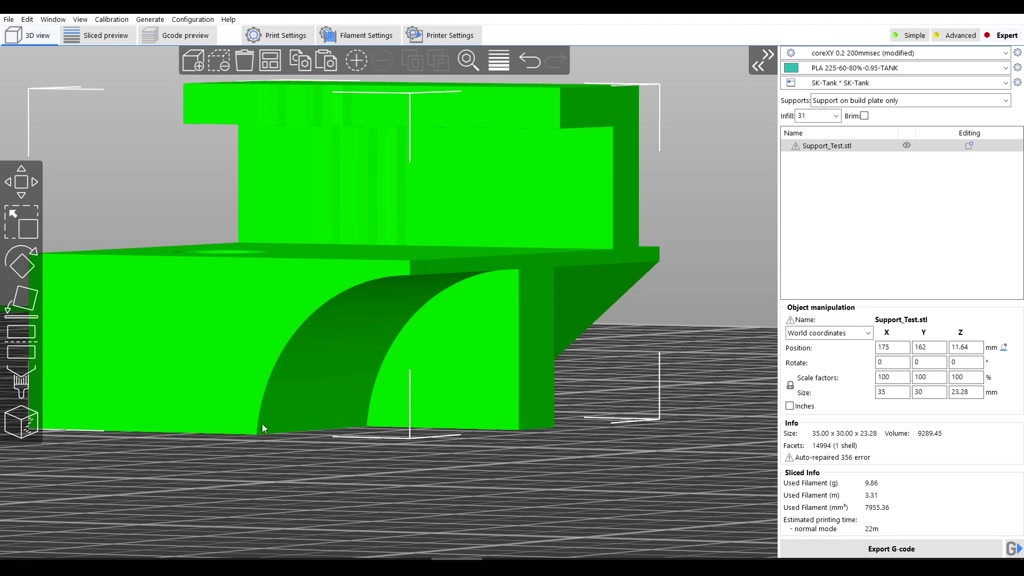
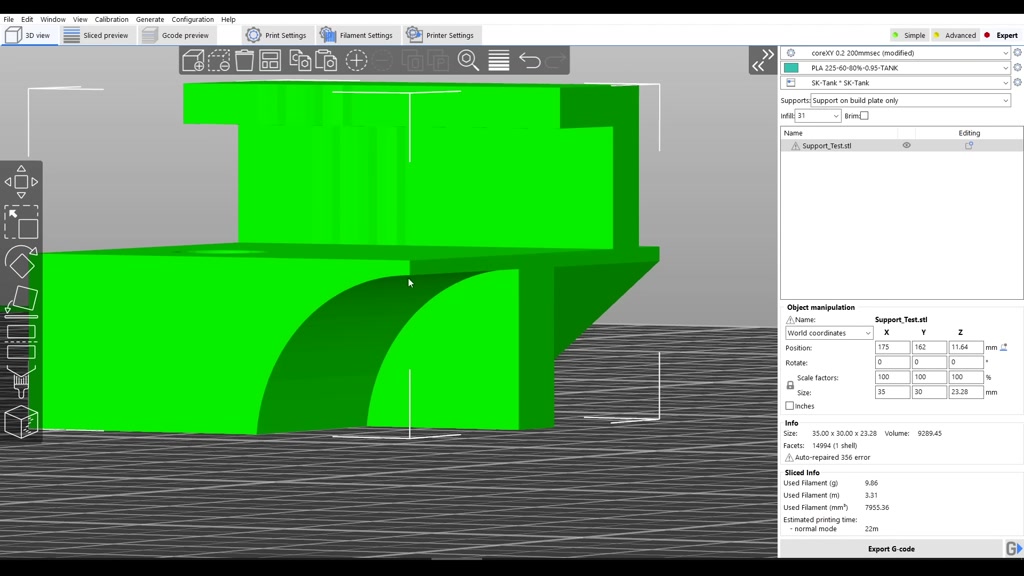
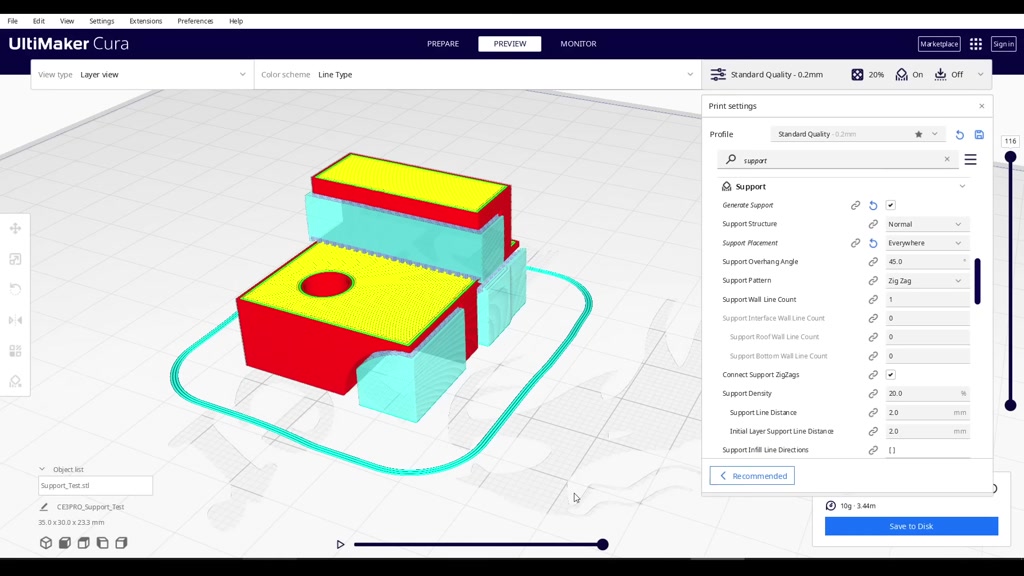
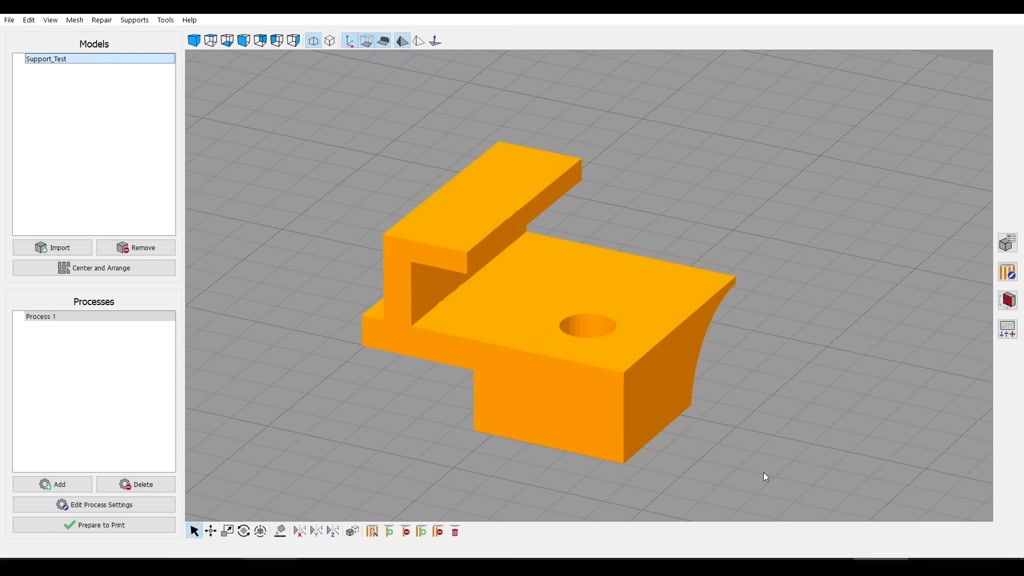
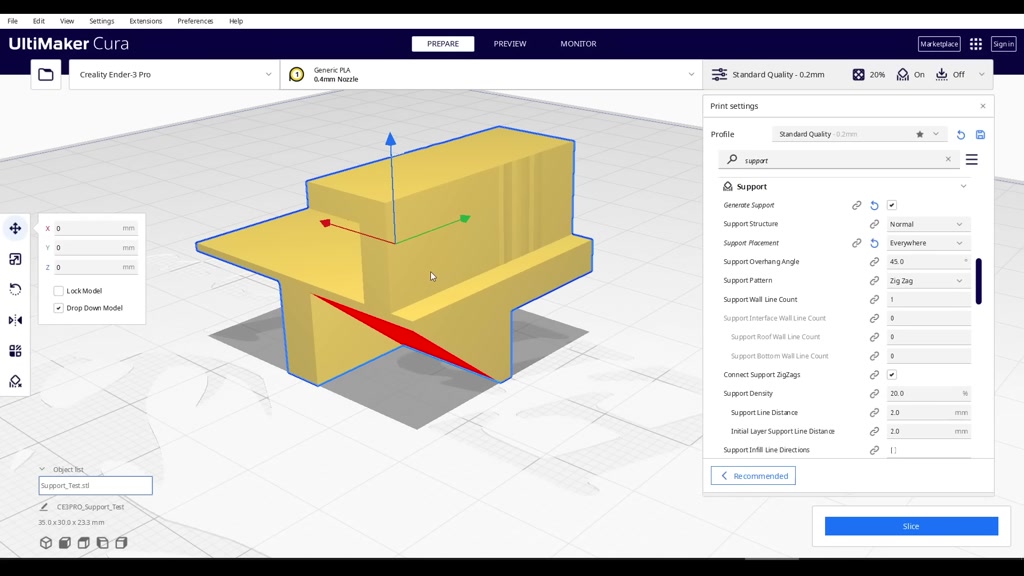
to fail before we continue we need a
#

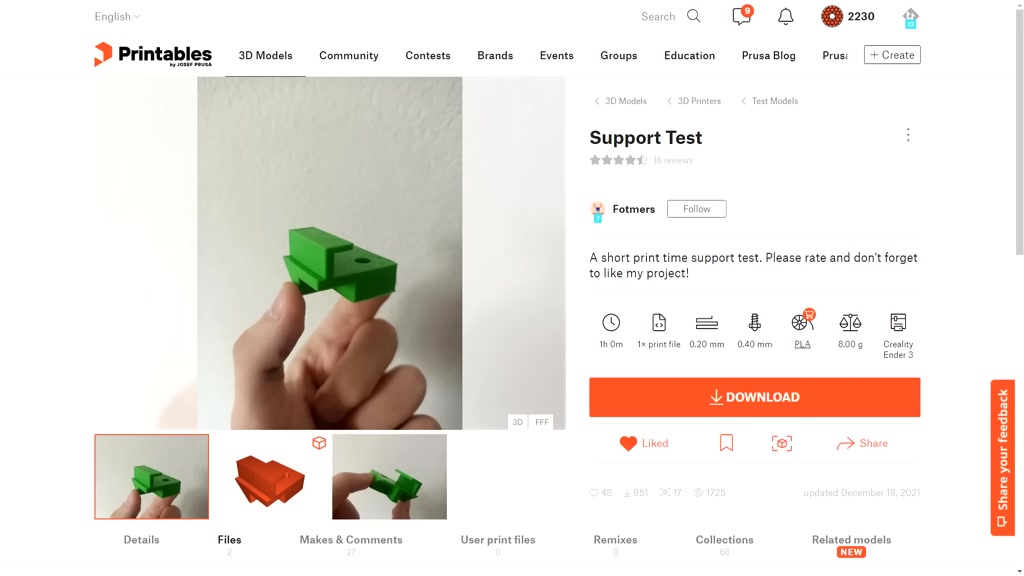
suitable test model to demonstrate the
#

principles and I think this support test
#

by fotmas is ideal if we examine this
#
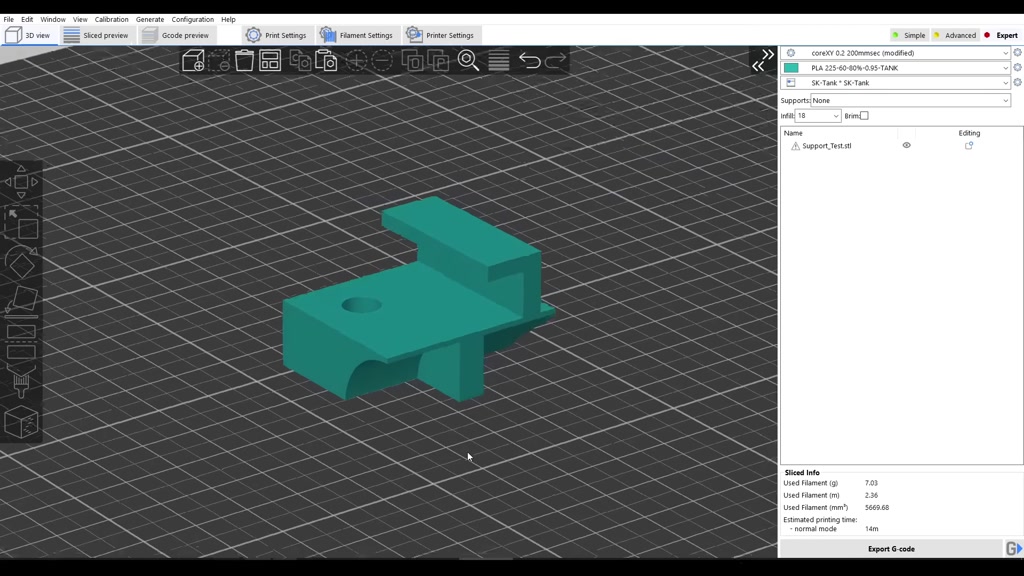
model we can see that the geometry will
#
cover a variety of scenarios where we
#
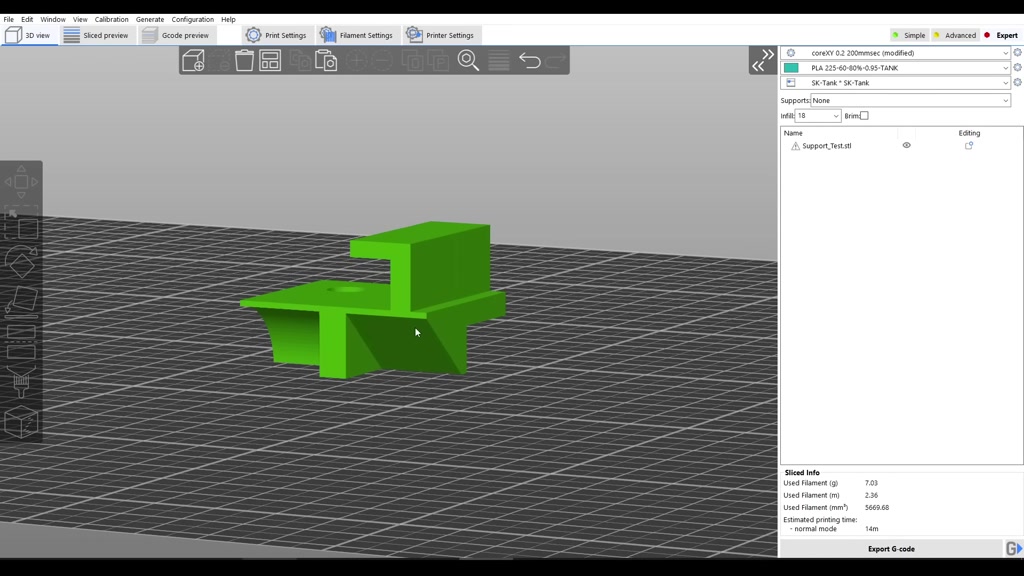
might need support firstly we have a 45
#
degree overhang then we've got
#

Affiliated overhang which starts close
#

to vertical and gets steeper as it goes
#

we've got an overhang with a flat
#
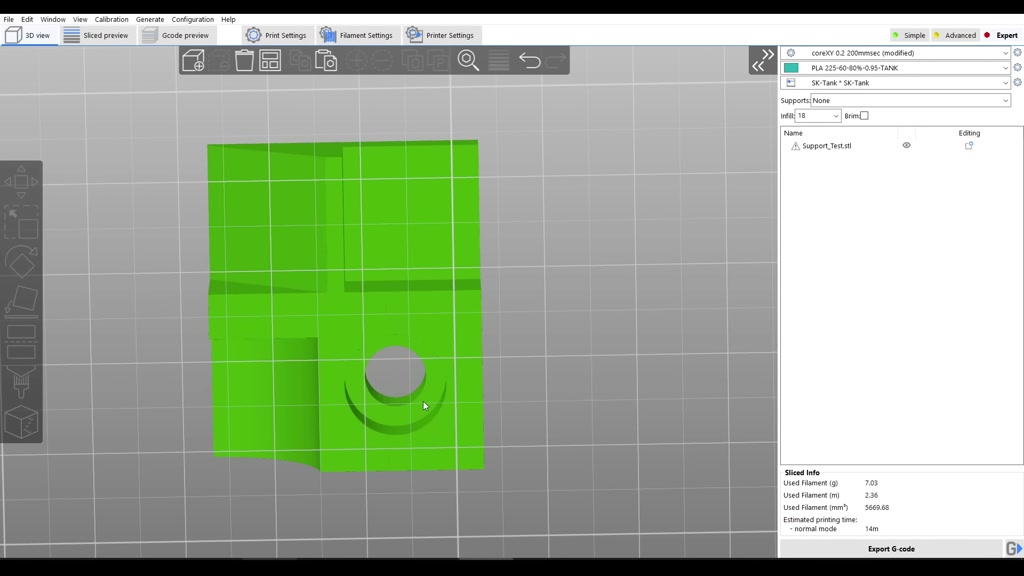
surface we have an overhang with the
#
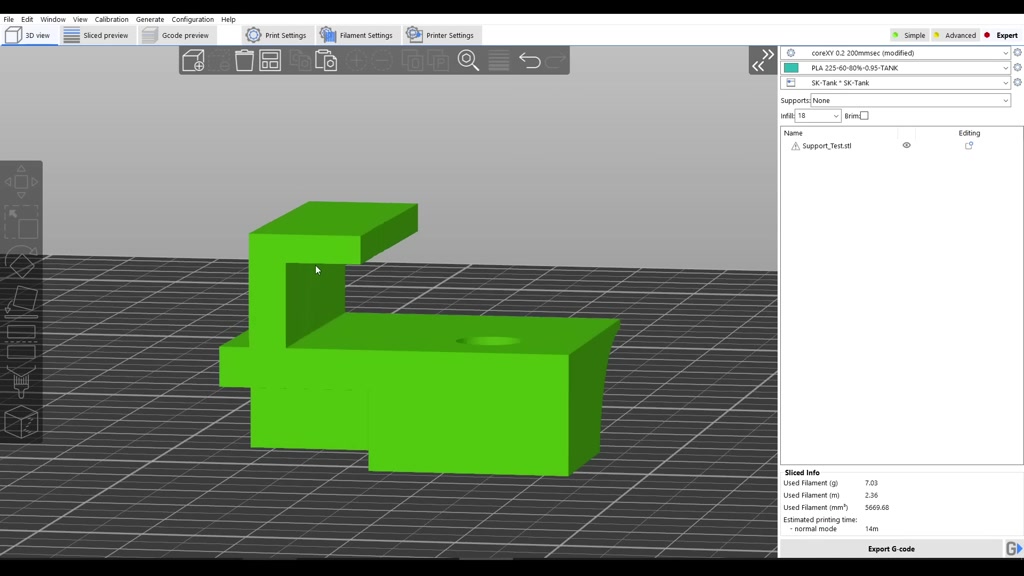
circular bore on the inside and we have
#
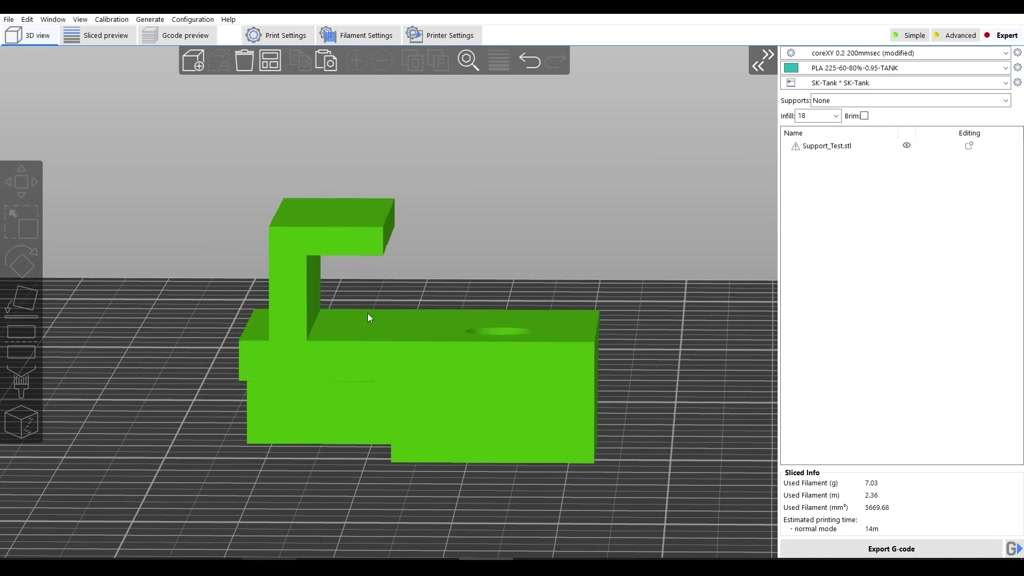
one more overhang on top cantilevered
#

but most importantly this sits above the
#
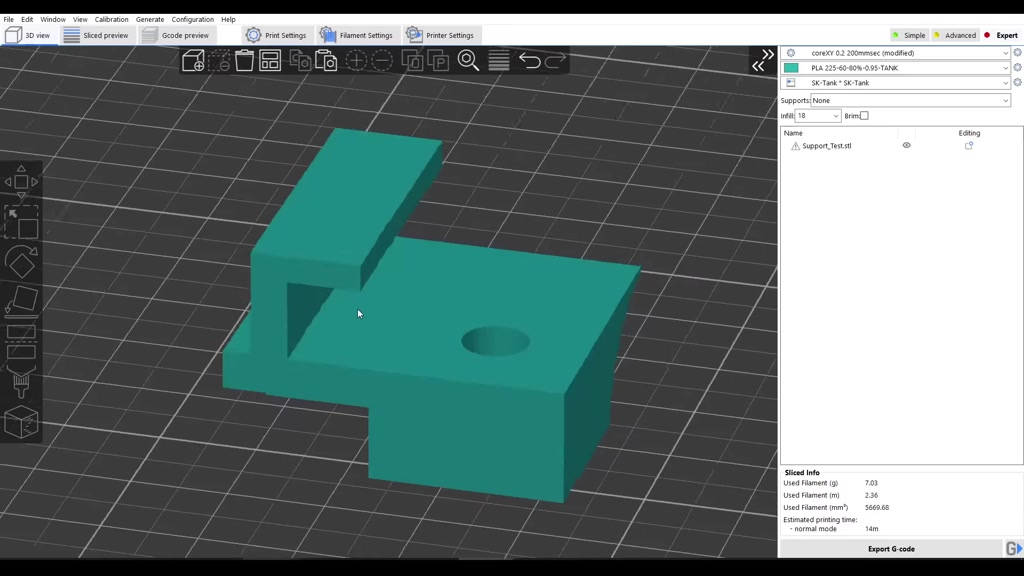
model rather than sitting on top of the
#
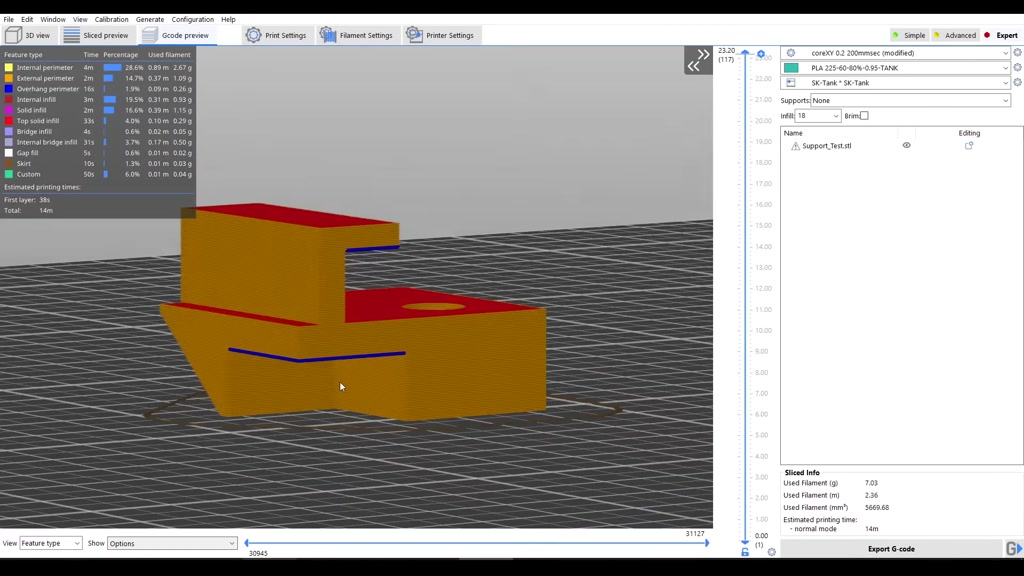
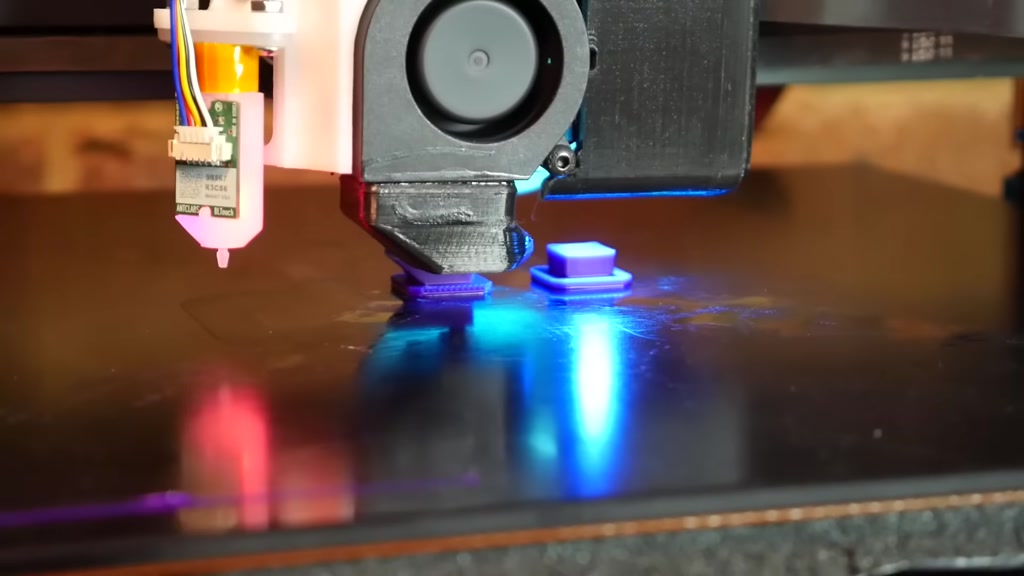
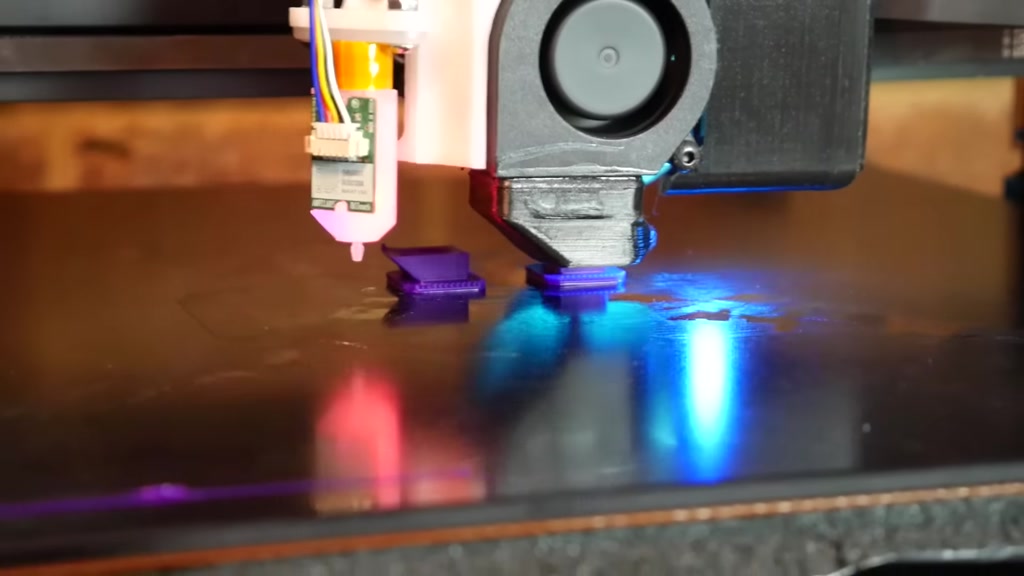
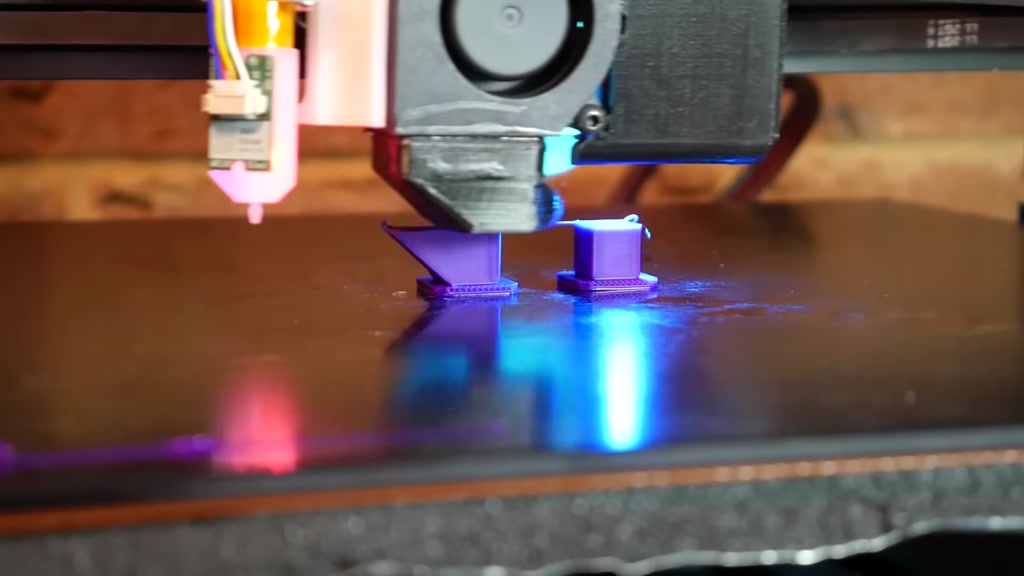
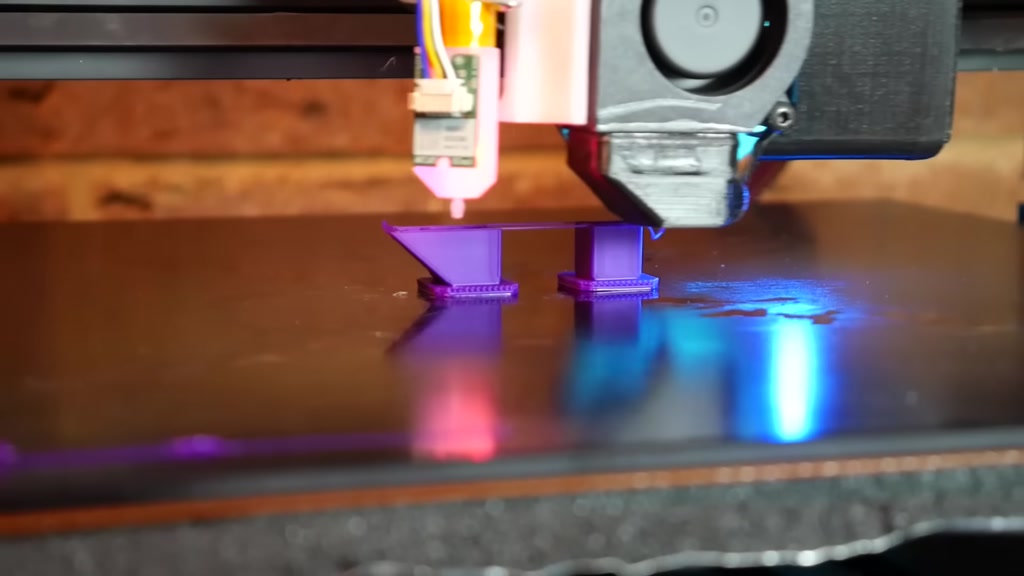
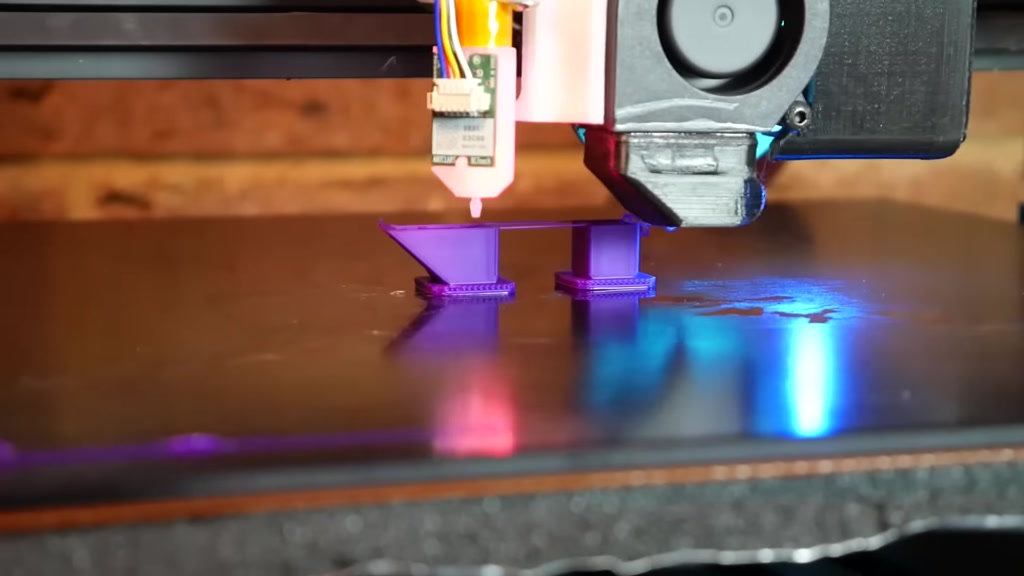
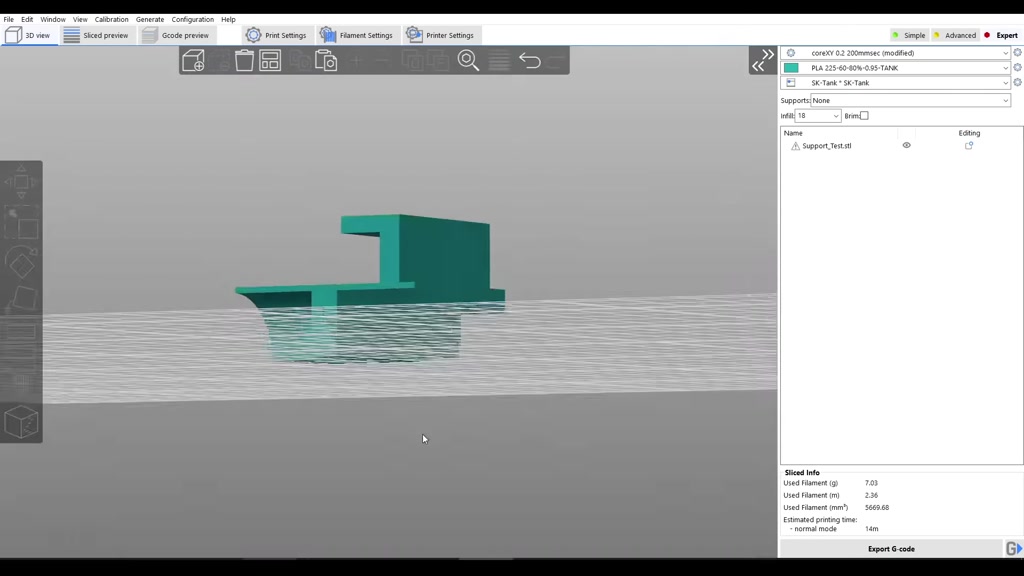
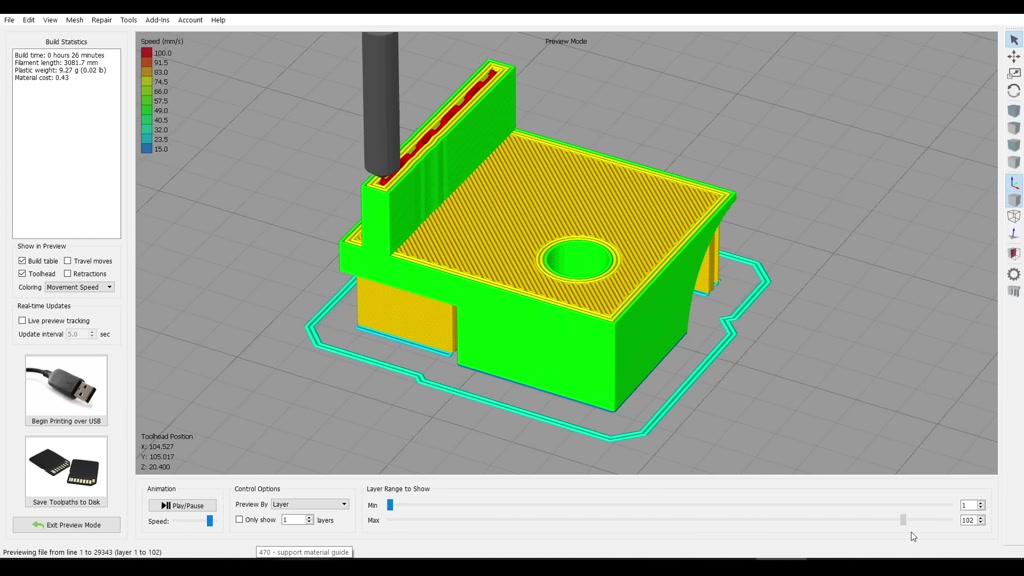
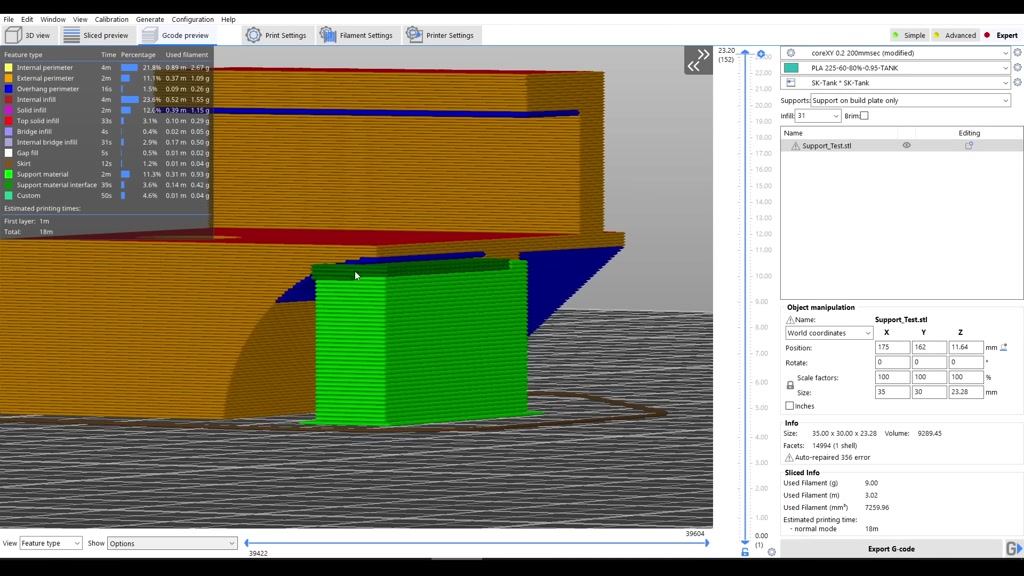
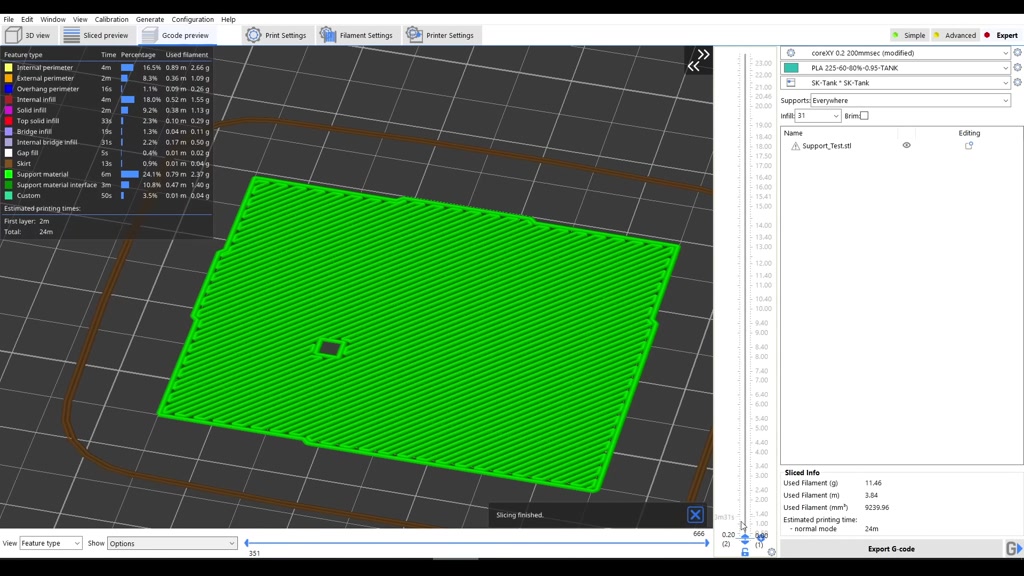
bed the first thing I'm going to do is
#
to slice it and print it without any
#
support material in place just to see
#
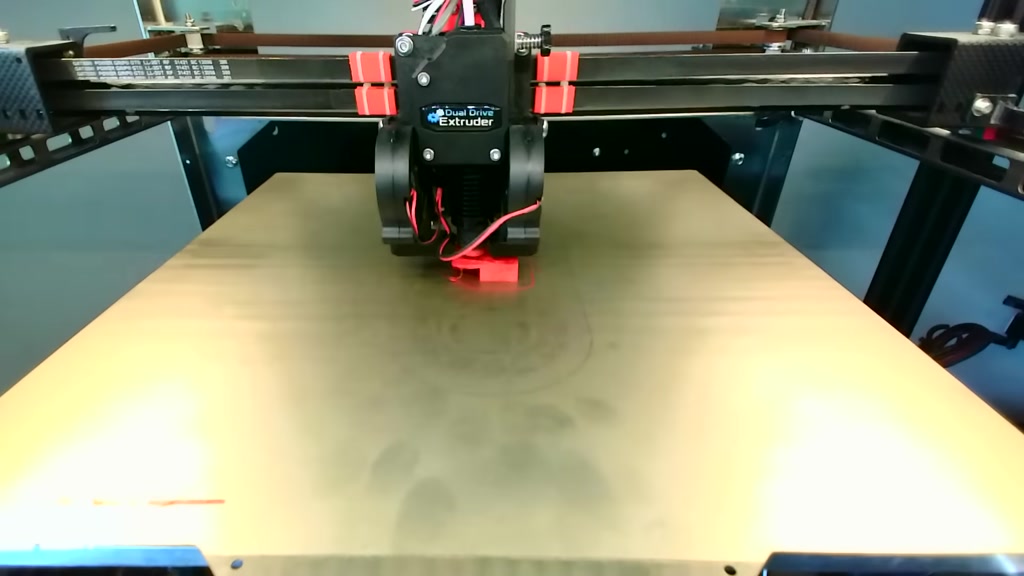
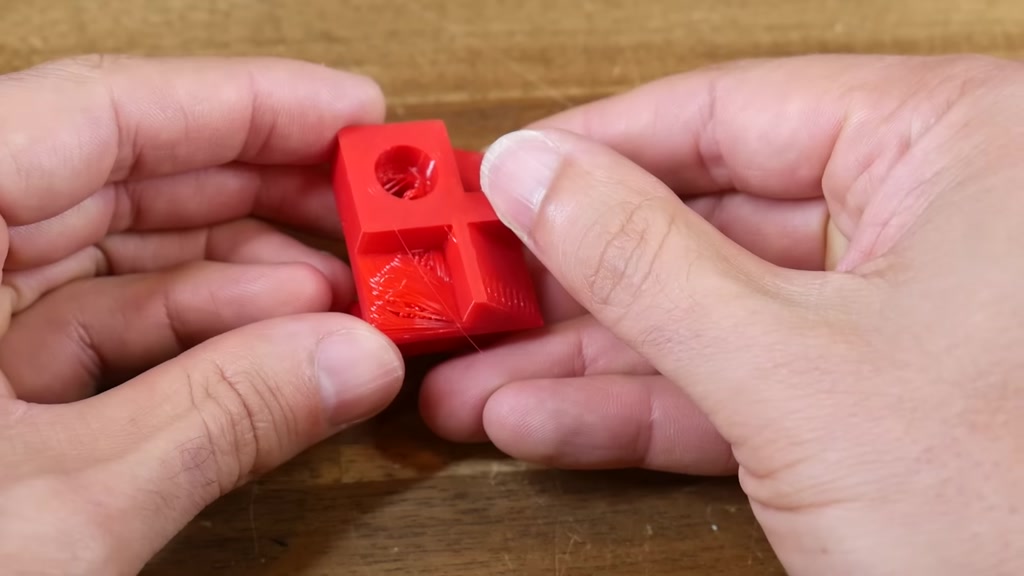
how it goes like this we use minimal
#
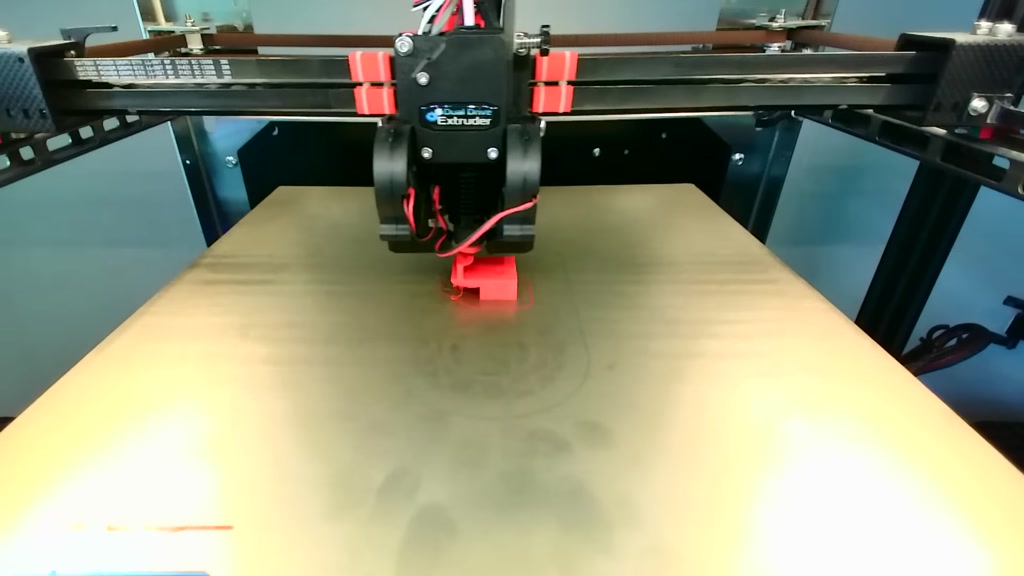
filament and this took just under 15
#
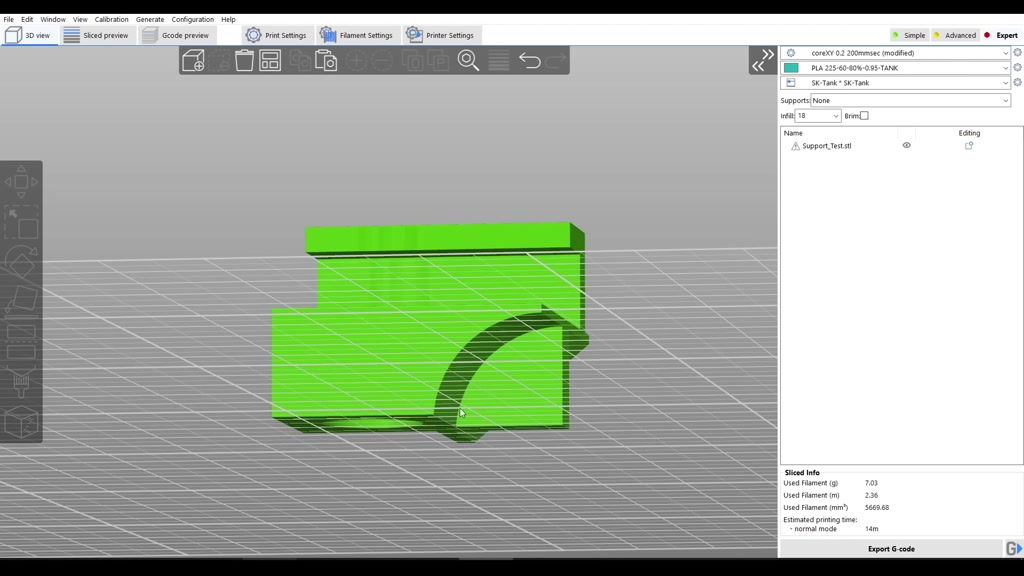
minutes and considering no support
#

honestly it doesn't look too bad but
#
there are droopy sections where the
#
plastic is messy because it's been
#
extruded in midair so let's see how much
#
we can improve this print by turning on
#

support material
#

next we'll answer the question what are
#

the available types of support material
#

and at the time of recording there's two
#

to choose from traditional and tree or
#

organic traditional is by far the most
#

common so we'll start with that it's
#

also the most like the scaffolding
#

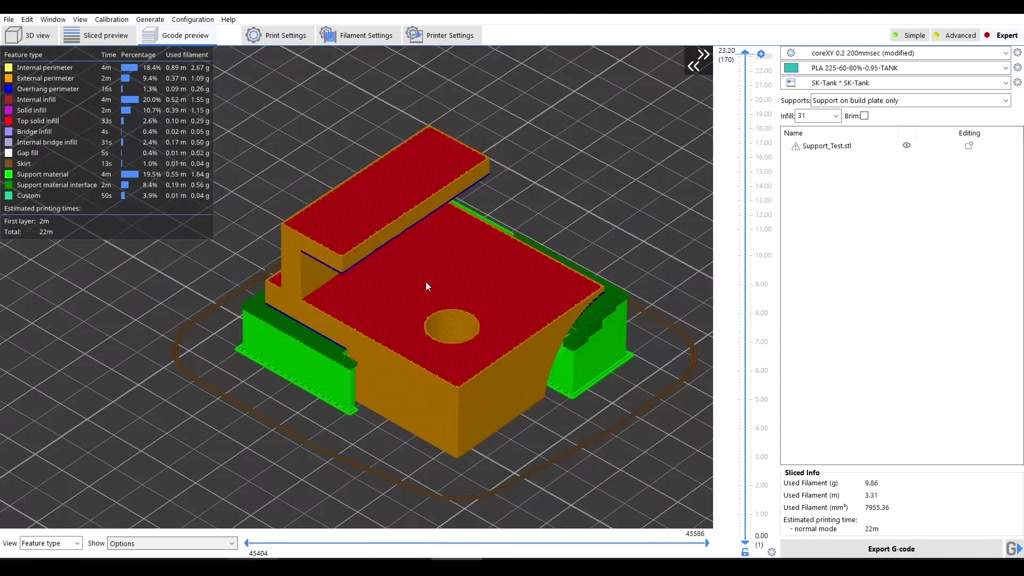
example we looked at from real life
#
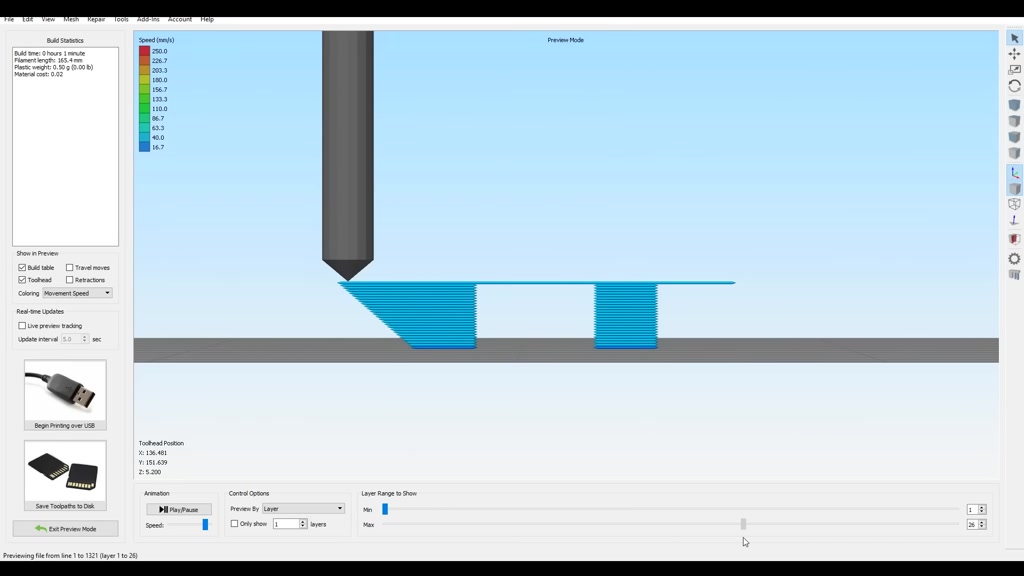
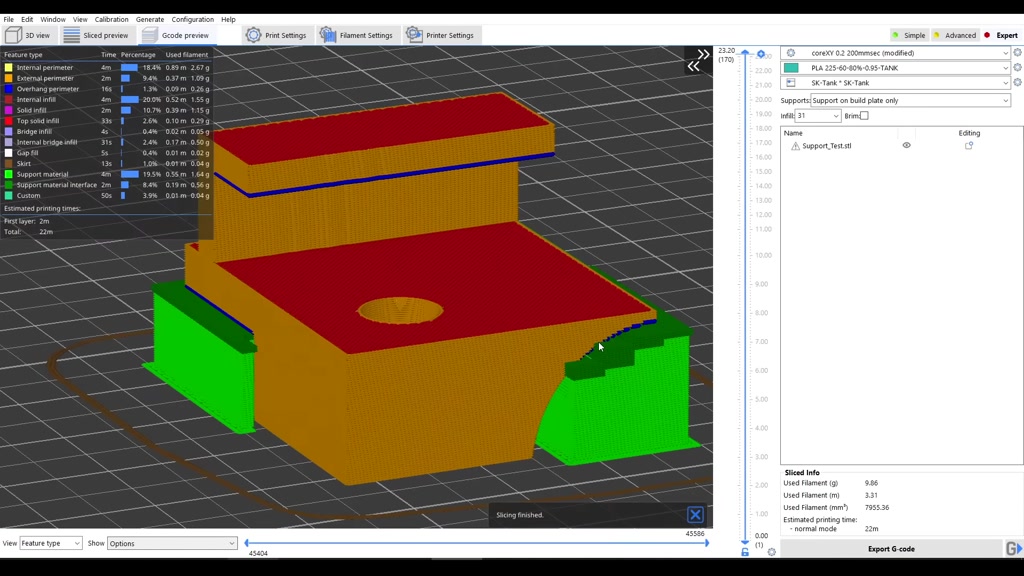
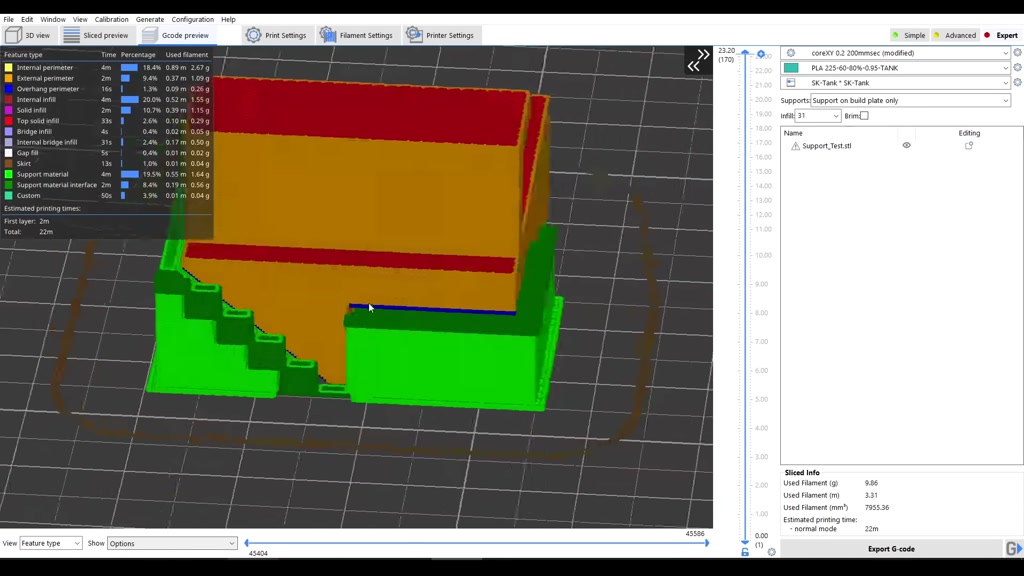
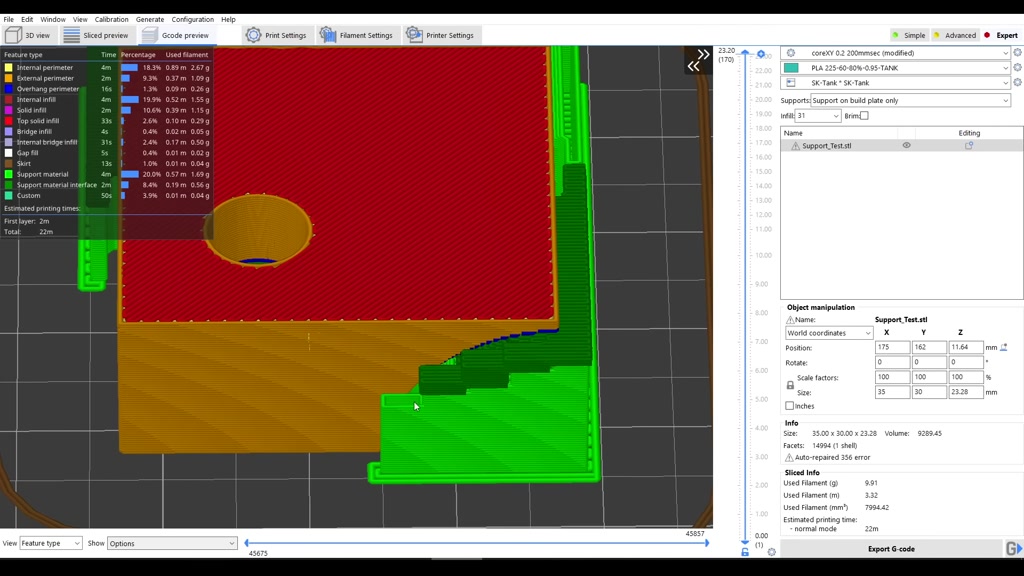
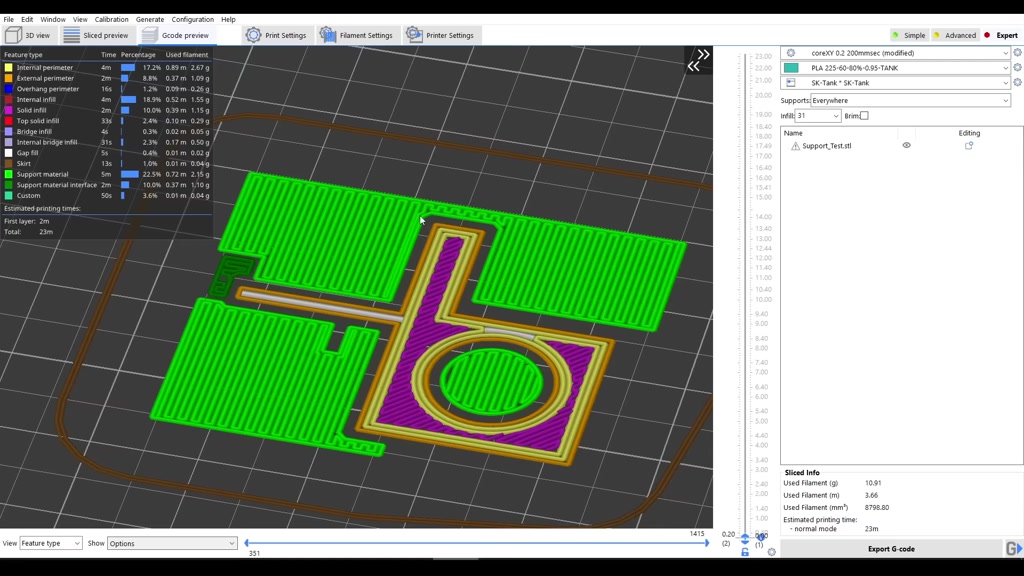
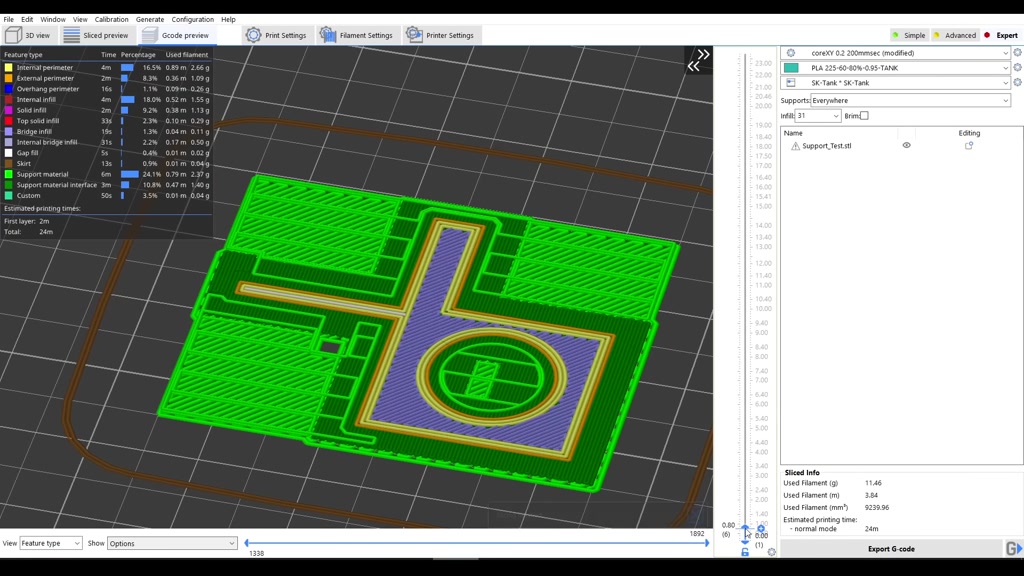
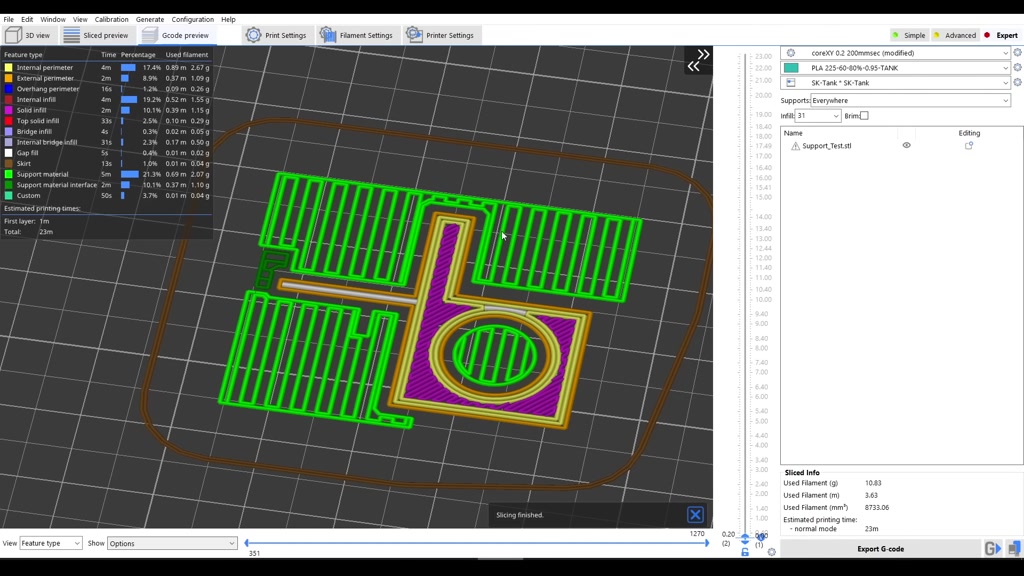
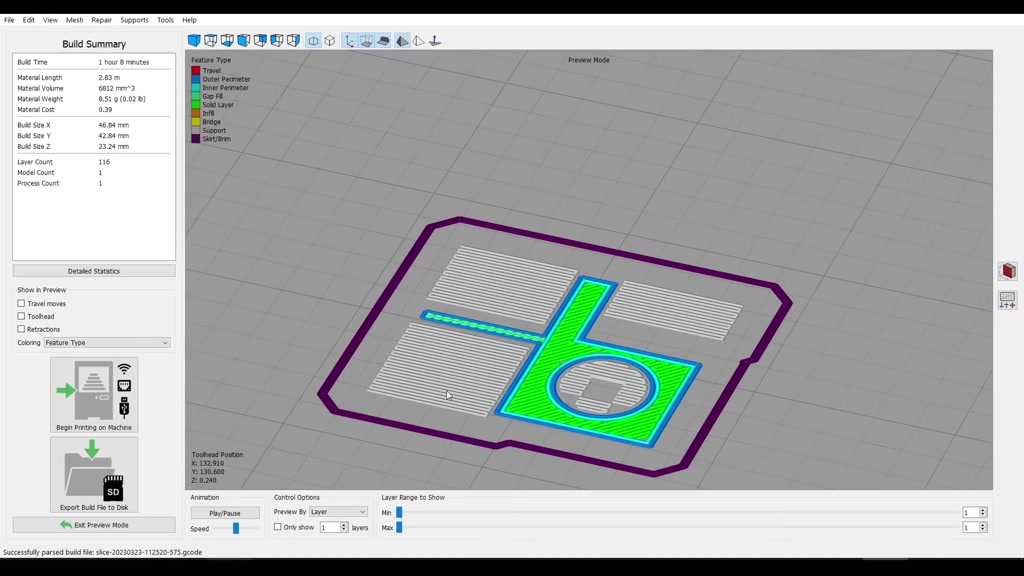
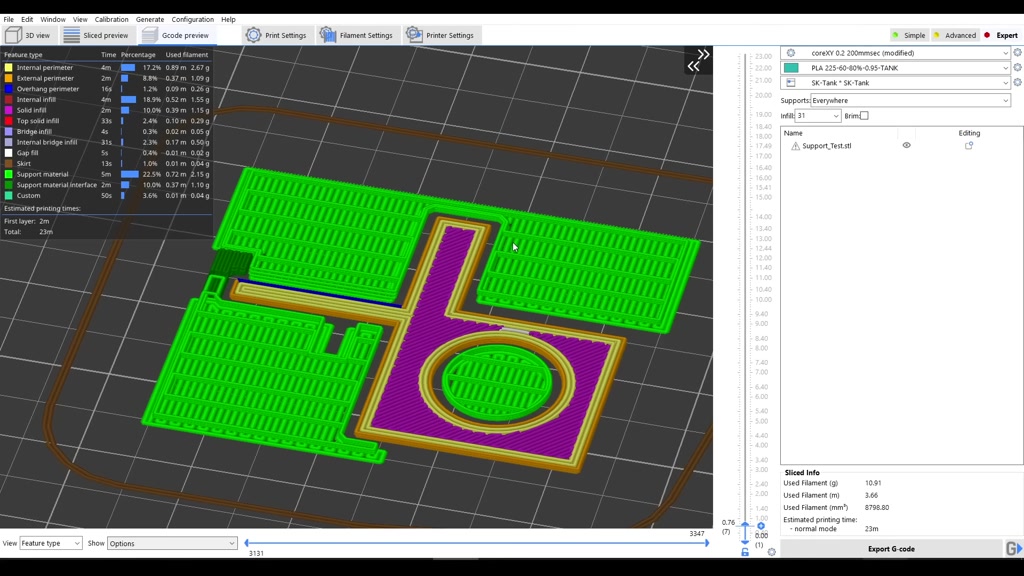
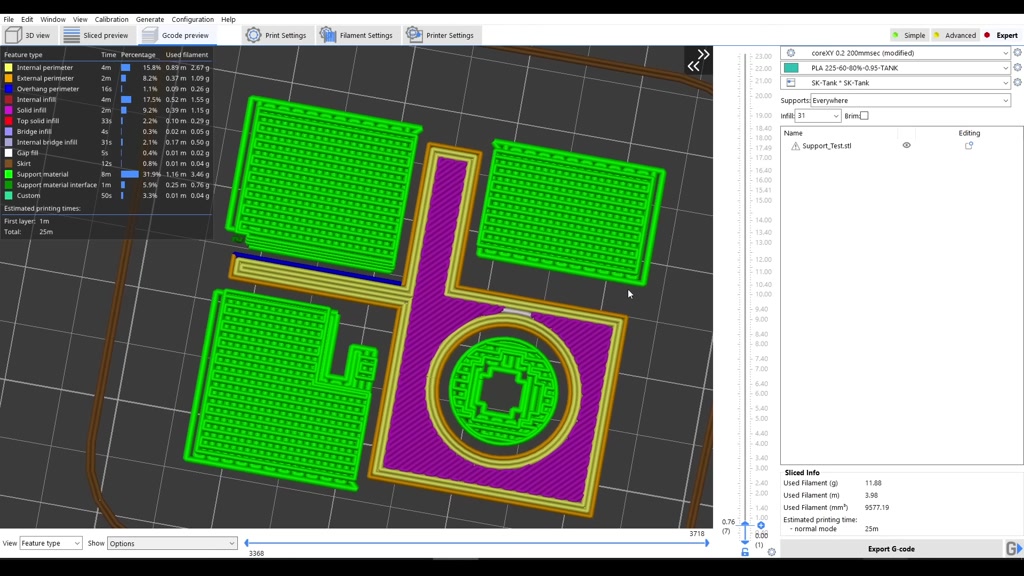
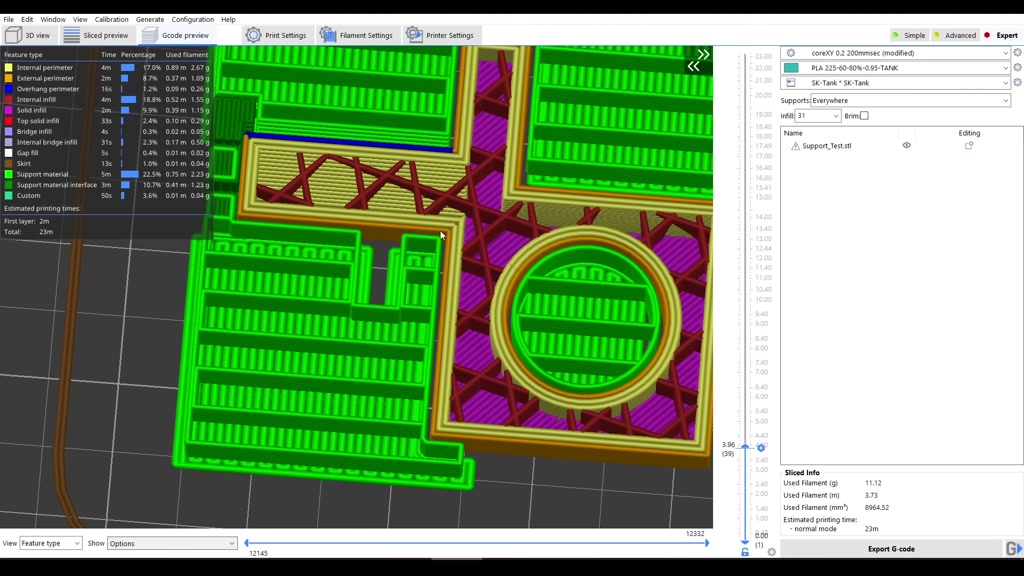
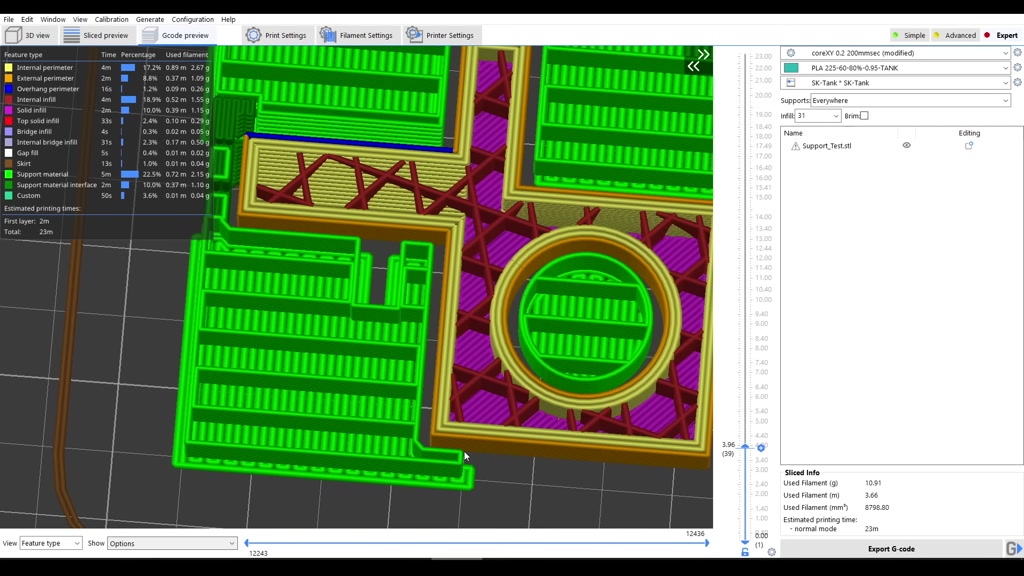
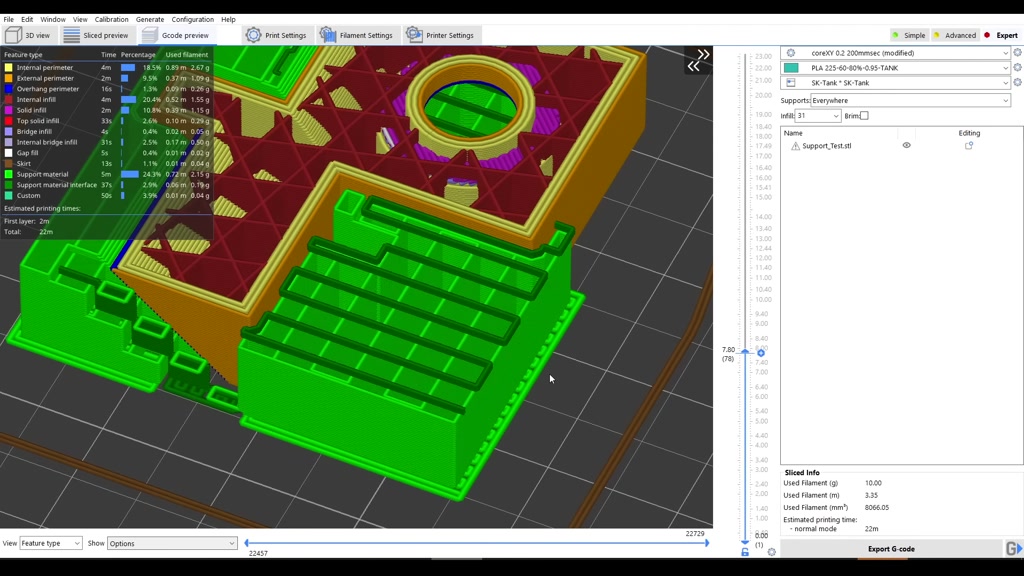
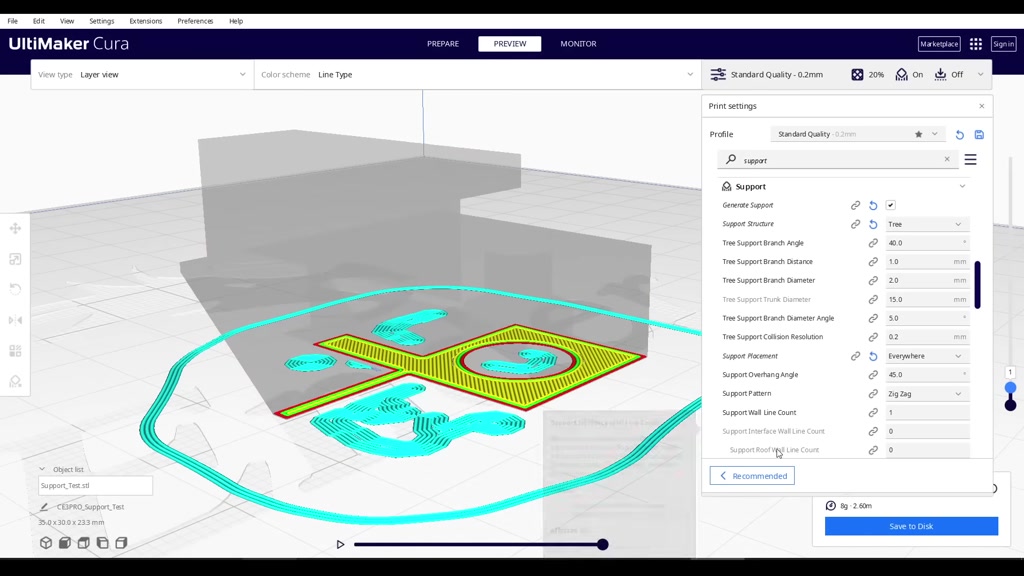
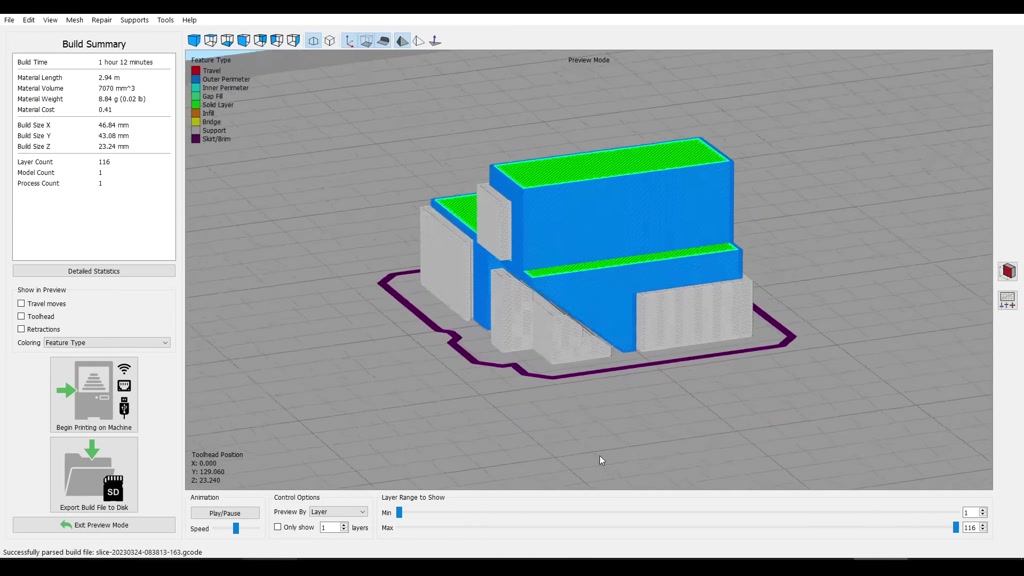
let's come back to our slicer and turn
#
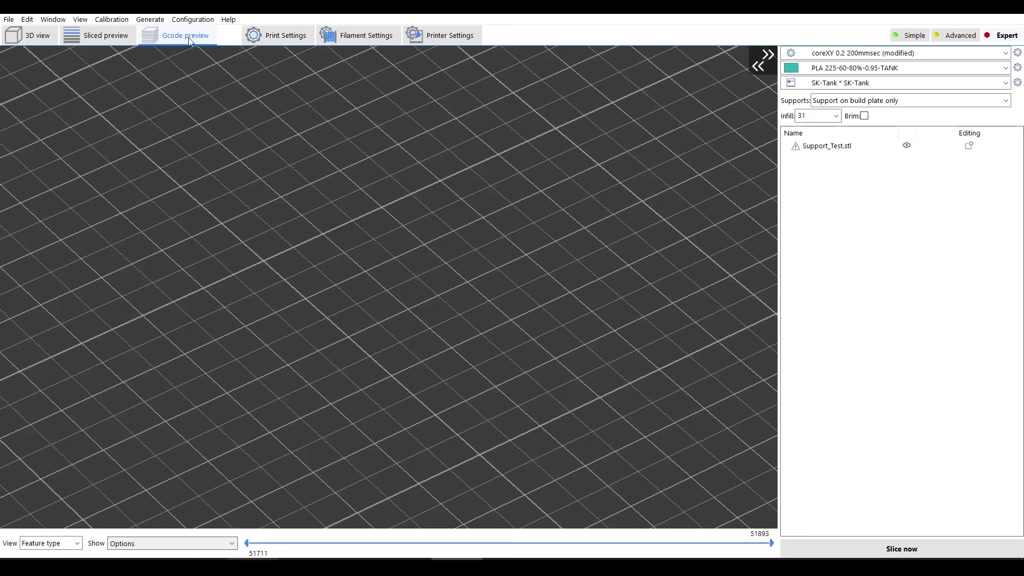
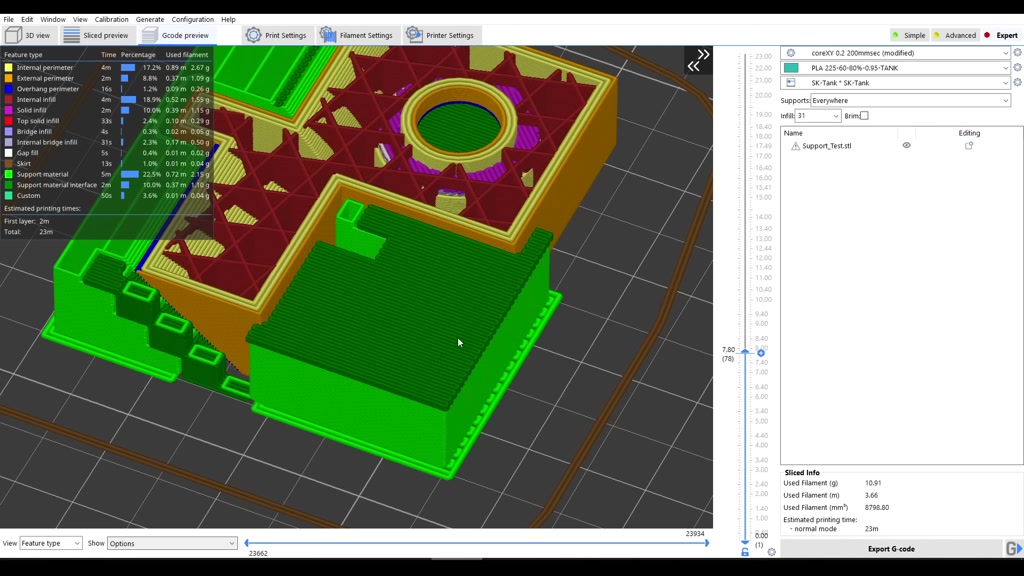
support material on slicing with the
#
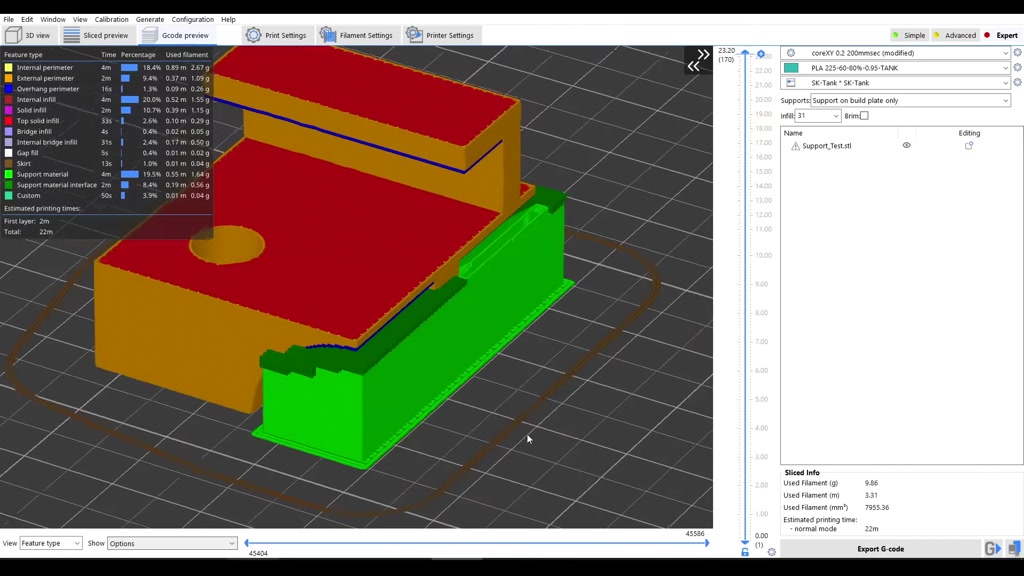
defaults at this stage all of the
#
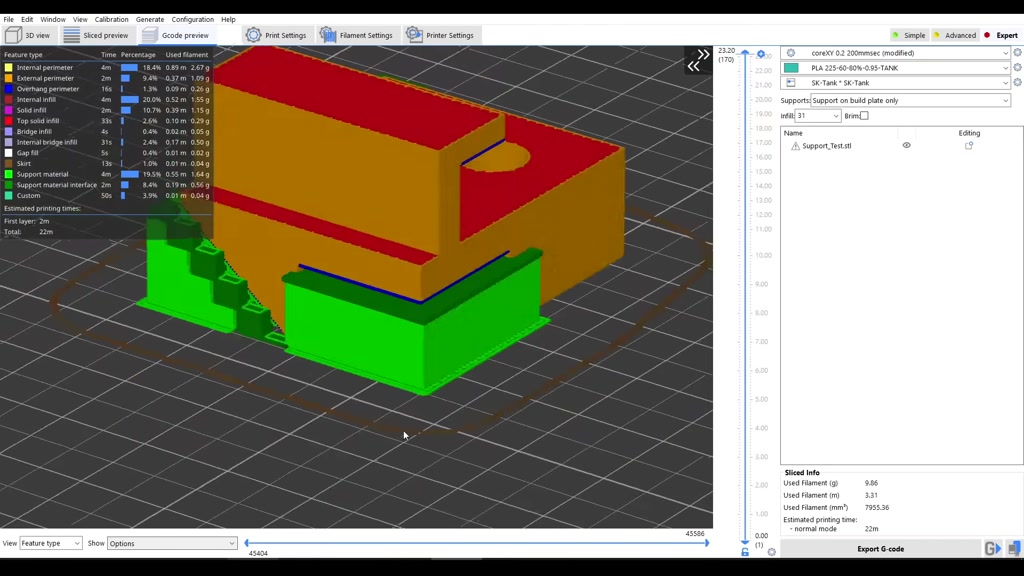
support material is shown here in green
#
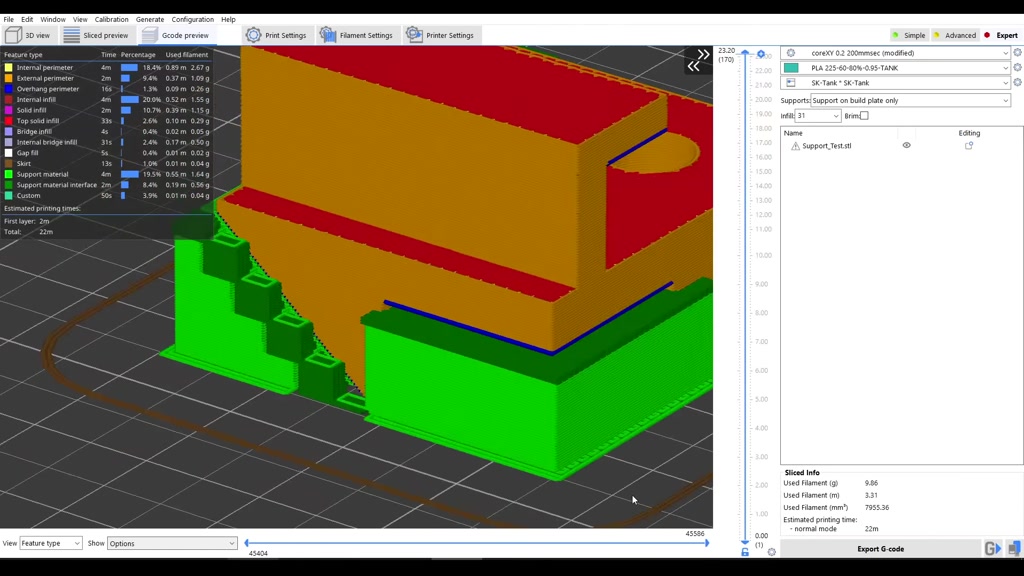
and let's break down exactly what we're
#

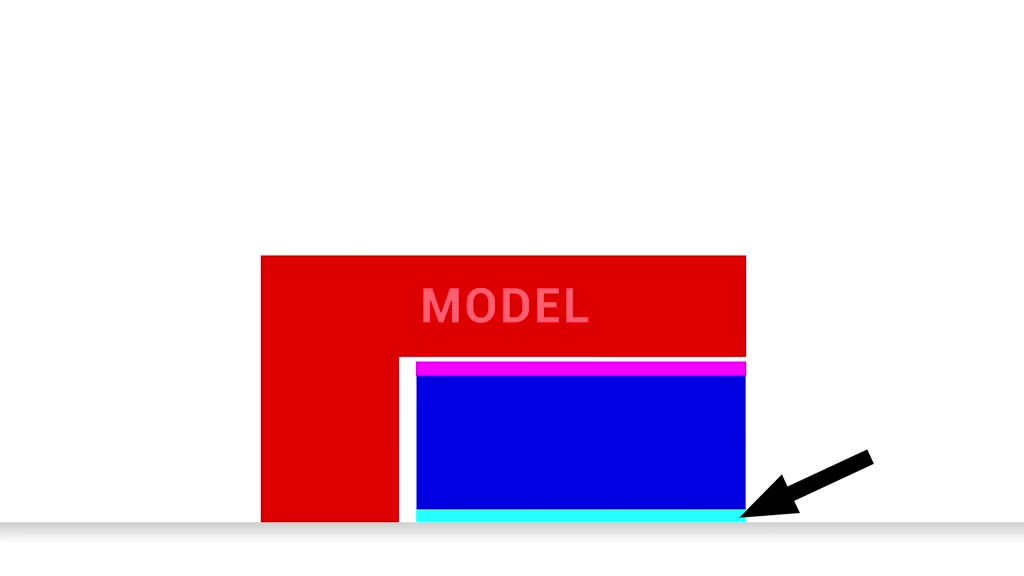
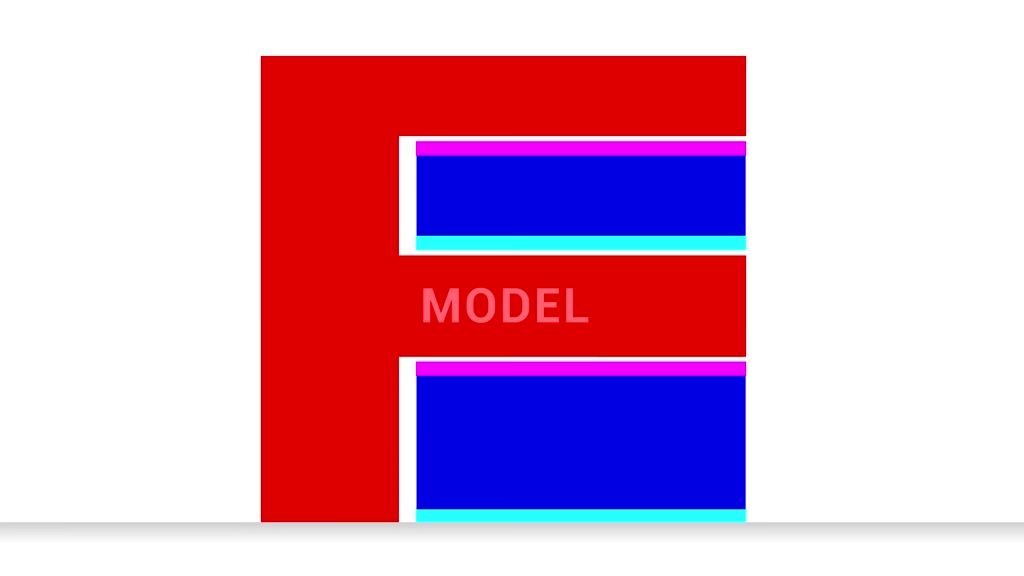
seeing most support material has some
#
sort of thicker element on the bottom
#

which we can refer to as a raft this is
#

to give a stable foundation for what's
#
going to be built on top we'll then have
#
a much Spicer pattern built up in layers
#
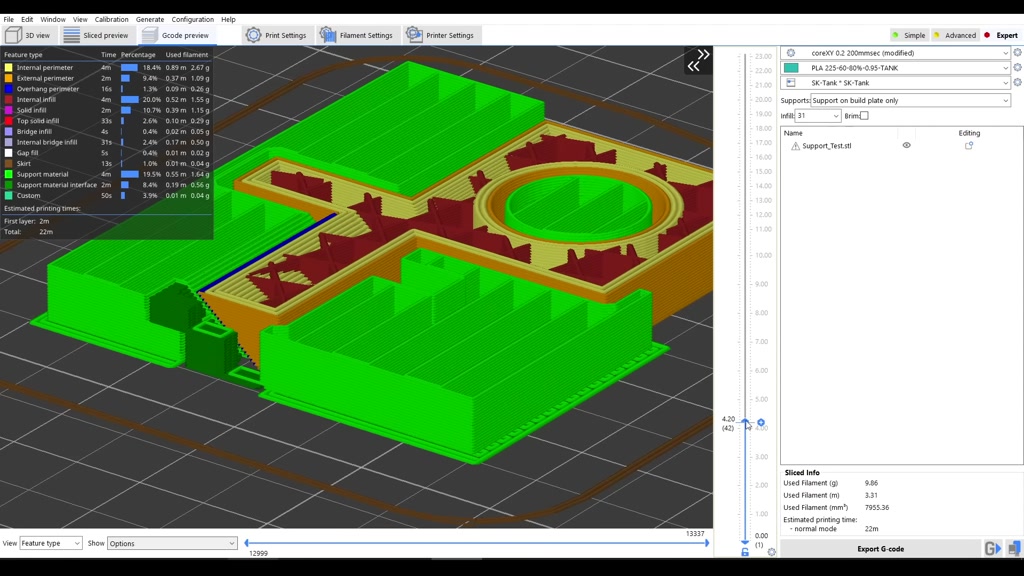
vertically and this will form the bulk
#
of the support material perhaps the most
#
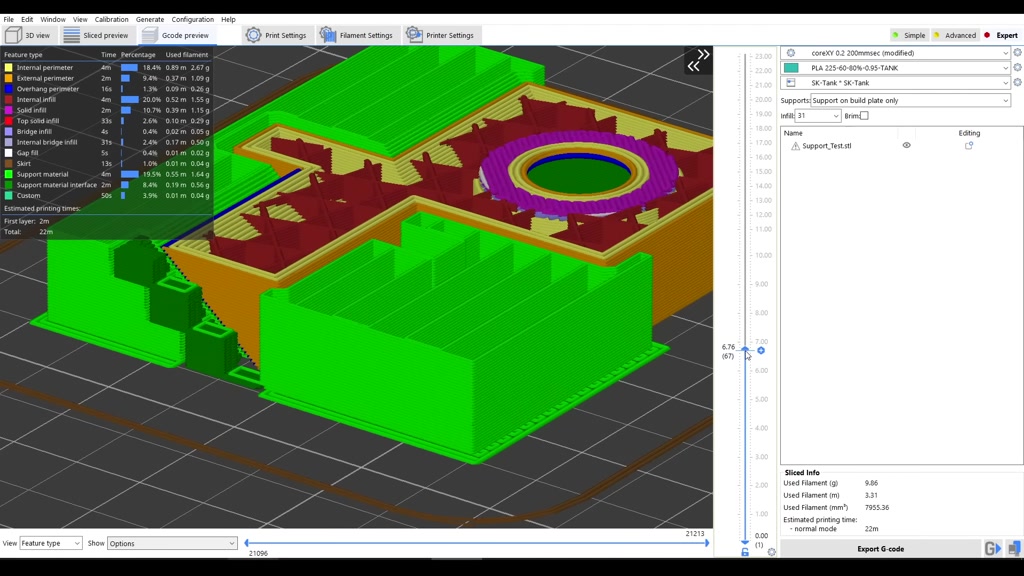
important layer is what we call the
#
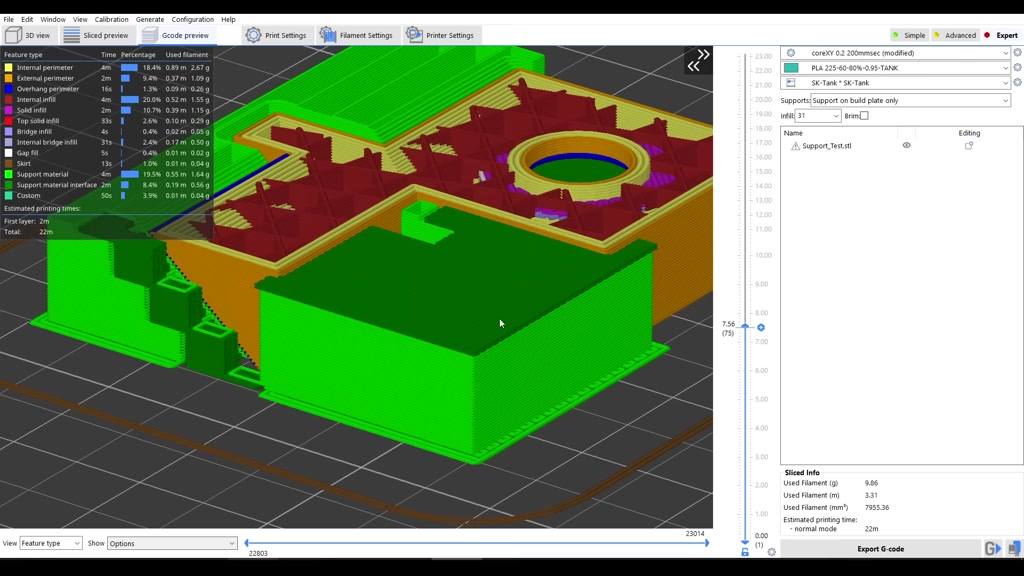
interface layer shown here in dark green
#
this is designed to provide a solid
#

platform on which the actual model is
#
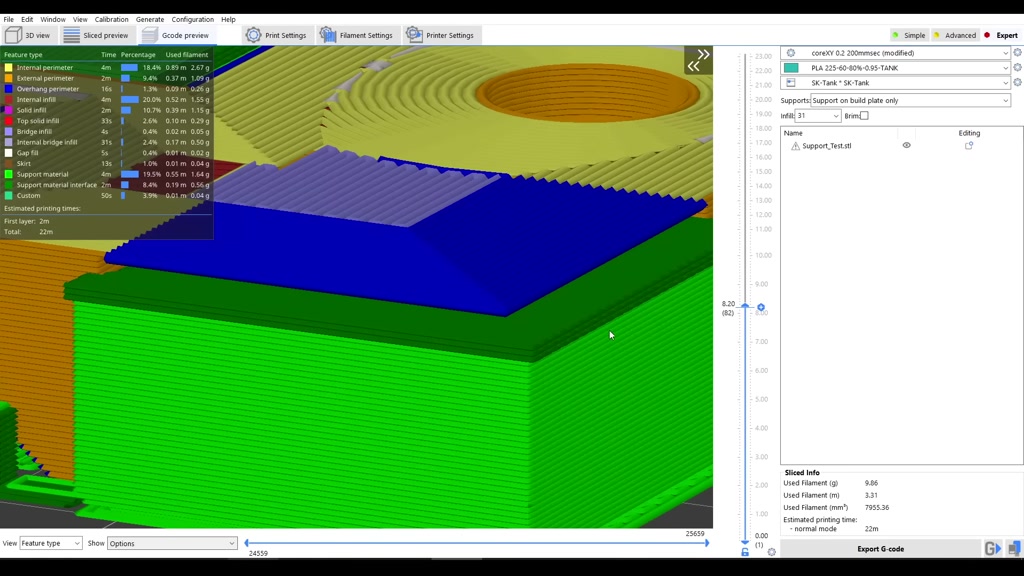
then printed however it's not printed on
#

top directly there's always a subtle air
#
gap in between to ensure they don't fuse
#

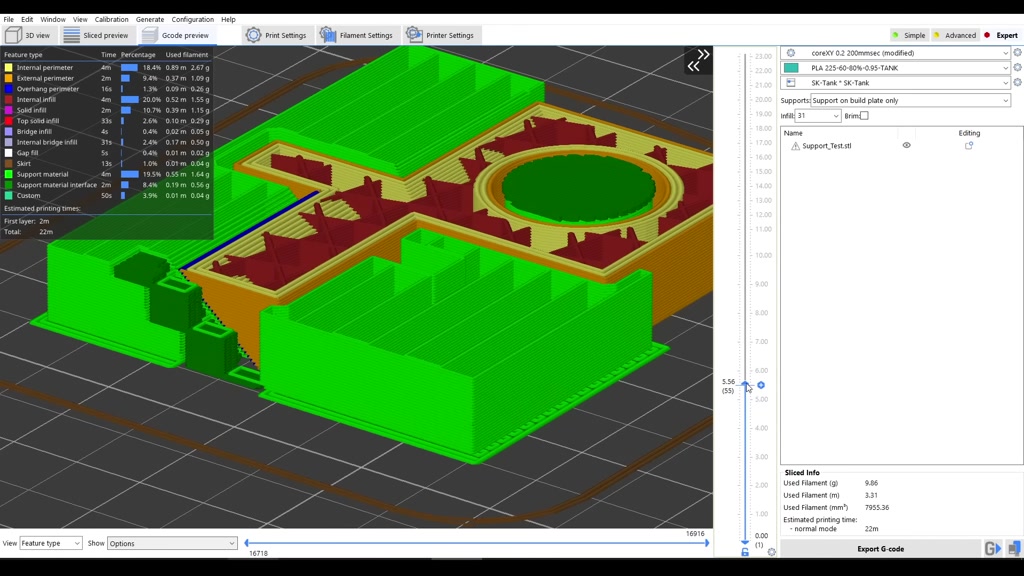
together permanently we'll also note
#
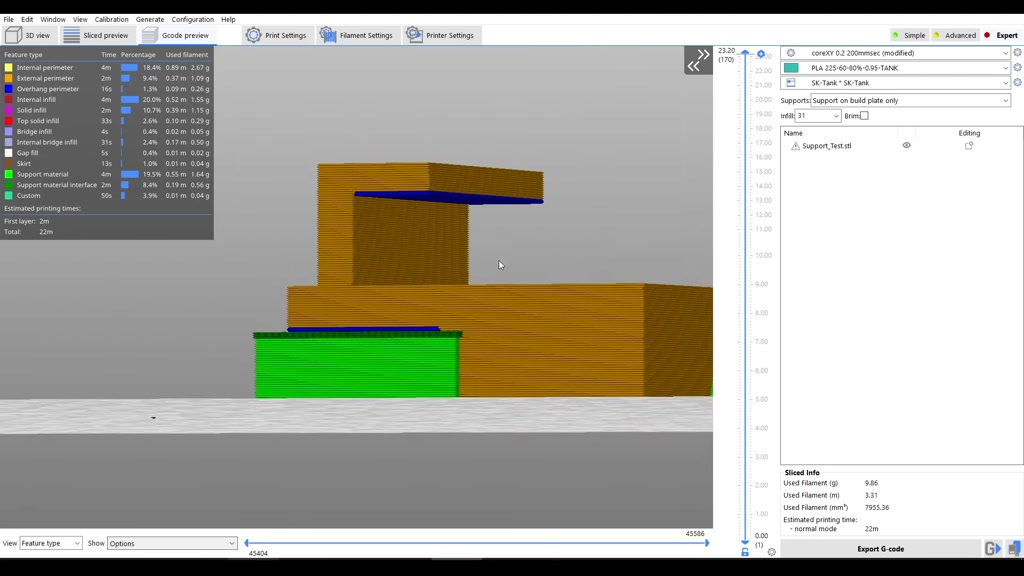
that by default this upper section has
#
not been supported but we'll get to the
#
settings for this shortly what you've
#
seen so far is in my slicer of choice
#

super slicer but you'll find that most
#
slices build up their support material
#
with these same elements they just might
#
call them by a different name across
#
various slices the approach is still
#
more or less the same so now let's look
#
at how to tweak these parameters to get
#
that oh so satisfying to remove perfect
#

support material
#

this is where variation in slices makes
#

things tricky but I'll try my best to
#

cover most of the popular ones so we
#

have Cura as a standalone as well as
#

simplify 3D and the other popular slices
#

started from slick 3r which was forked
#
by Prussia slicer which was forked to
#
make super slicer and also forked by
#

bamboo labs to make bamboo studio and
#

then that was by Soft fever to
#

make Orca slicer when you hear me talk
#
about prusa slice of derivatives we're
#

talking about prusa slicer and
#

everything that followed as the names of
#

the settings seem to be quite consistent
#

we'll start with some general settings
#

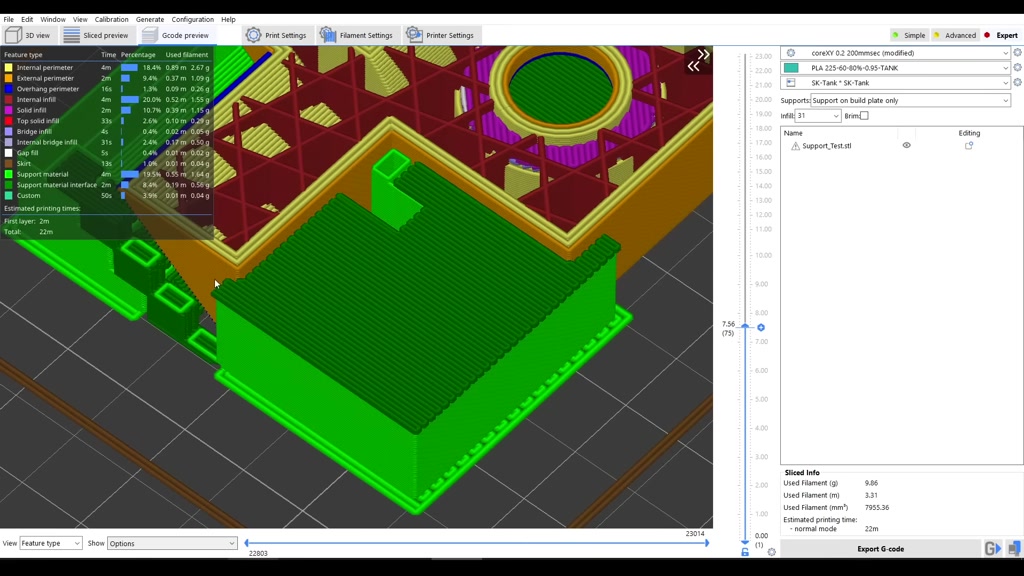
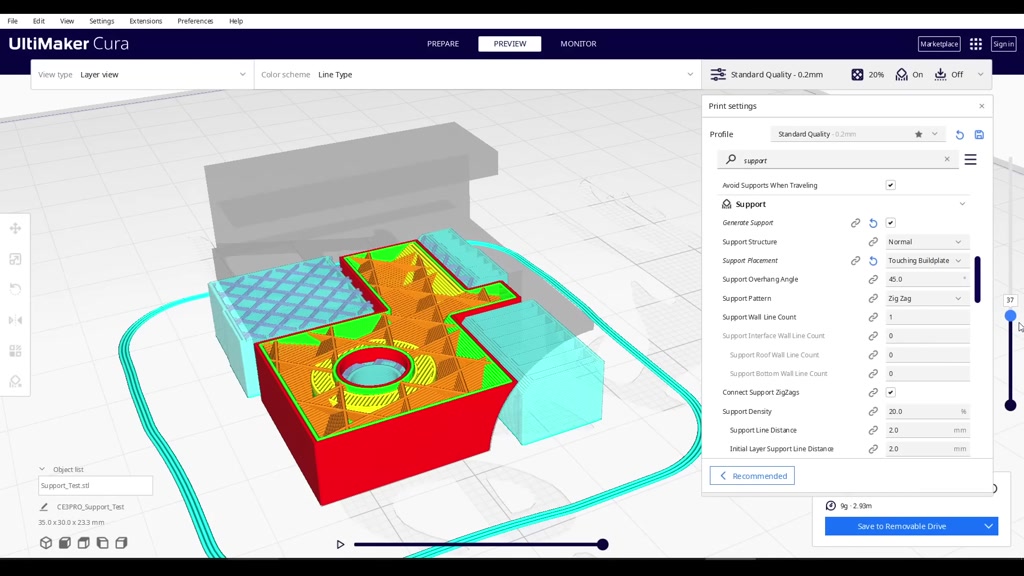
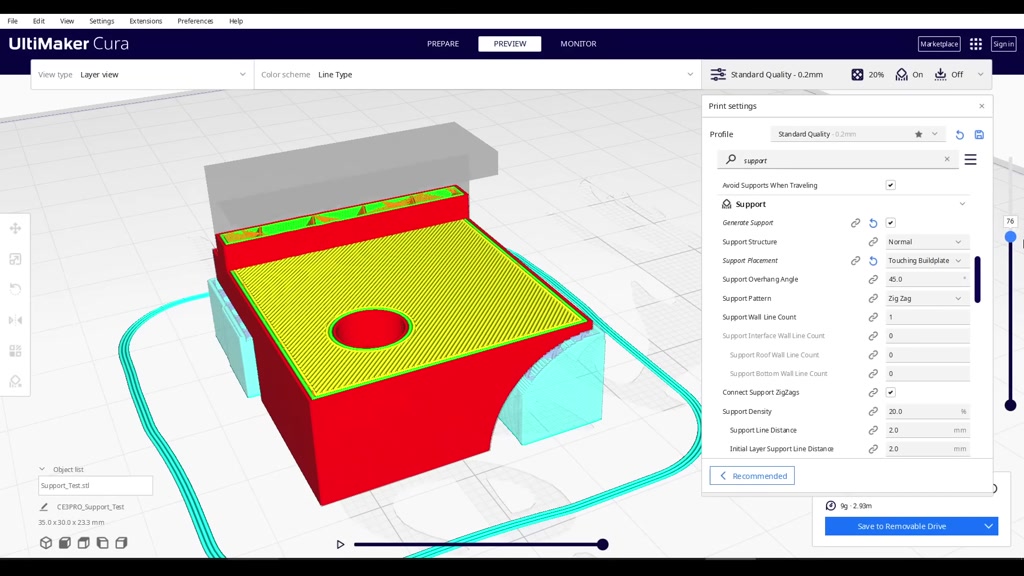
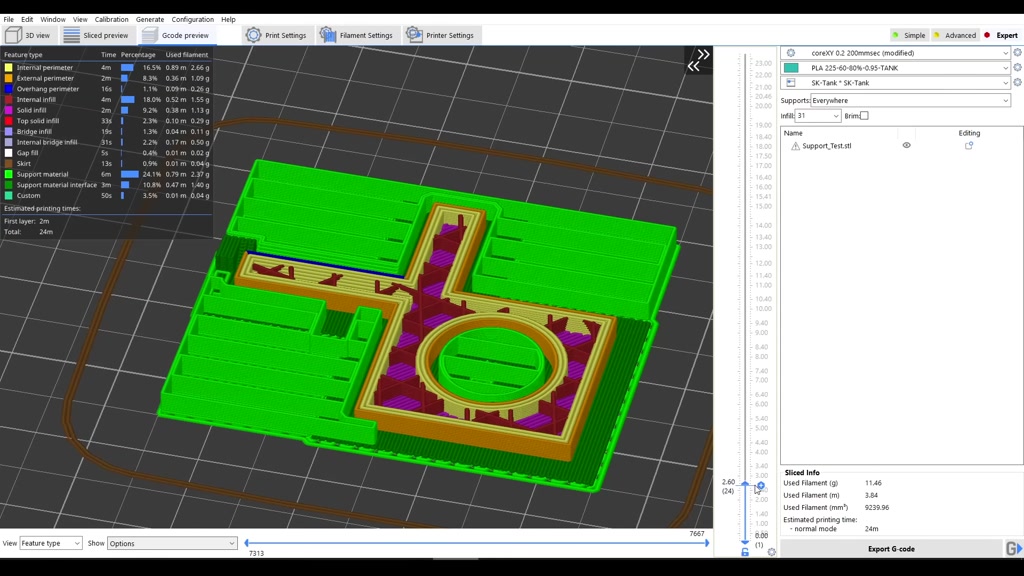
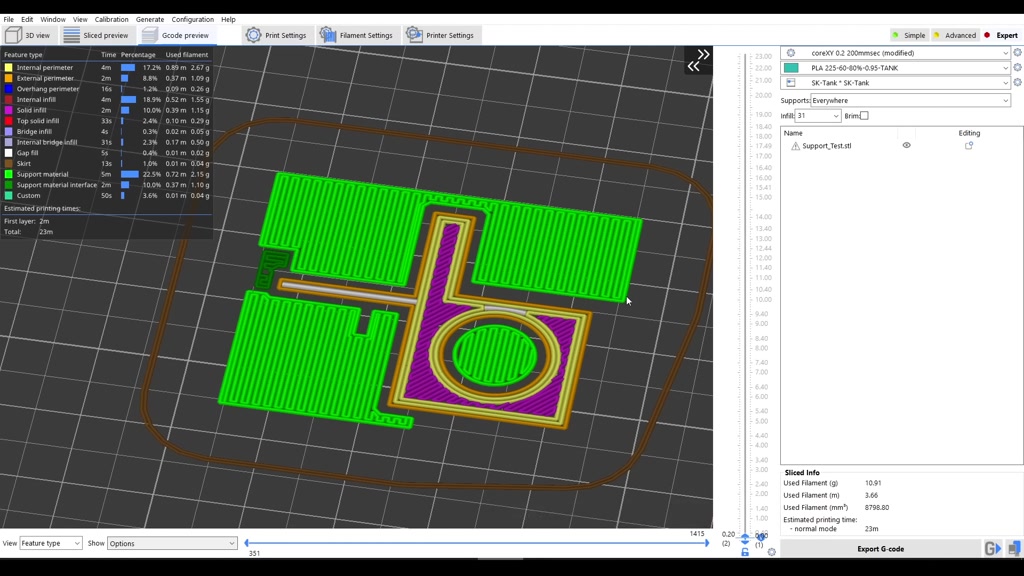
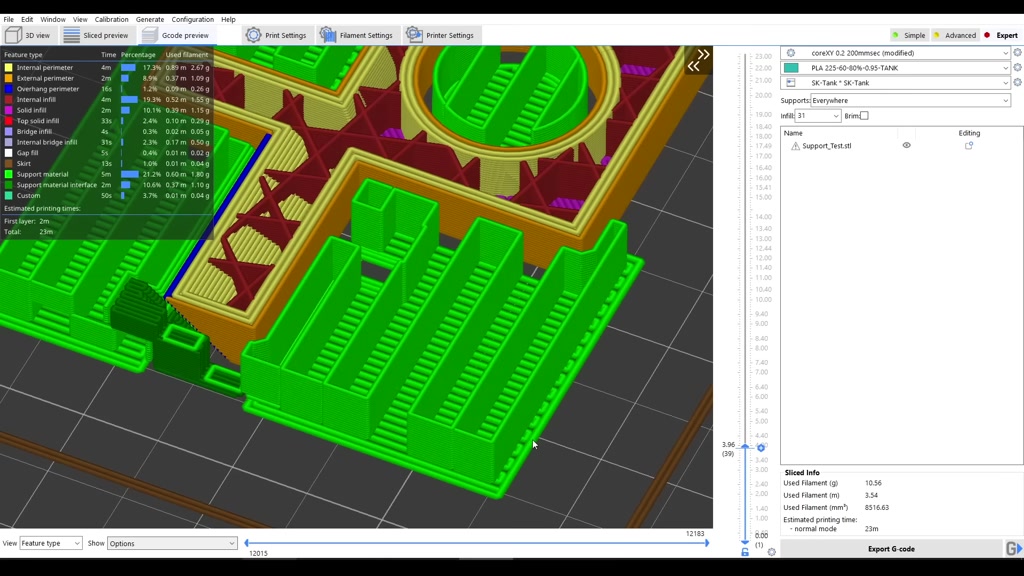
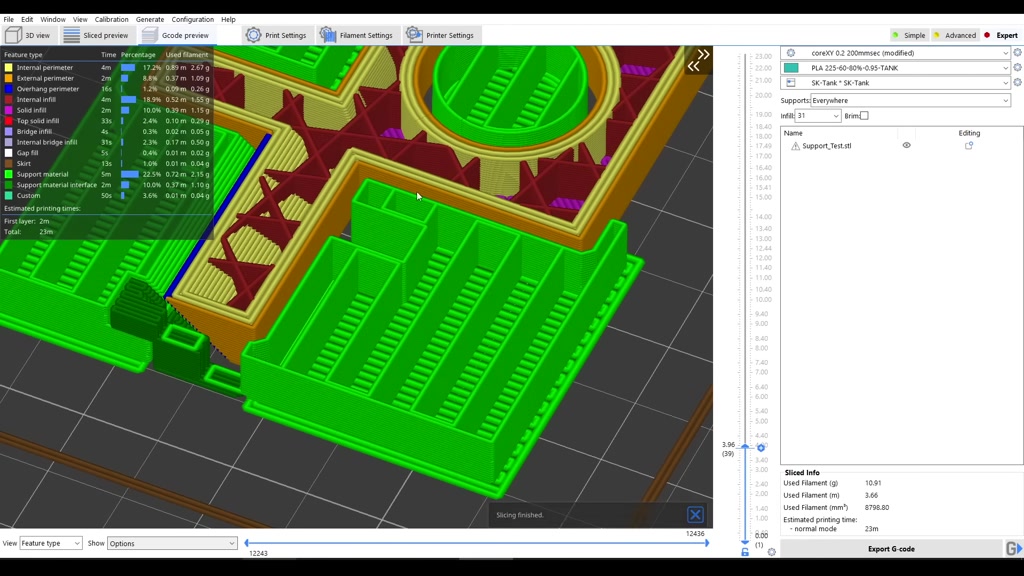
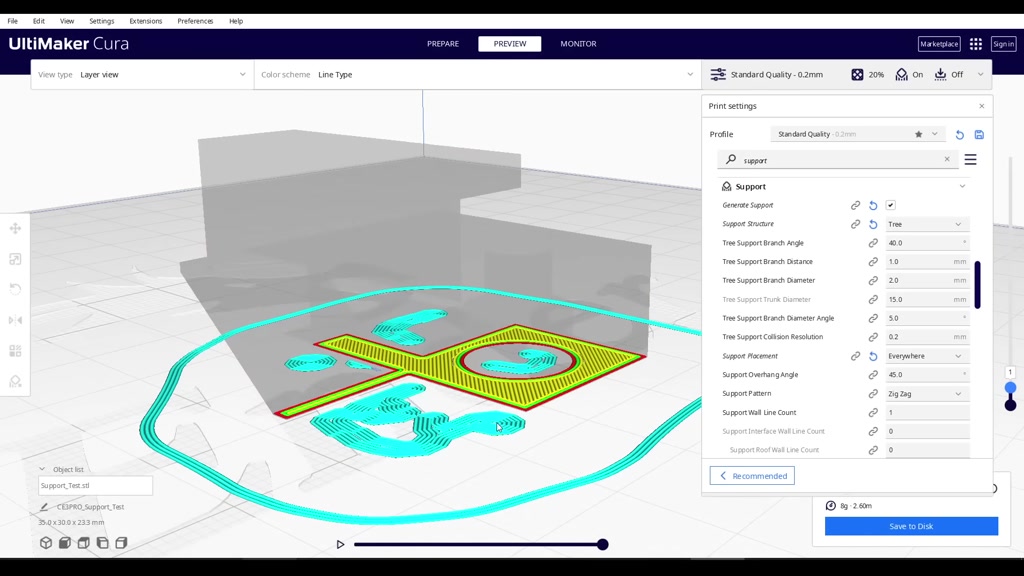
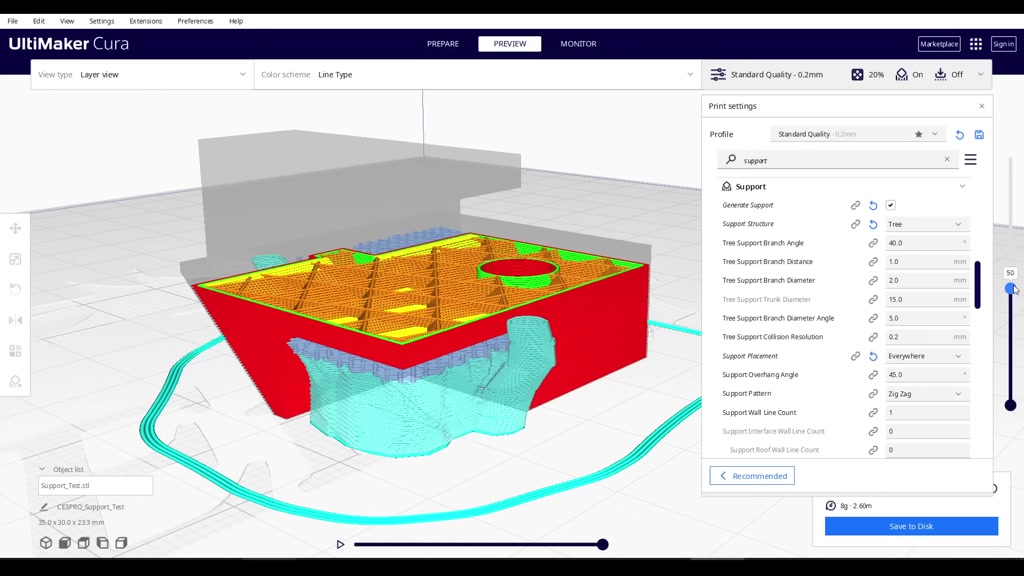
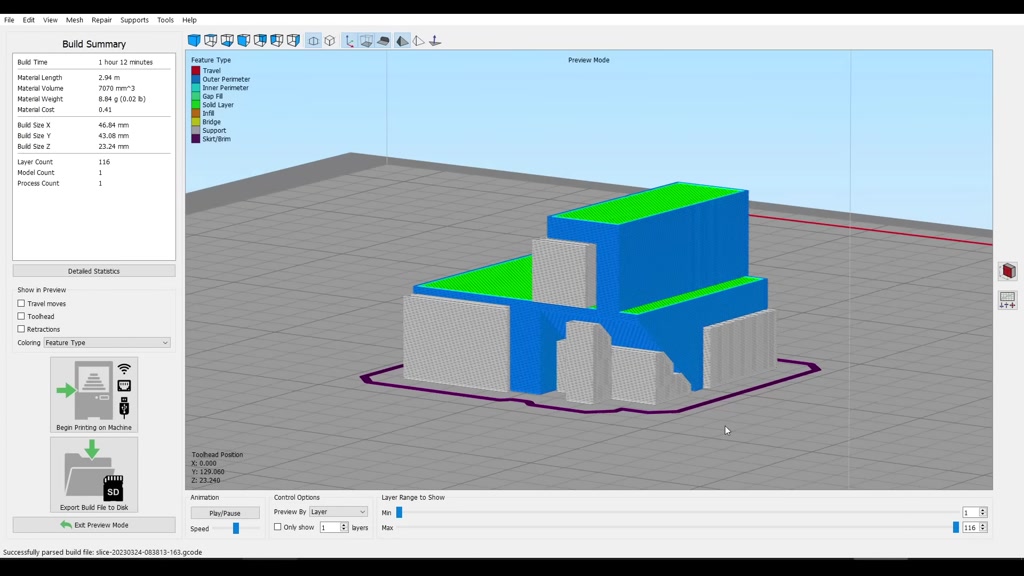
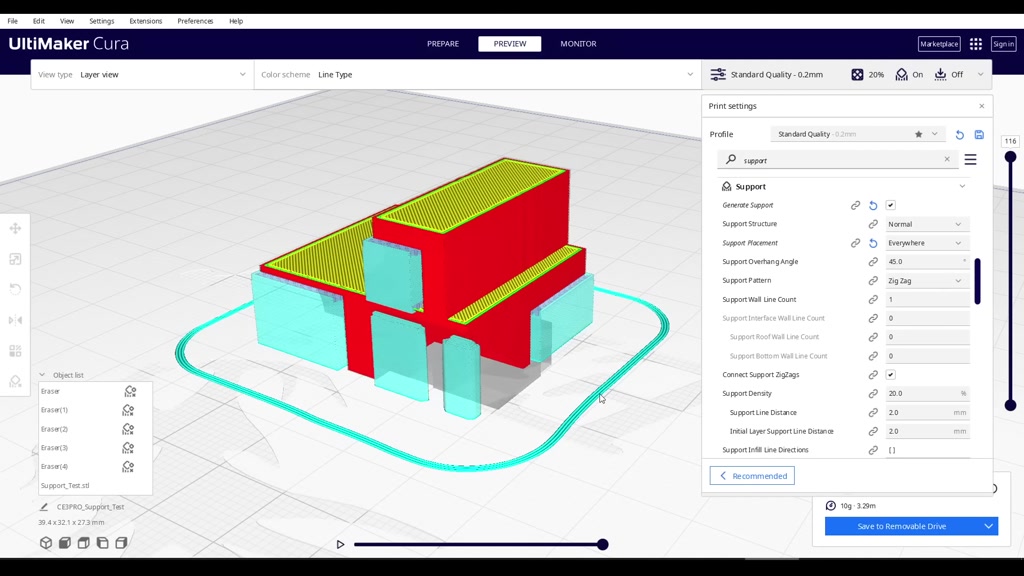
that affect how the support is applied
#
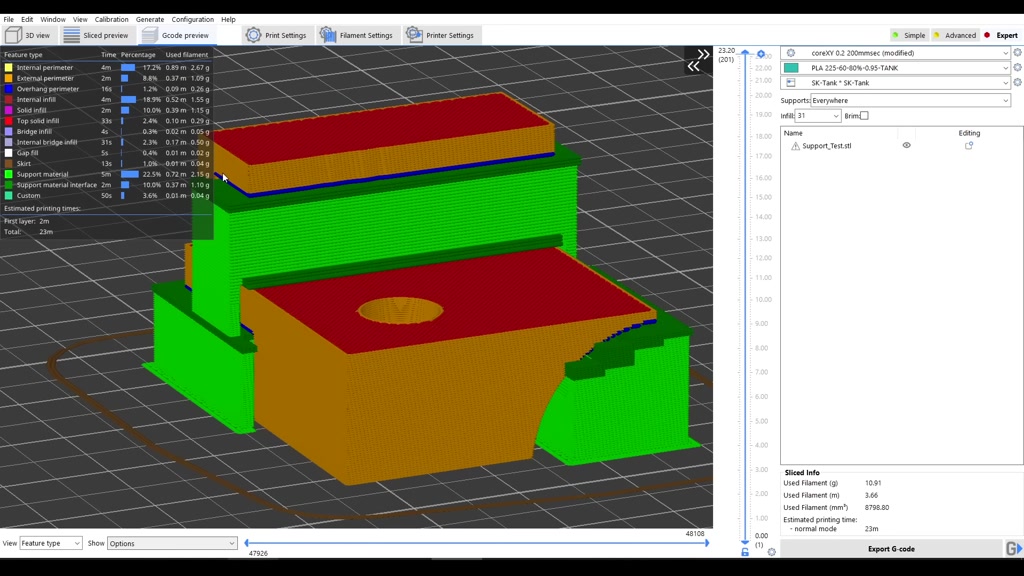
remember this section up the top which
#
is unsupported because it's above the
#
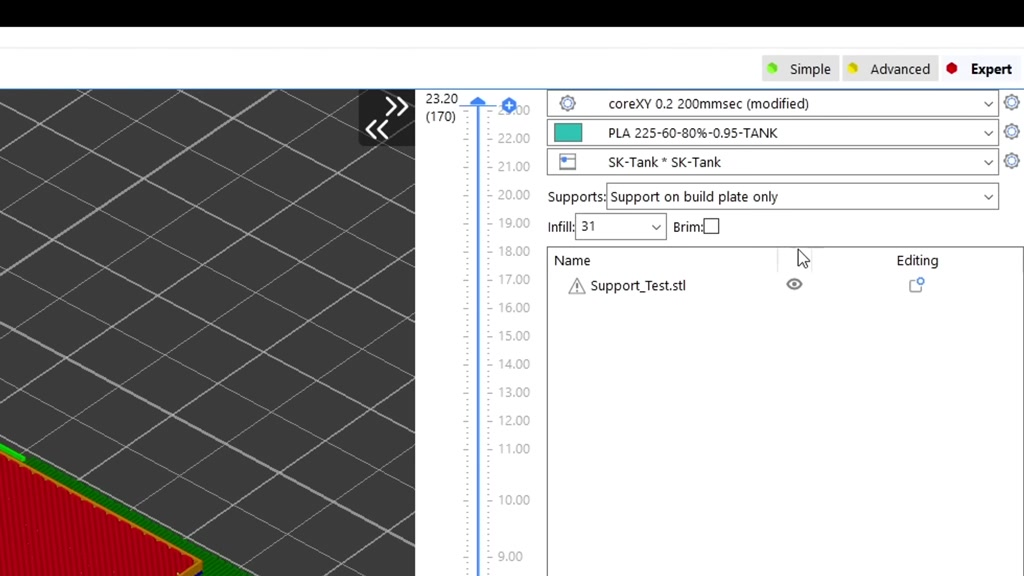
rest of the model to get support there
#
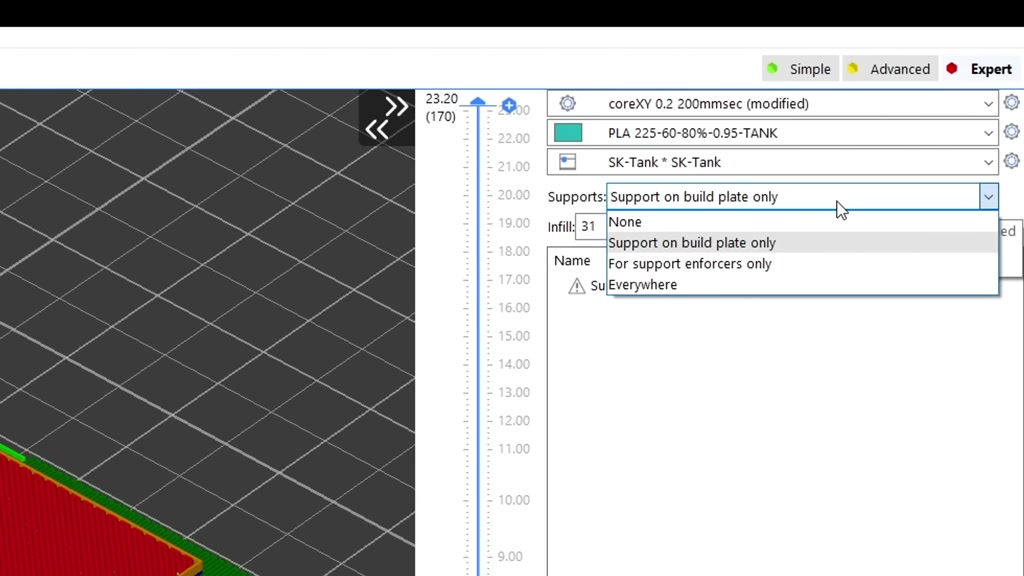
we need to change from build plate only
#

to everywhere and now when we re-slice
#

we can see that this area is supported
#
unless your model explicitly has a
#

section like this it does need support
#
above the model I would recommend
#
leaving the setting on build plate only
#
as less support will be generated in
#
general
#

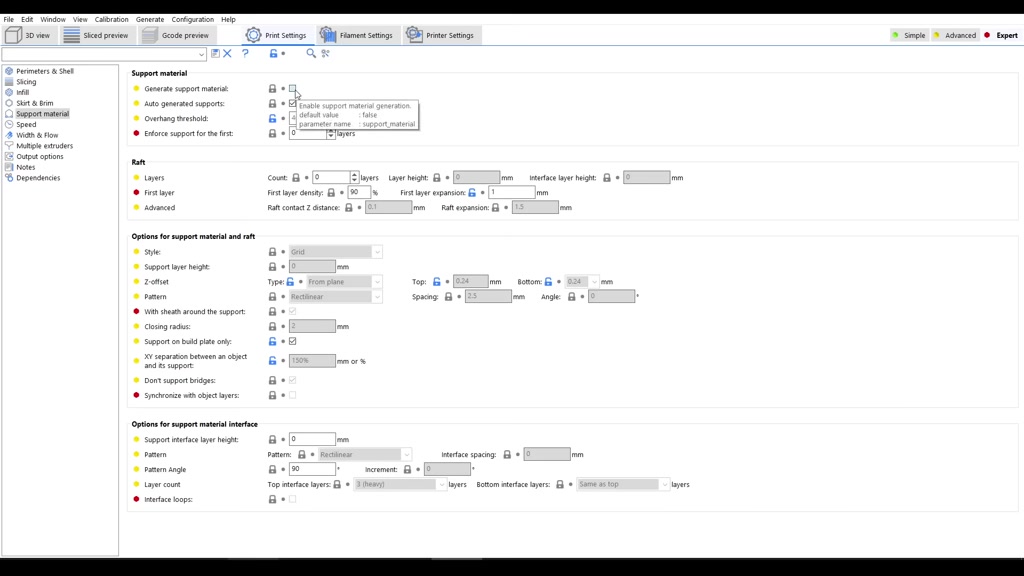
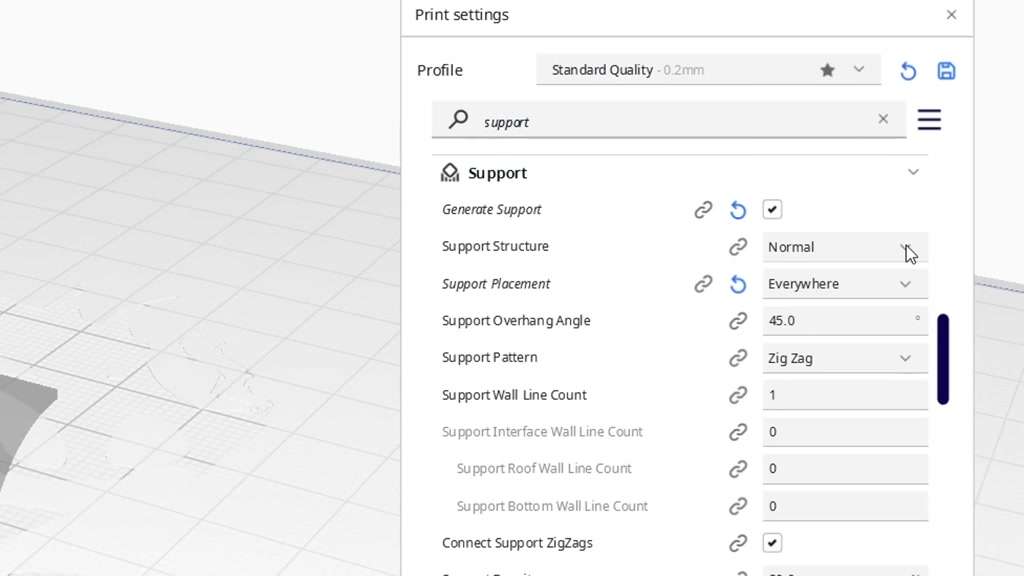
the next common setting is called
#
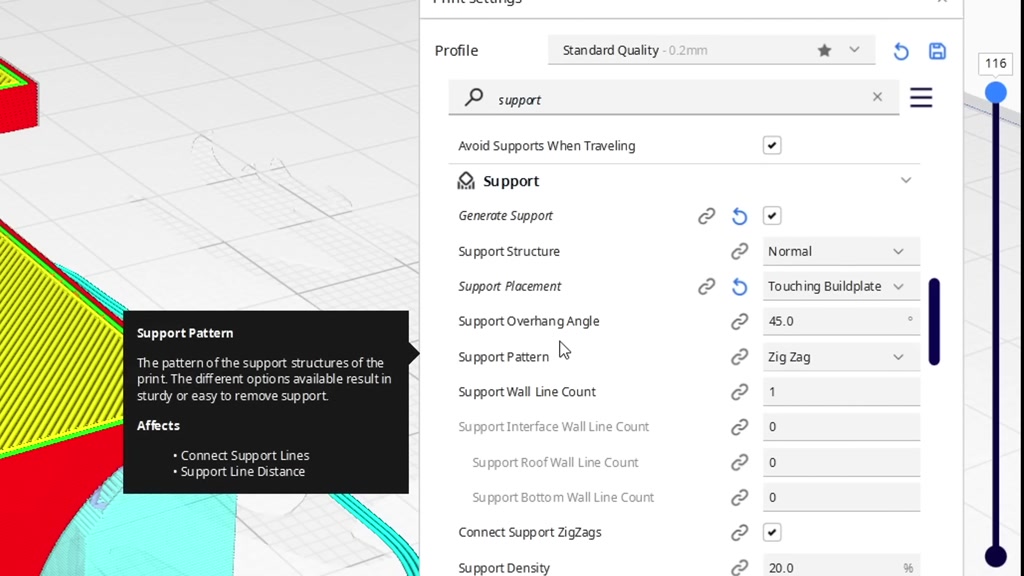
overhang threshold or in Cura support
#

overhang angle if we look at the curve
#
on our test model we can see it's nearly
#
vertical down this end and almost
#
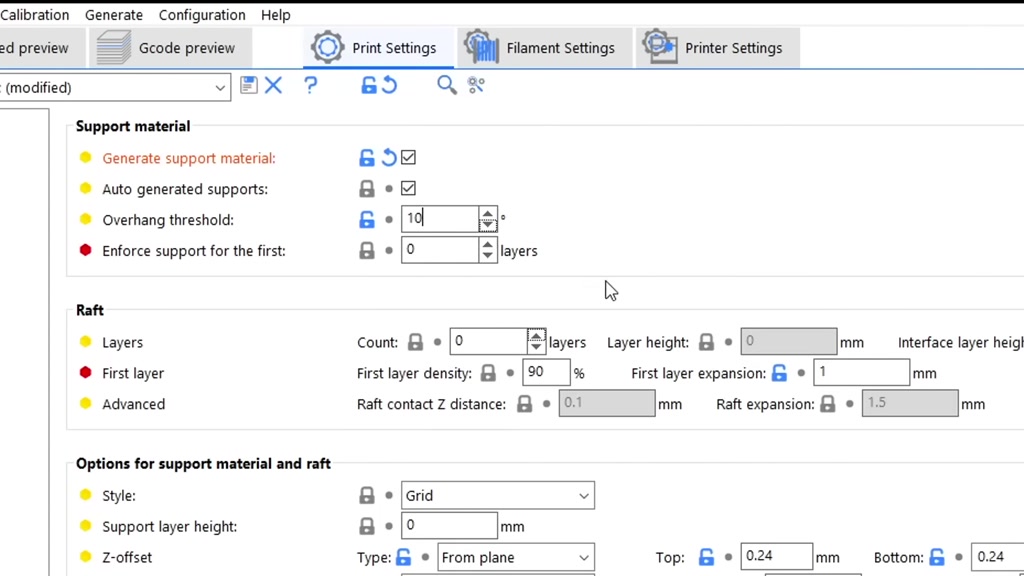
horizontal up the Top If we exaggerate
#

this setting setting it to 10 degrees we
#
can see that support material is not
#

applied until the model is almost
#
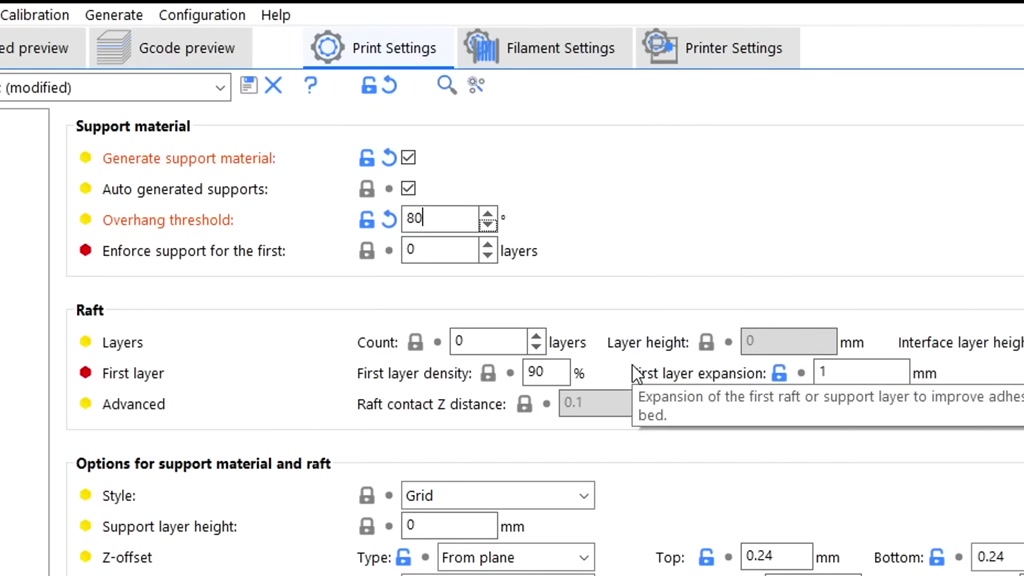
horizontal and if we exaggerate it the
#

other way to 80 degrees we can see that
#
support material is applied much earlier
#

in this curve the right value will
#

depend on your model but to work out a
#
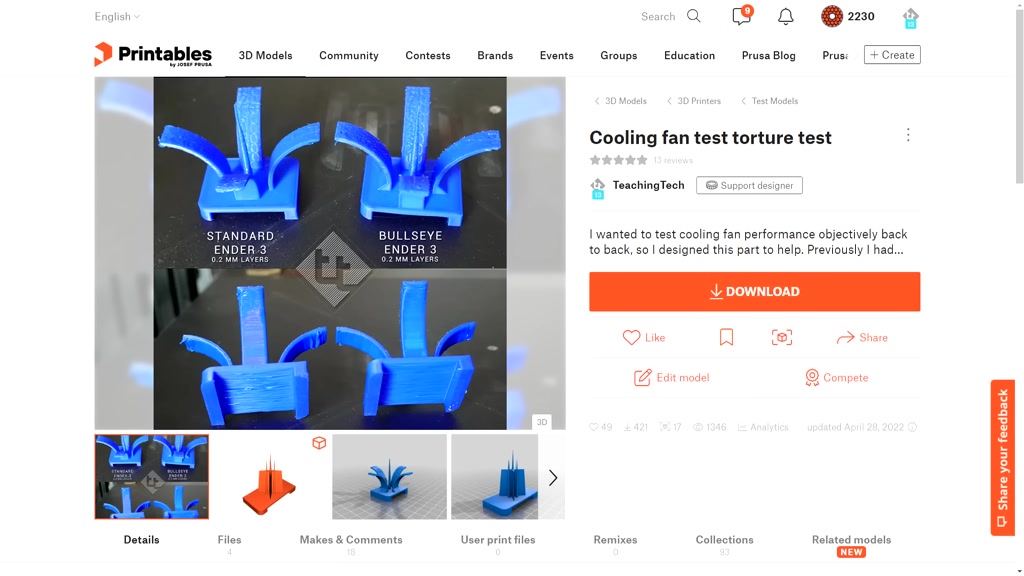
good default you can download and print
#

this torture test from the description
#
and find out at what angle of overhang
#
your printer starts to struggle with the
#

general settings out of the way let's
#

start to look at specifics starting with
#

our bottom or raft section of the
#
support the amount of control we get
#

over this depends on the slicer for
#
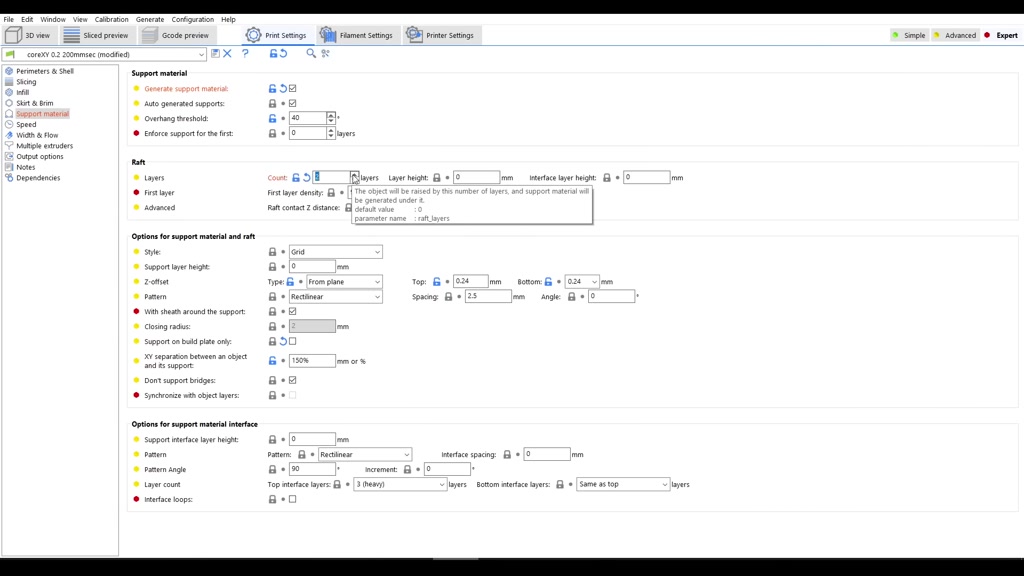
instance for prusa slice and derivatives
#

by increasing the raft layers and then
#
slicing the model we can see that it
#
adds a raft underneath the entire thing
#
not just the support material girl and
#
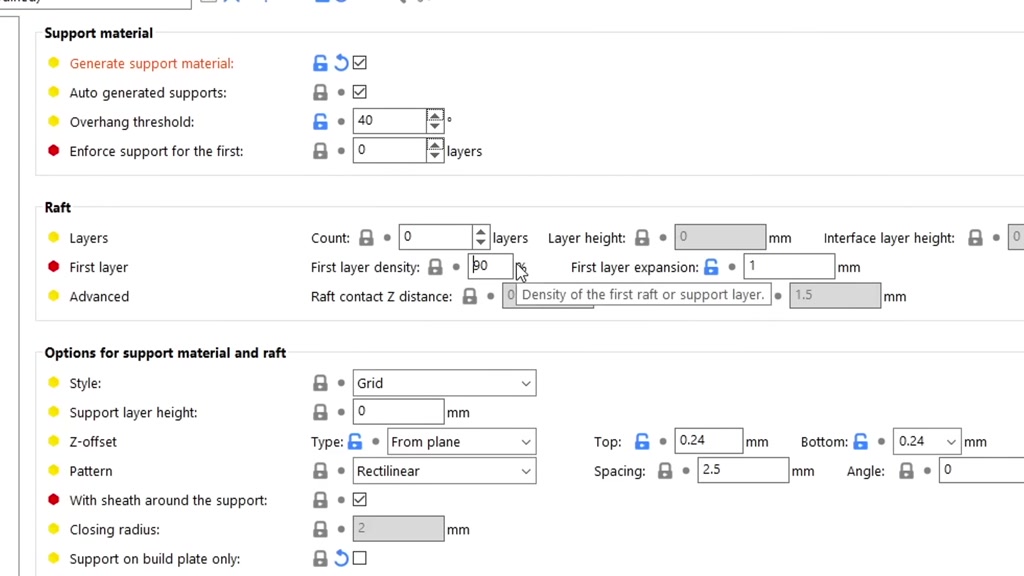
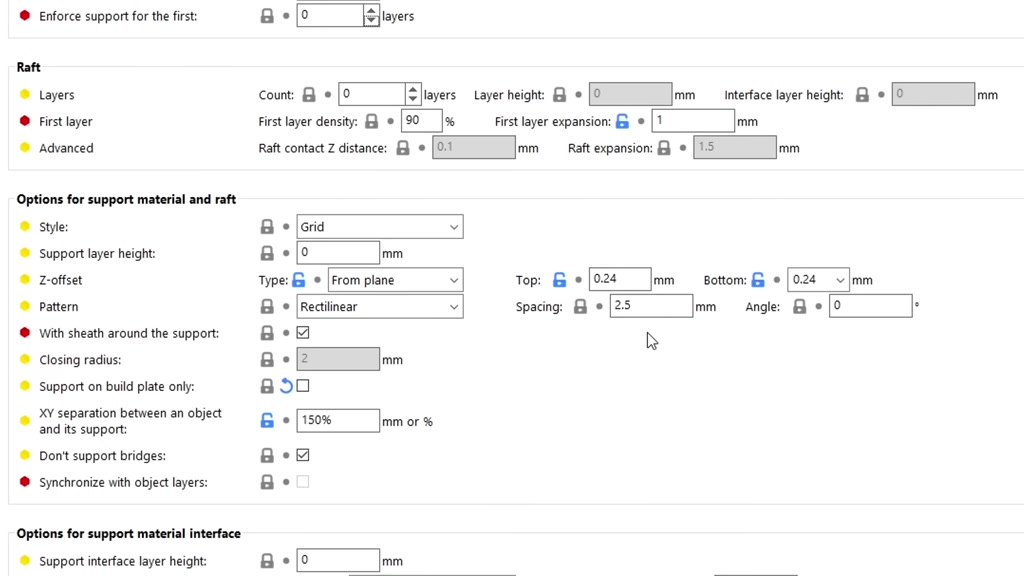
you probably won't want this so instead
#
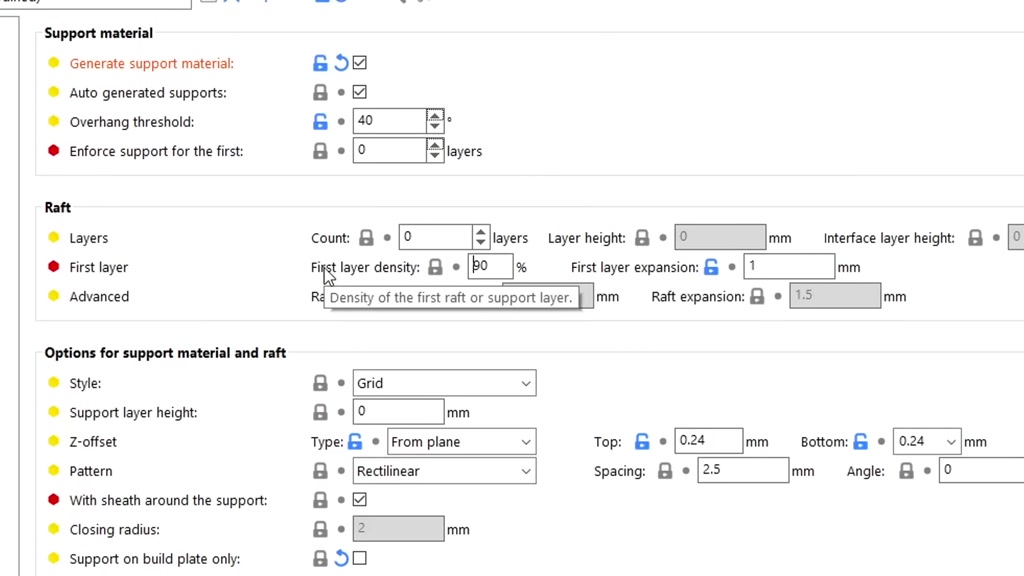
the setting we want is first layer
#
density here's the default 90 and here's
#

a much lower 45 you're probably going to
#
want to keep this quite dense just to
#
give it additional grip to the bed in
#
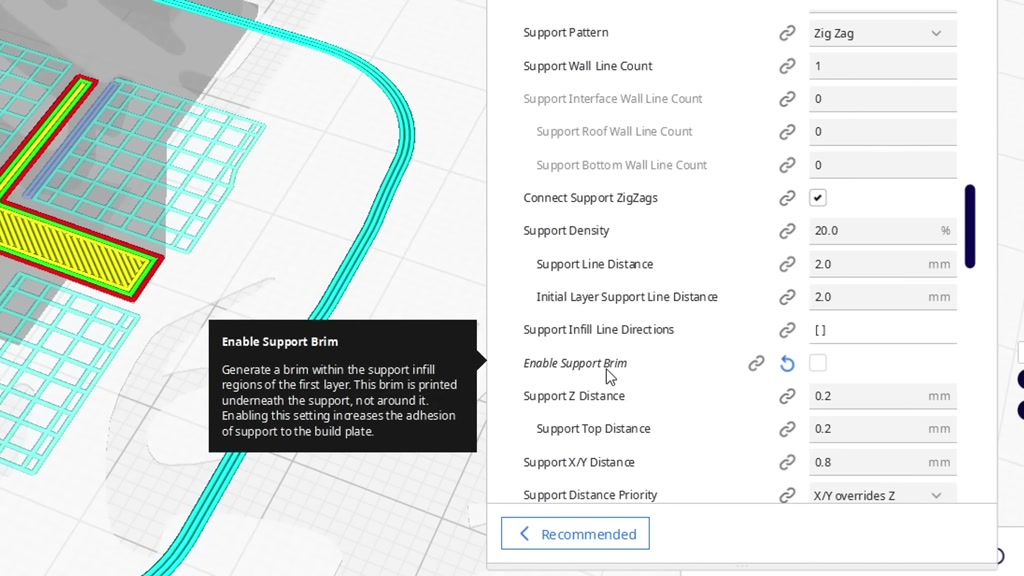
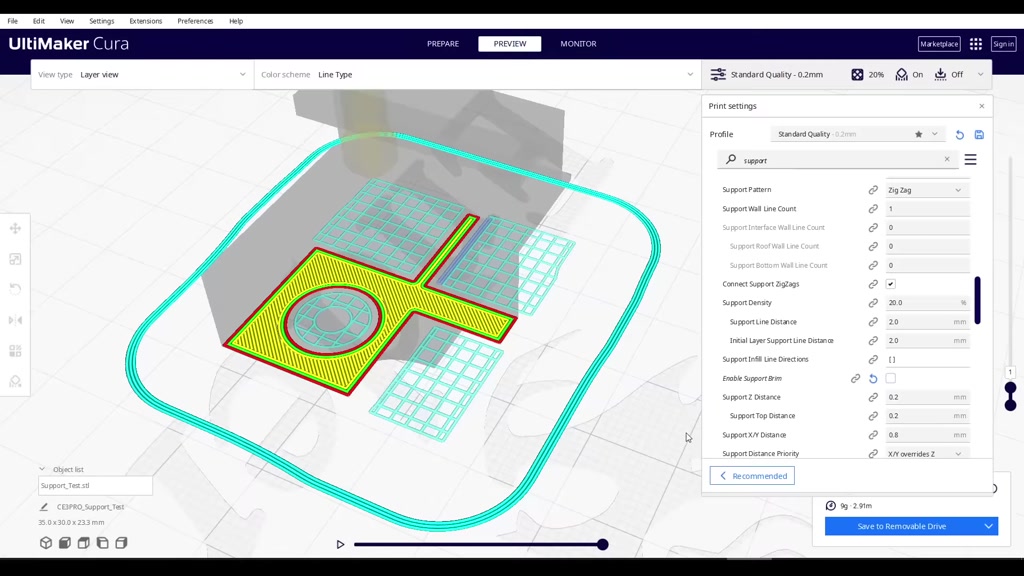
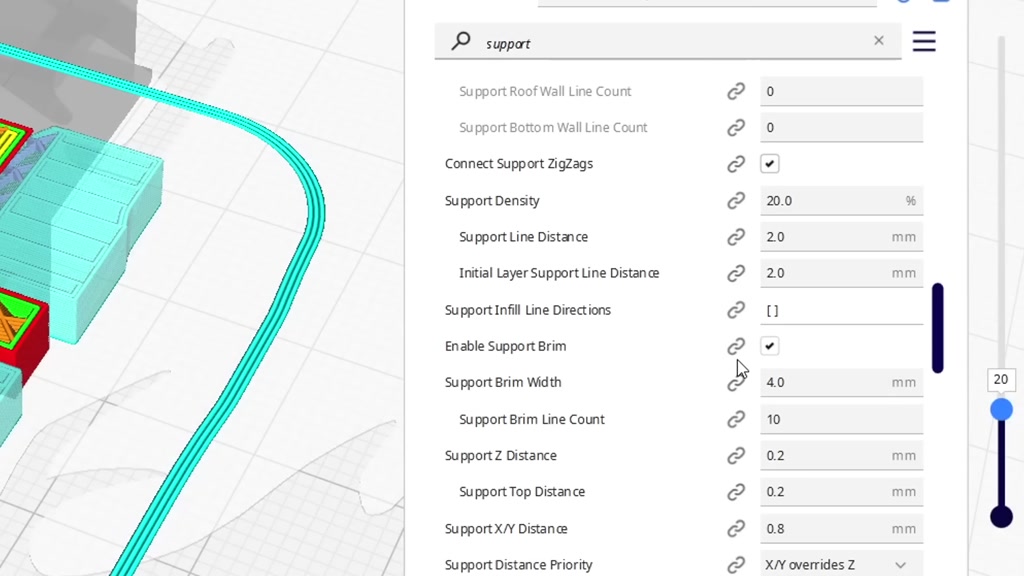
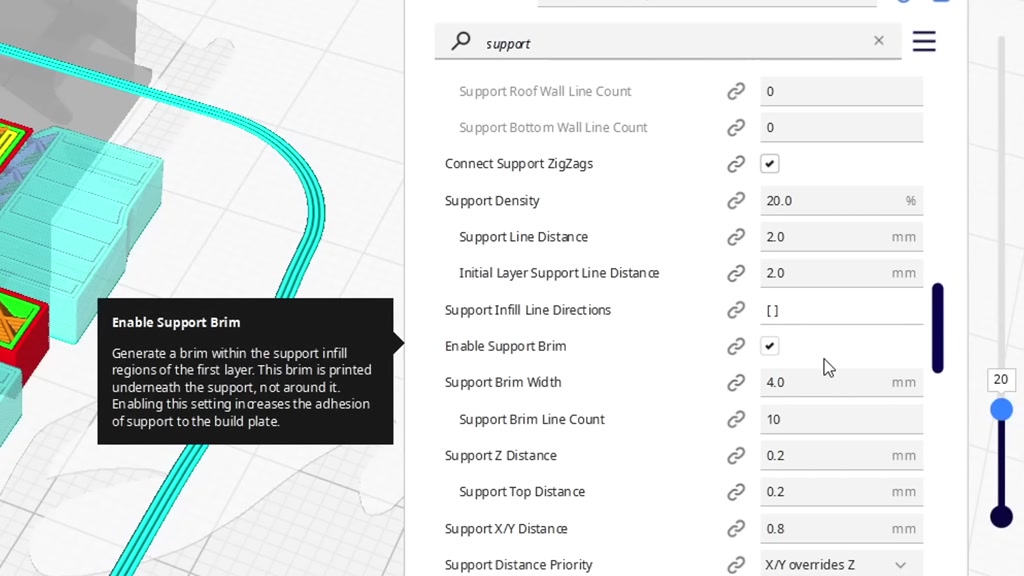
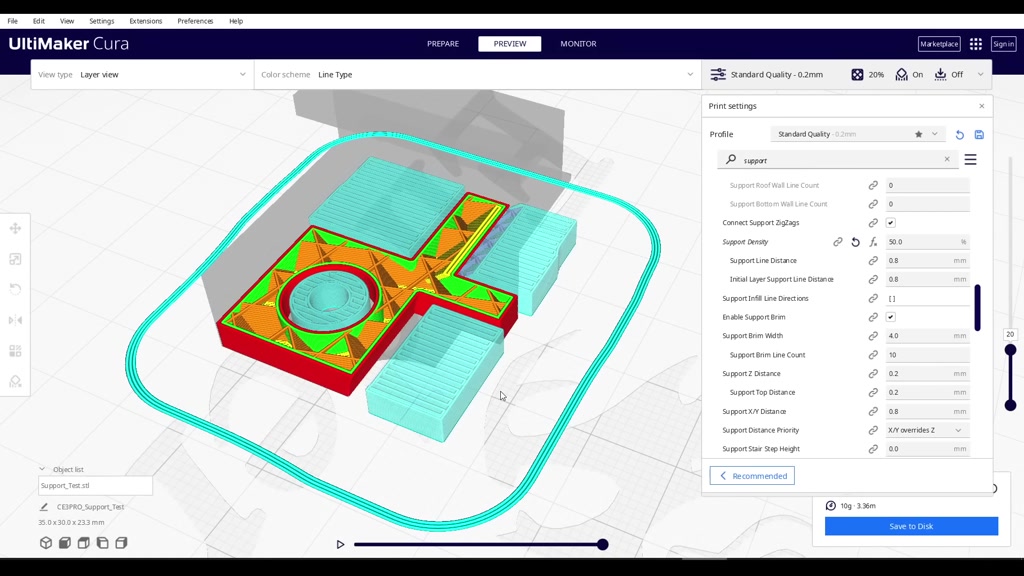
Cura the equivalent setting is enable
#

support brim we can see without it we
#
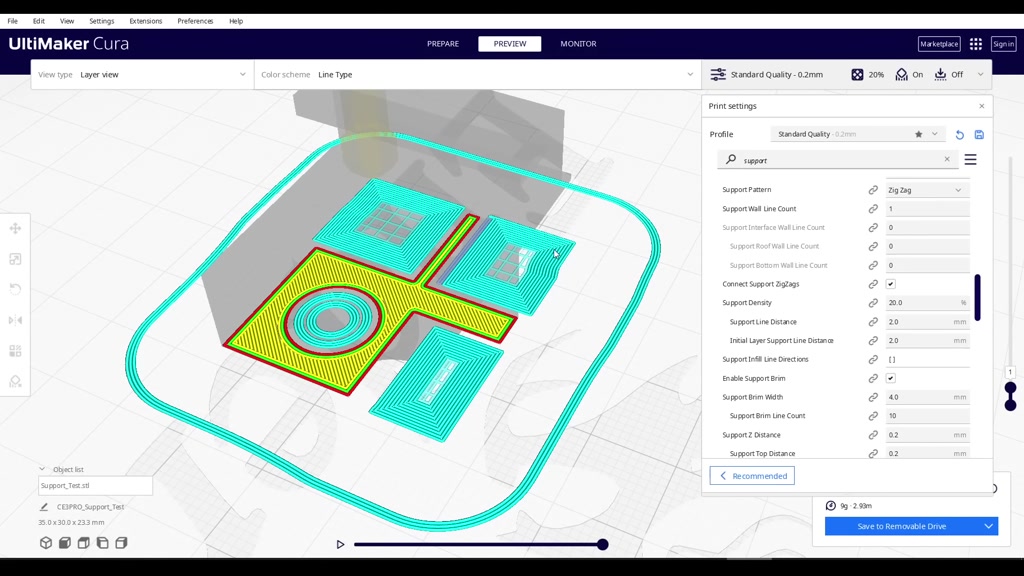
don't have much grip on the bed but
#

turning it on and re-slicing will give
#

us a much denser section for maximum
#
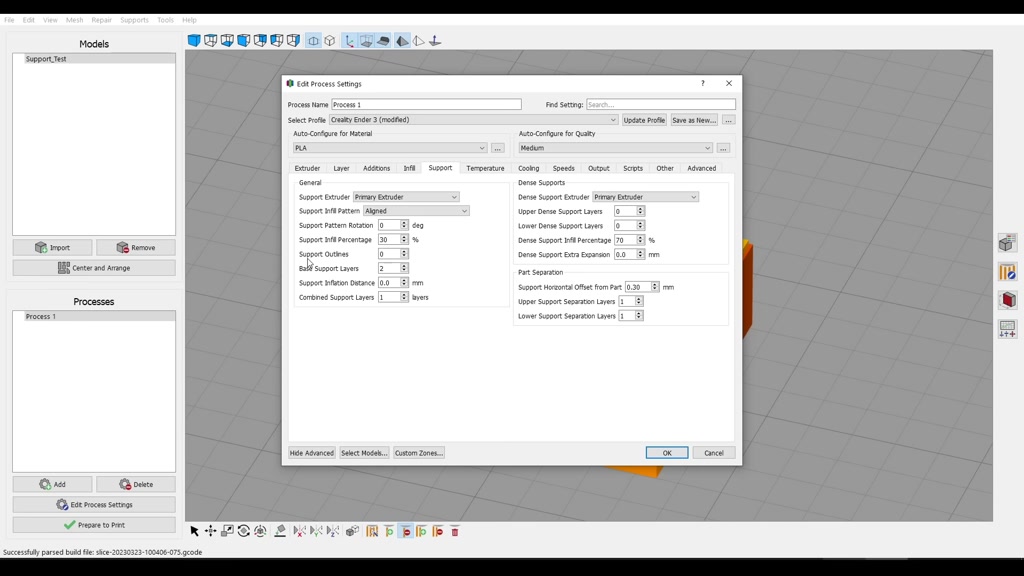
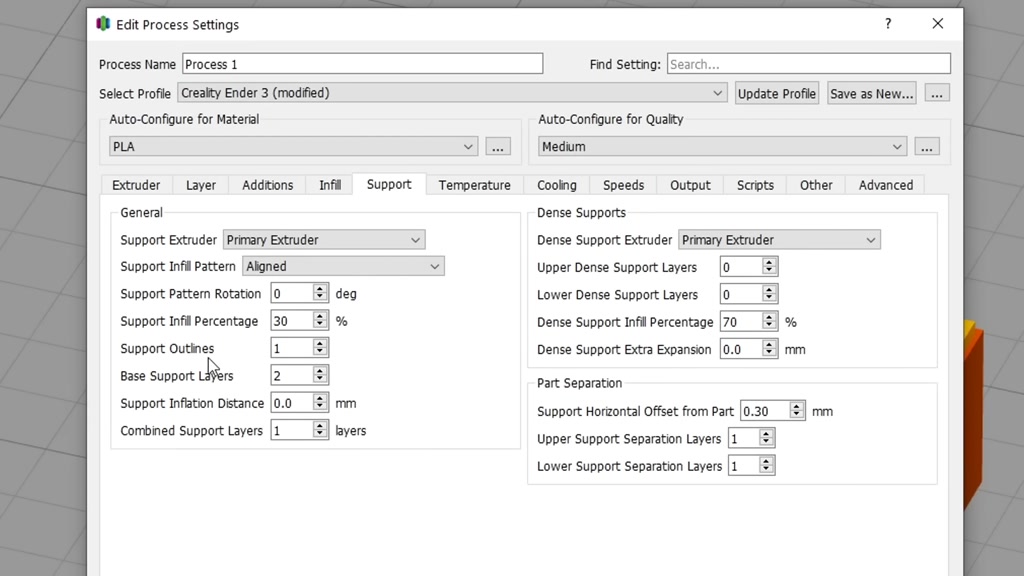
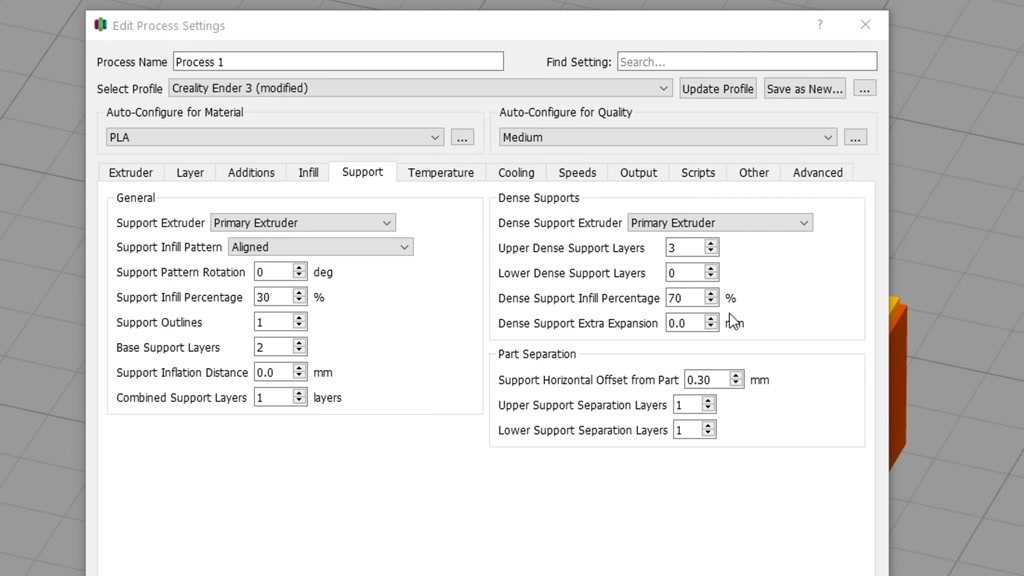
adhesion simplify 3D handles this
#
explicitly with bass support layers with
#

the default being to generally the aim
#
of our support base is to get a good
#

solid platform to build on so we want it
#

to be fairly dense without wasting too
#

much filament let's move to our core
#

support material in the middle this
#

simply acts as a scaffold but we can
#
still customize it quite a bit the
#
density of this section is handled
#
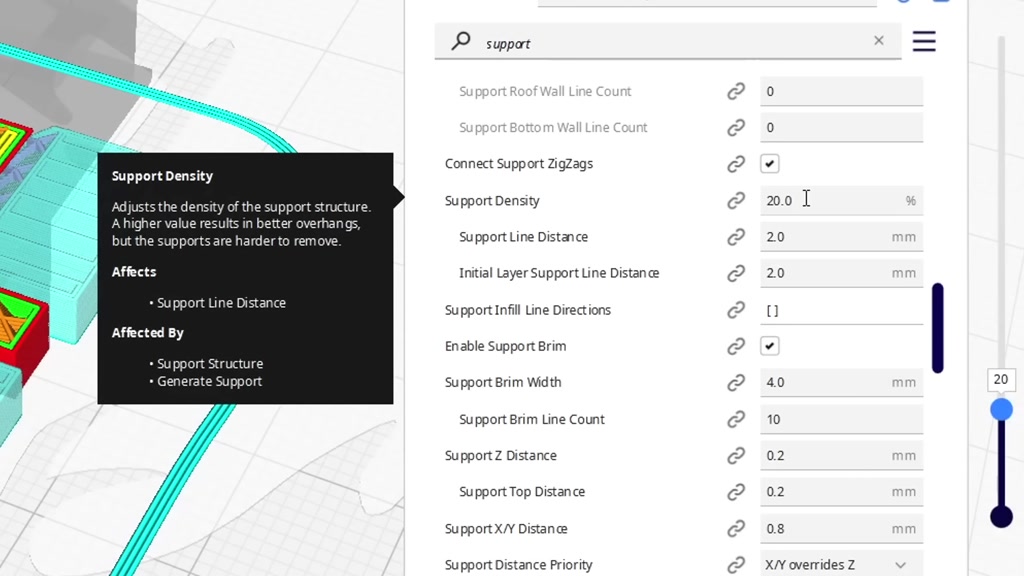
differently in various slices it's
#
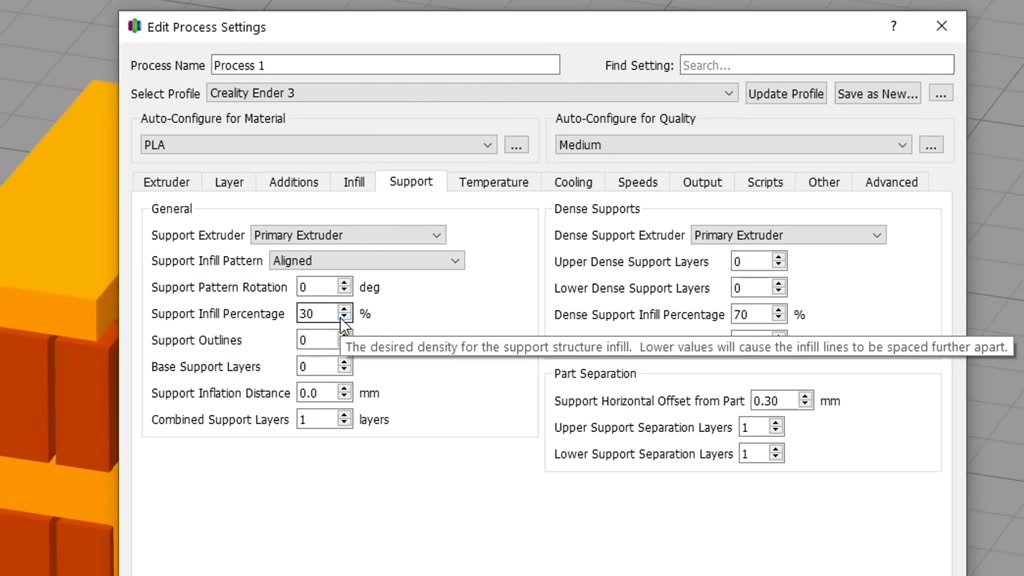
called support density in Cura and
#
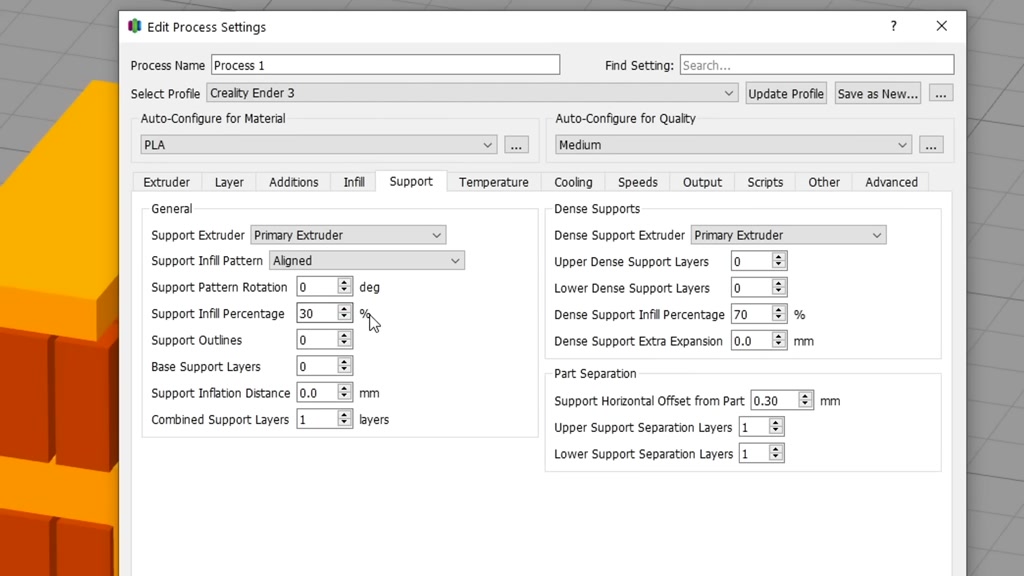
support infill percentage in simplify 3D
#

this is like your regular in-field
#

density you is the default value of 20
#

and here's the value up to 50 an
#
equivalent of this for the software
#
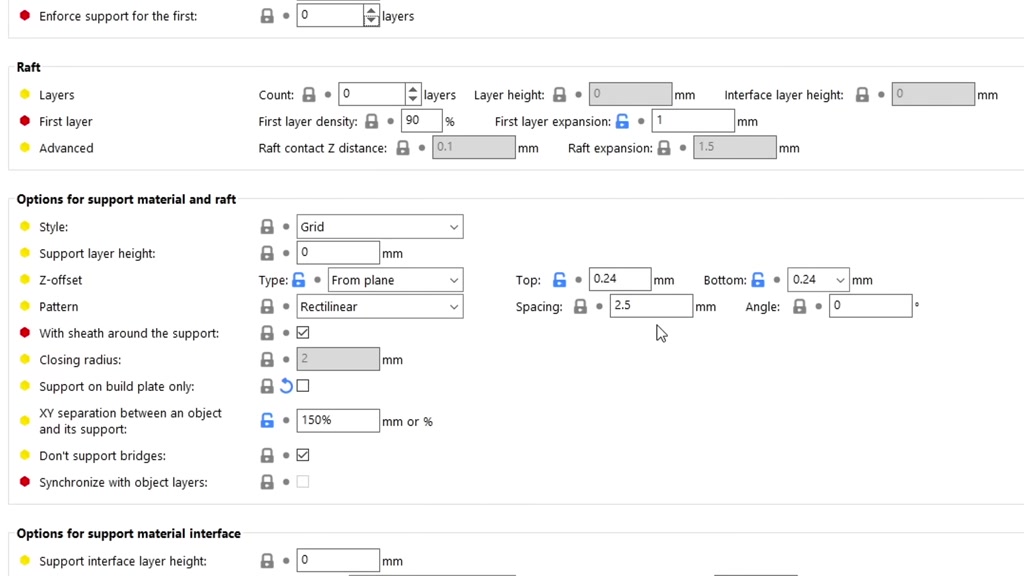
derived from prusa slicer is a spacing
#
setting is the default 2.5 millimeters
#

spacing of one millimeter and here's 0.5
#
millimeters everything packed a lot
#

tighter some particularly intricate
#
prints might need this density increased
#

but for most prints you can leave the
#
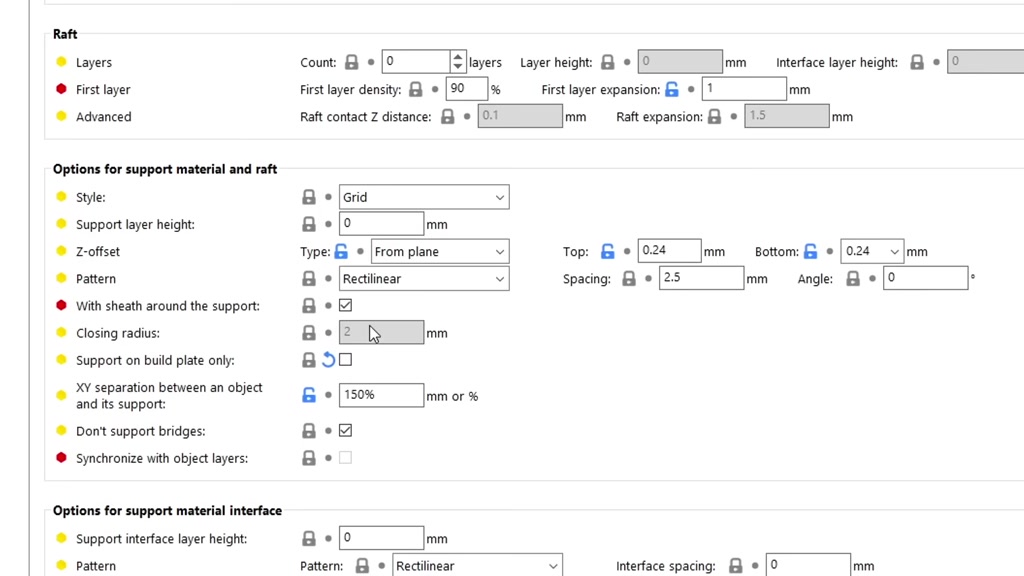
percentage low simply to say filament we
#
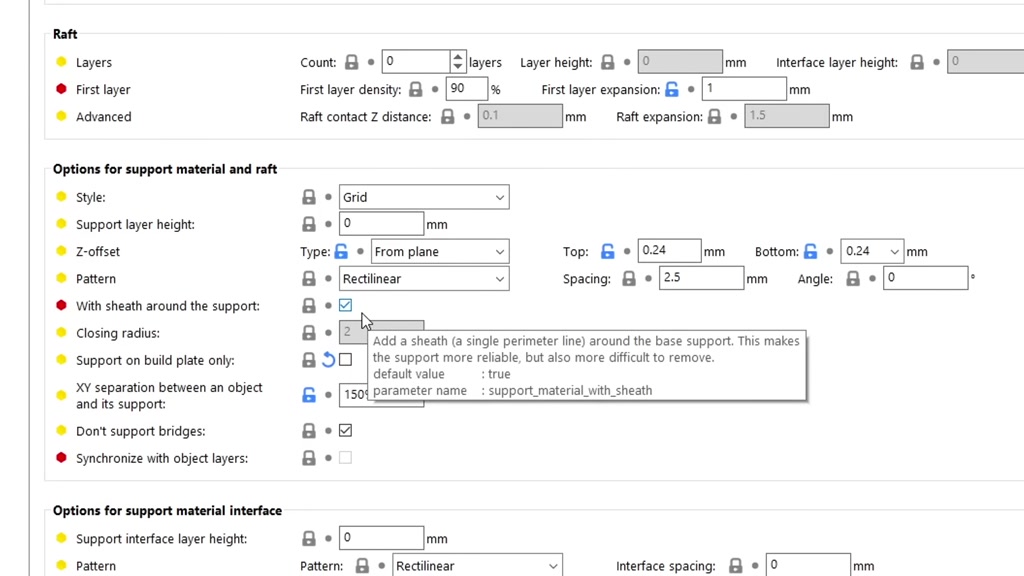
can optionally wrap walls or a sheath
#
around the outside of our support here
#
is this setting off and here it is on
#
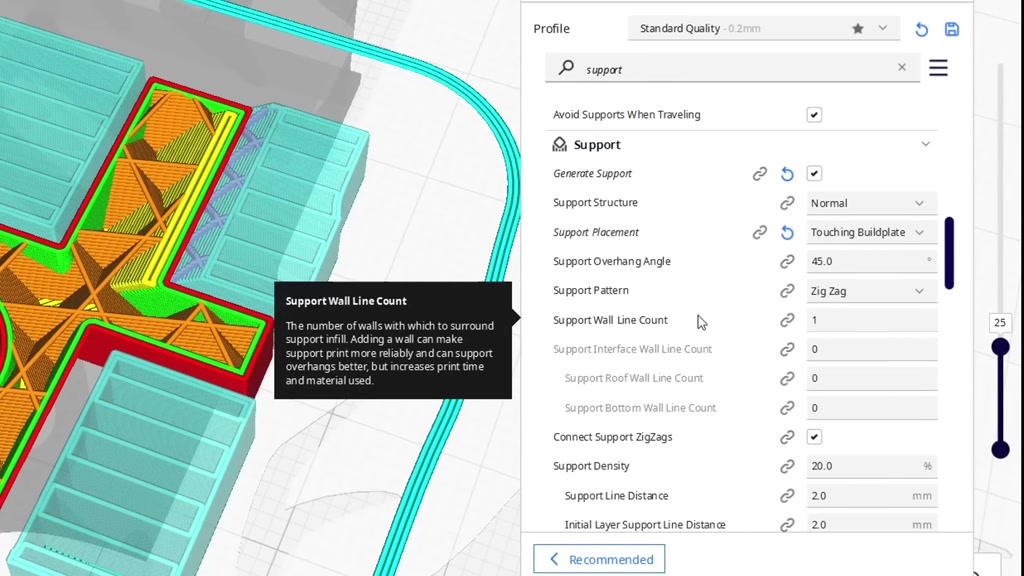
with A continuous exterior wall in Cura
#

this is called support wall line count
#
and then simplify 3D support outlines
#

this is personal preference but I like
#
to have this on as it holds the support
#
material together in chunks and makes it
#
easier to grab and rip off with pliers
#
what about the XY gap between the
#
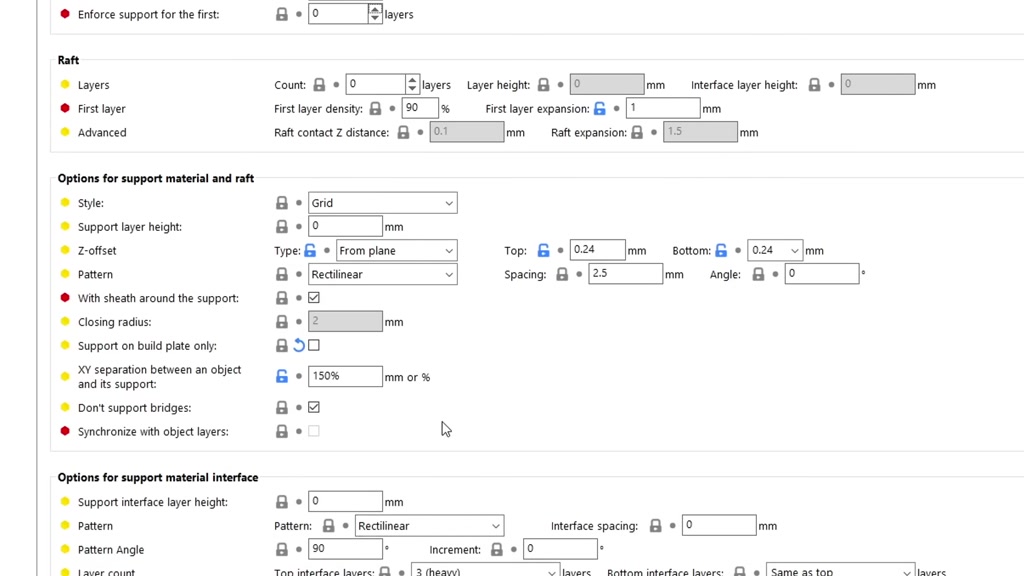
support material and our actual model in
#
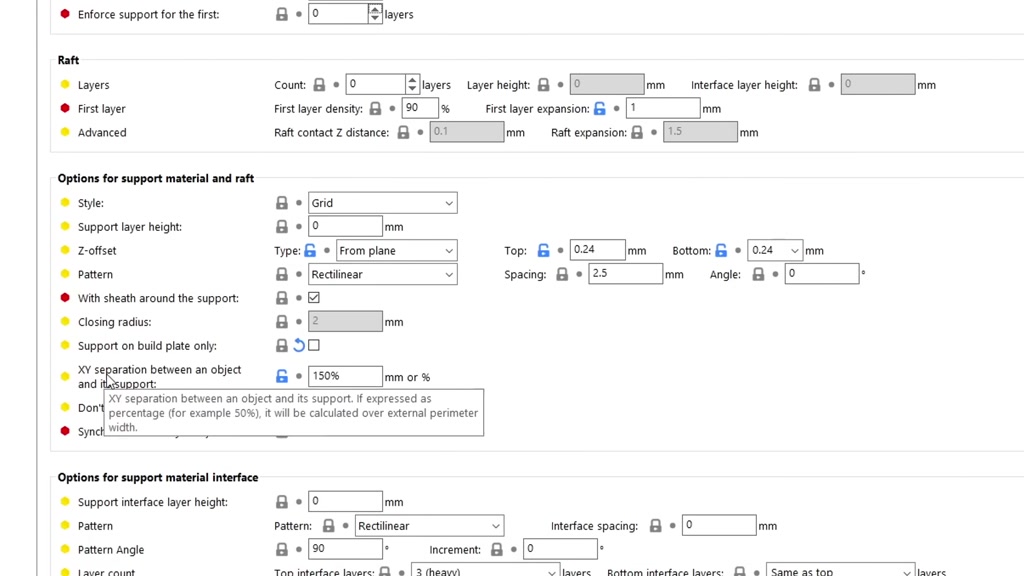
prusa slicer and derivatives this is
#
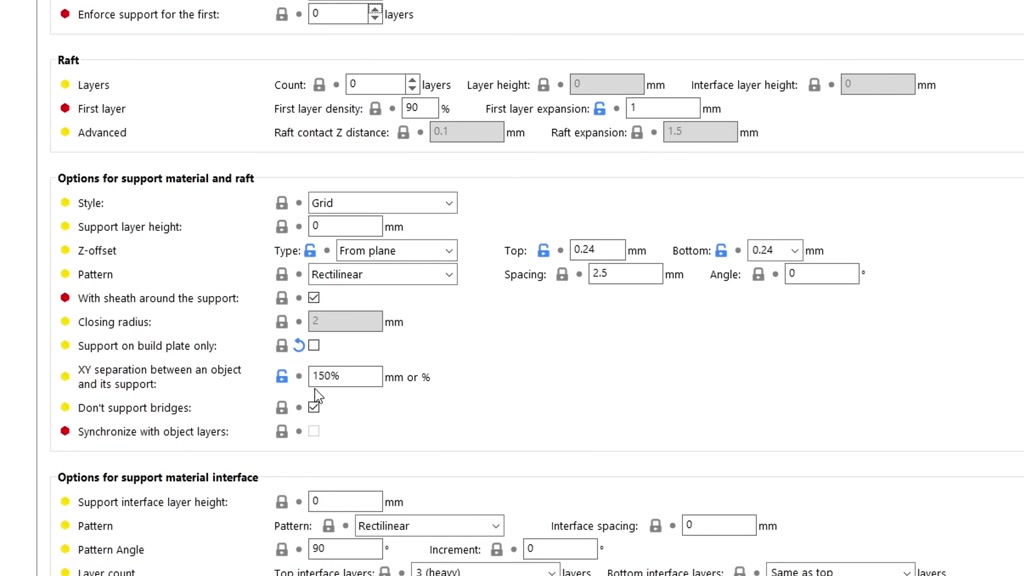
called XY separation and can be
#
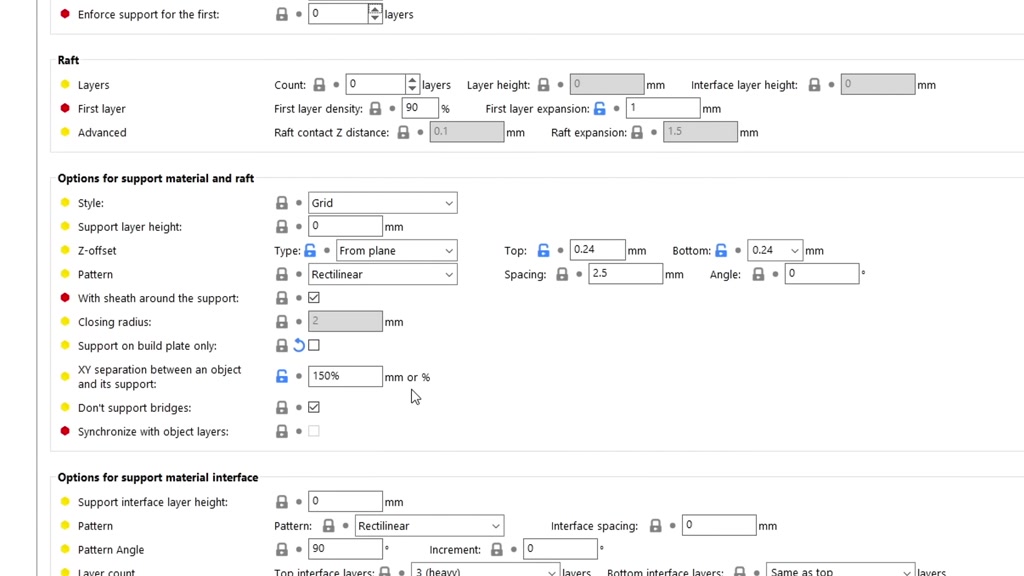
expressed as a percentage or in
#
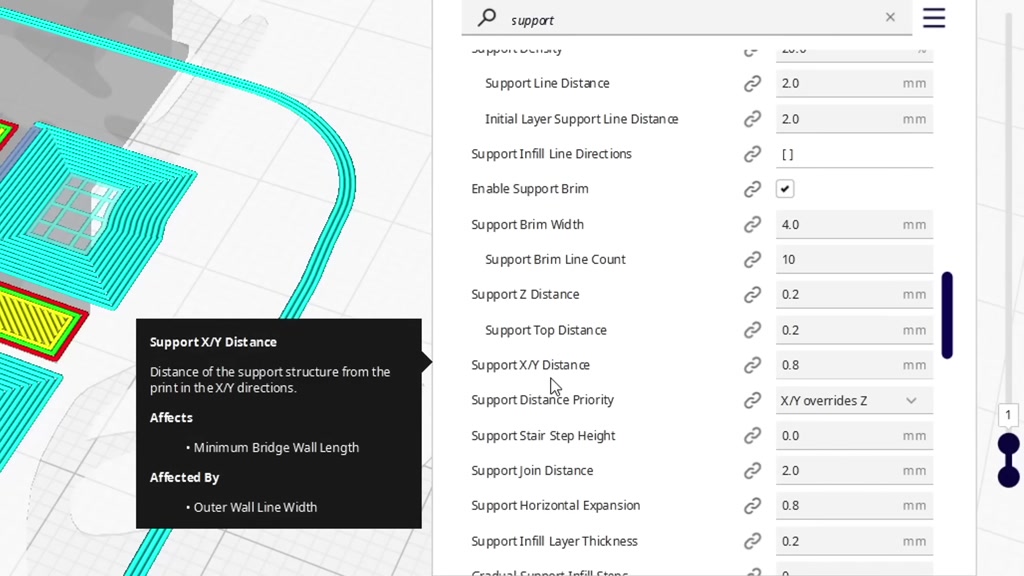
millimeters in Cura it's called support
#
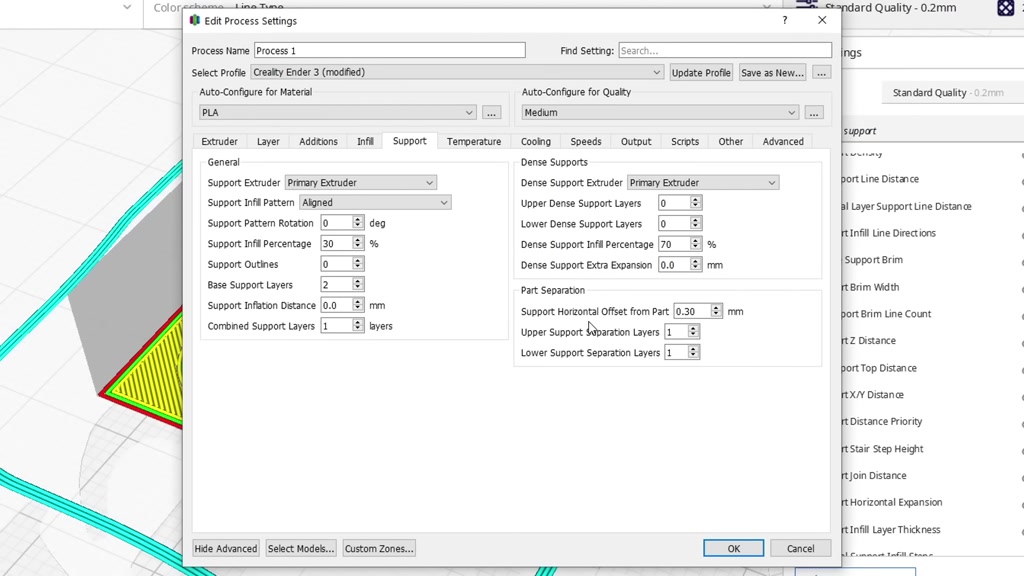
XY distance and in simplify 3D support
#
horizontal offset from part is a typical
#
close Gap that you'll see by default but
#

I actually like my Gap to be exaggerated
#
and large as it gives more room to fit
#
Tools in between the sub port and the
#

model to help lever It Off now our most
#
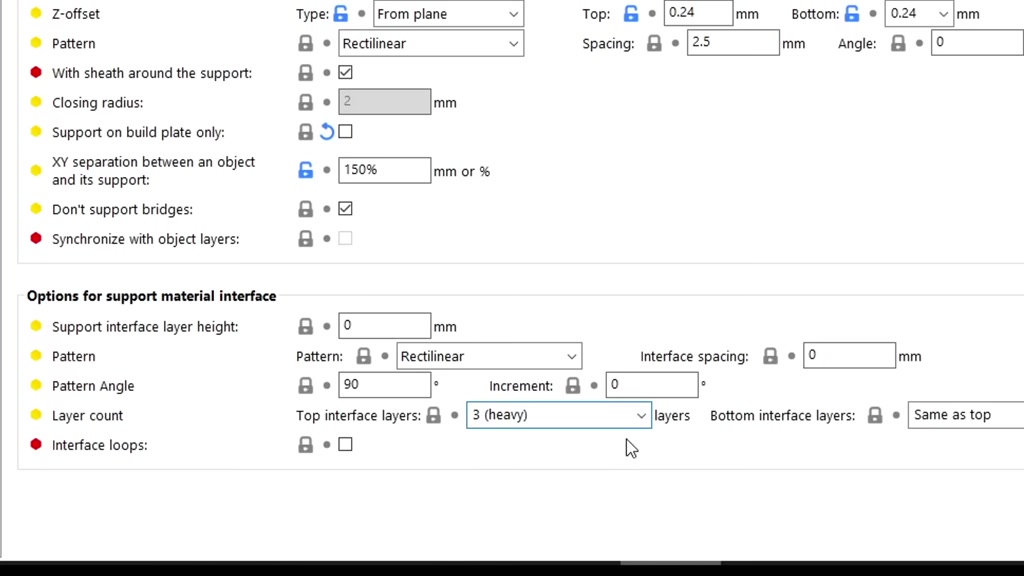
important section the interface if you
#
wanted to you can change the thickness
#
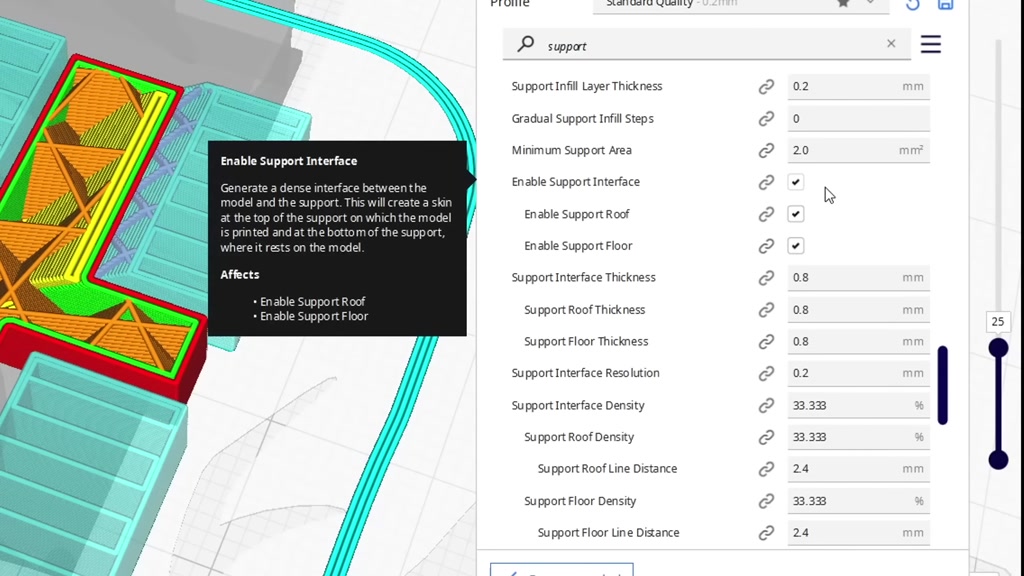
for this including setting it off in
#
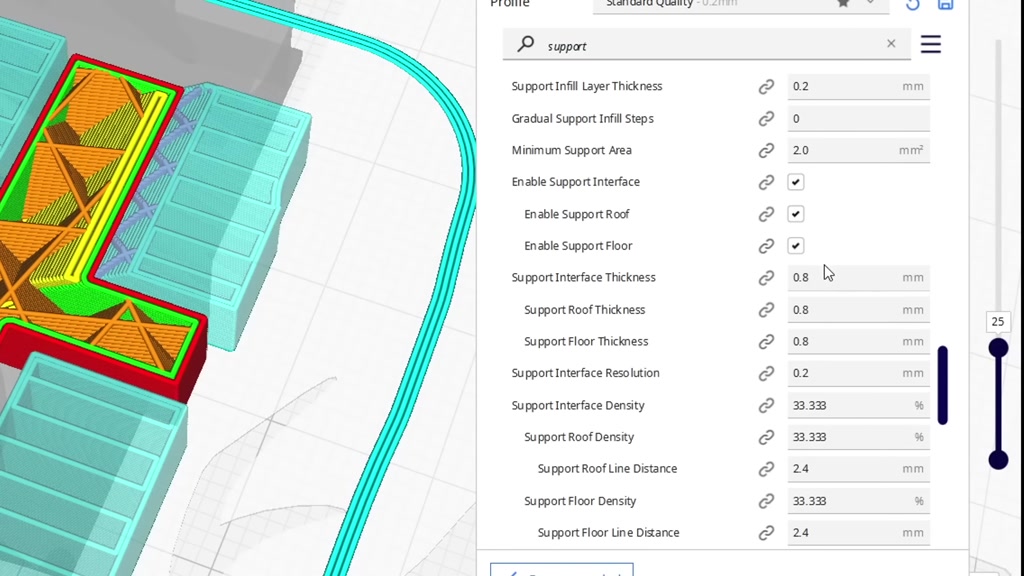
Cura it should be ticked by default and
#

we set the thickness in millimeters
#
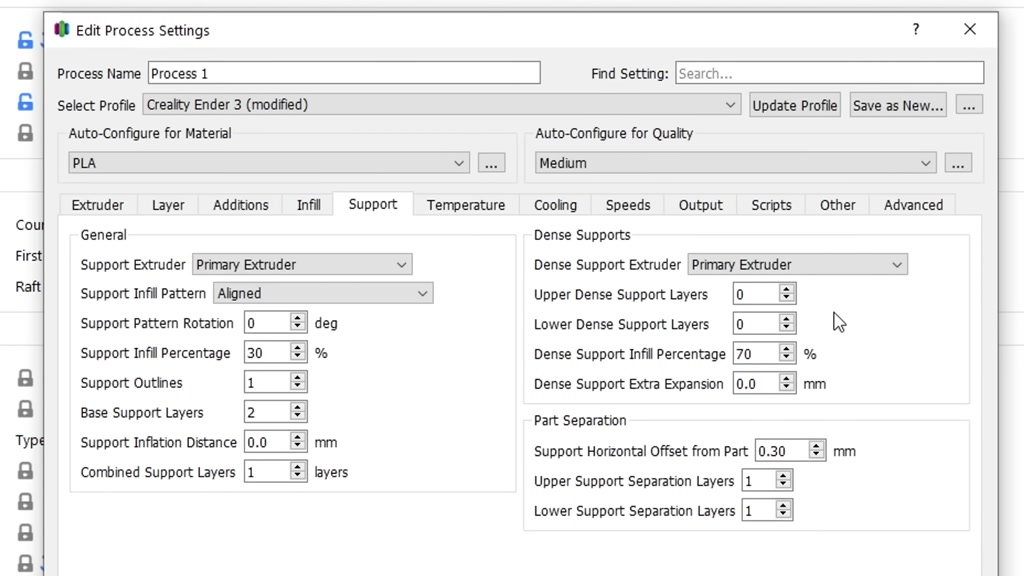
instead of layers in simplifier 3D it's
#
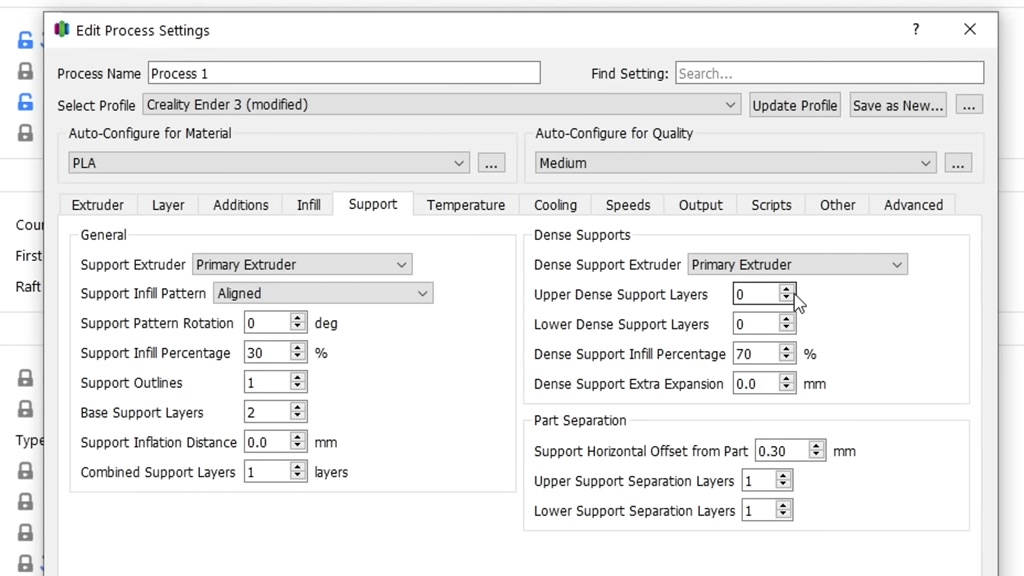
off by default and we change the upper
#

dense support layers to add it most of
#

the time you're going to want this
#

pretty dense as that will give the
#

flatter surface to build on top of
#
however if you'd like to say filament or
#

perhaps you'd like to make this easier
#
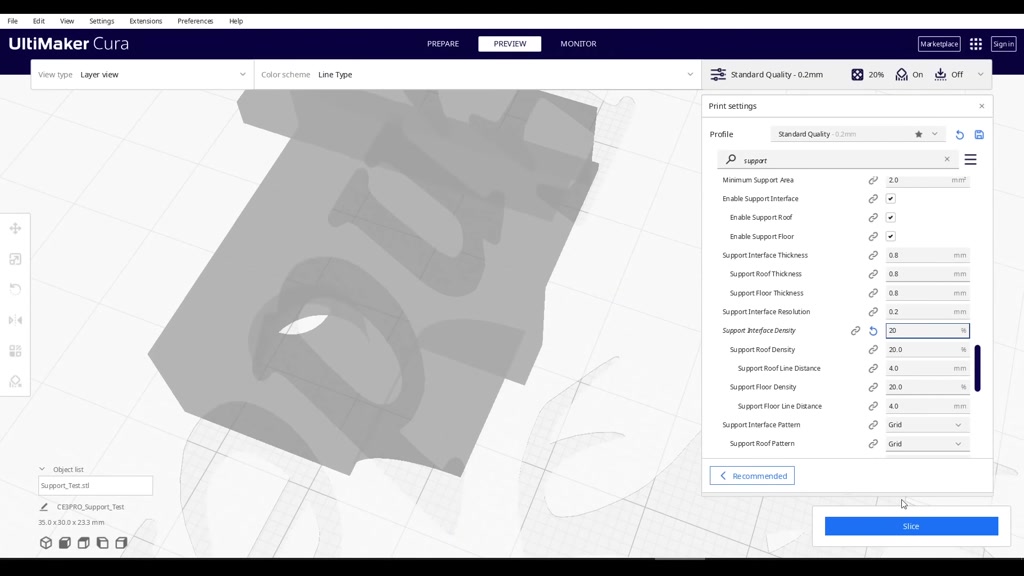
to peel off in Cura you can lower the
#

density with this grid being quite
#

sparse or here in 80 being a lot denser
#
simplify 3D also has a percentage for
#

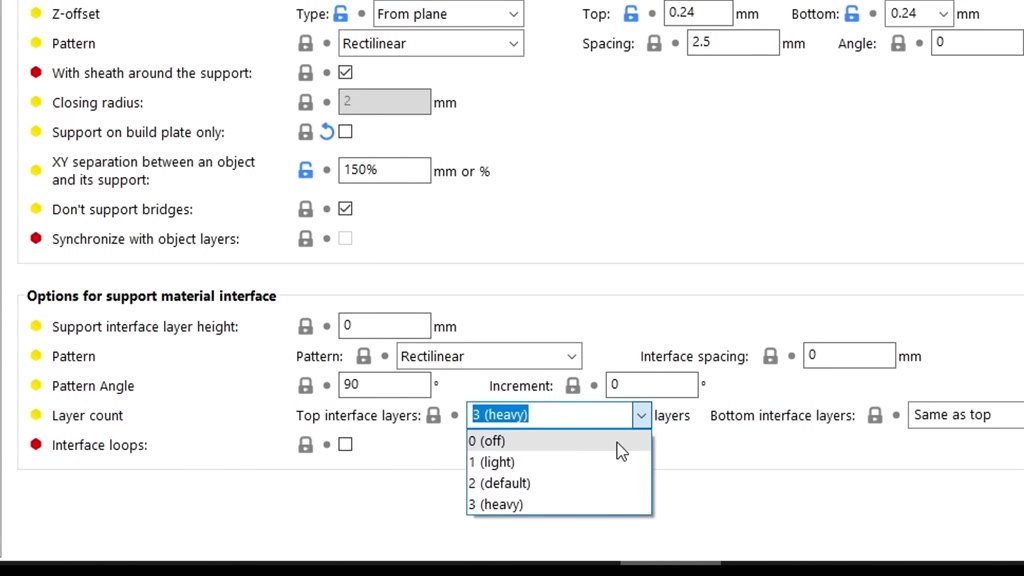
changing the interface density in prusa
#
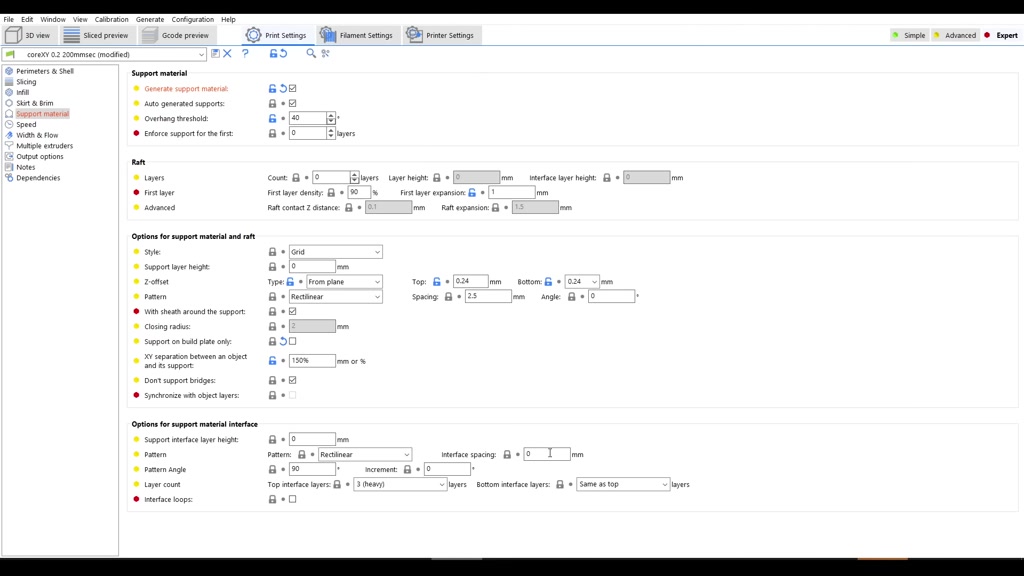
slicer derivatives it's a little
#

counter-intuitive if the interface
#

spacing is set to zero it will be dense
#
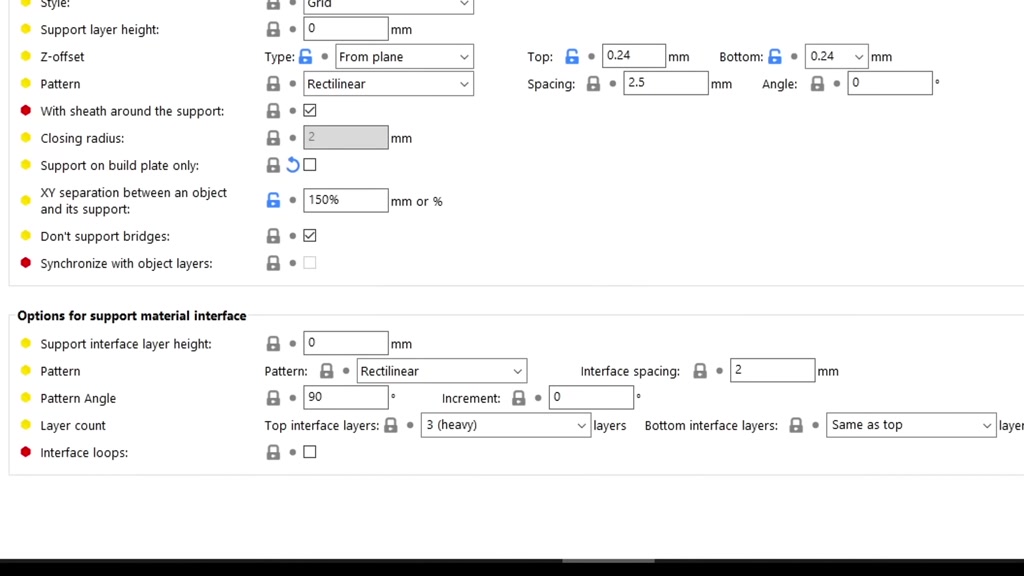
but we can manually override that with a
#

millimeter value which will add gaps in
#
between the Extrusion making it less
#
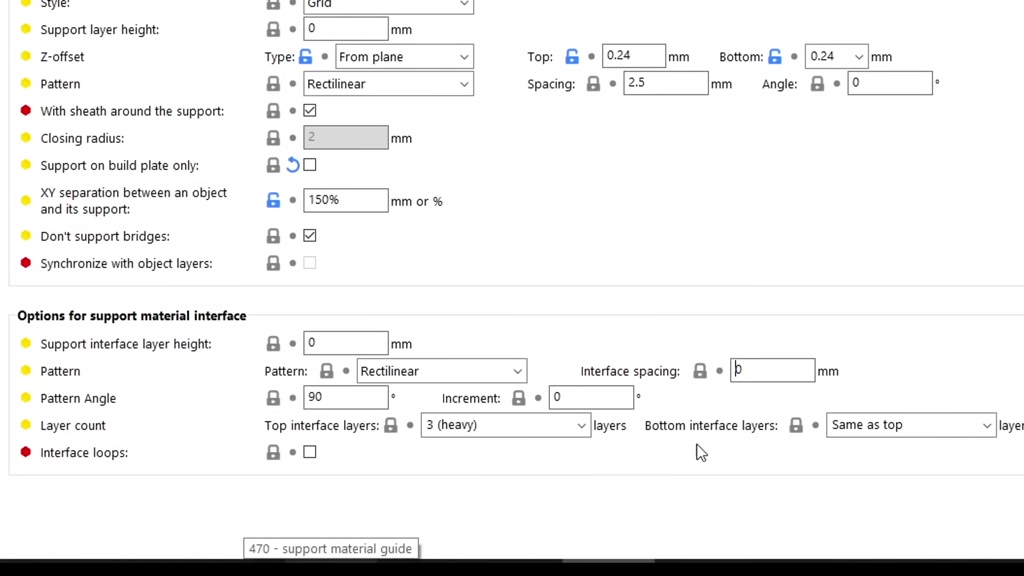
dense it's important to note that when
#

we see bottom interface layers this
#

doesn't affect the support raft touching
#
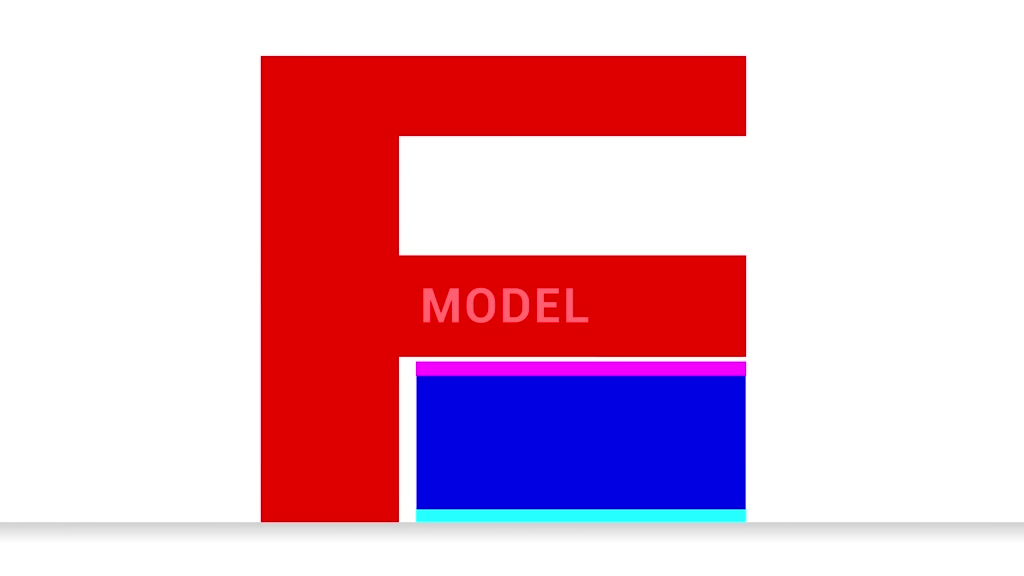
the bed but rather geometry where a
#
model will require support that's built
#
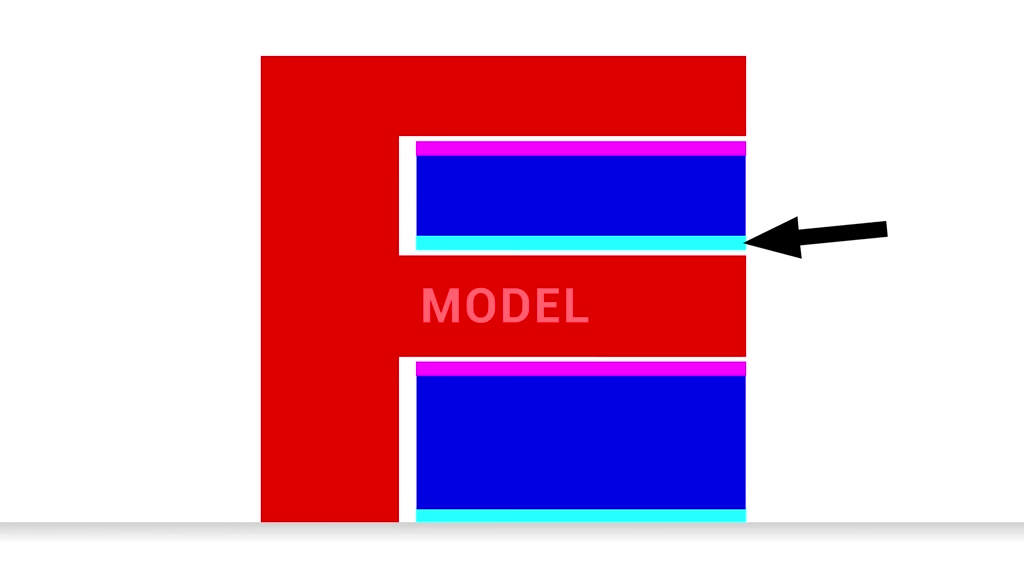
off the model instead of the bed so the
#

lower interface is the section just
#

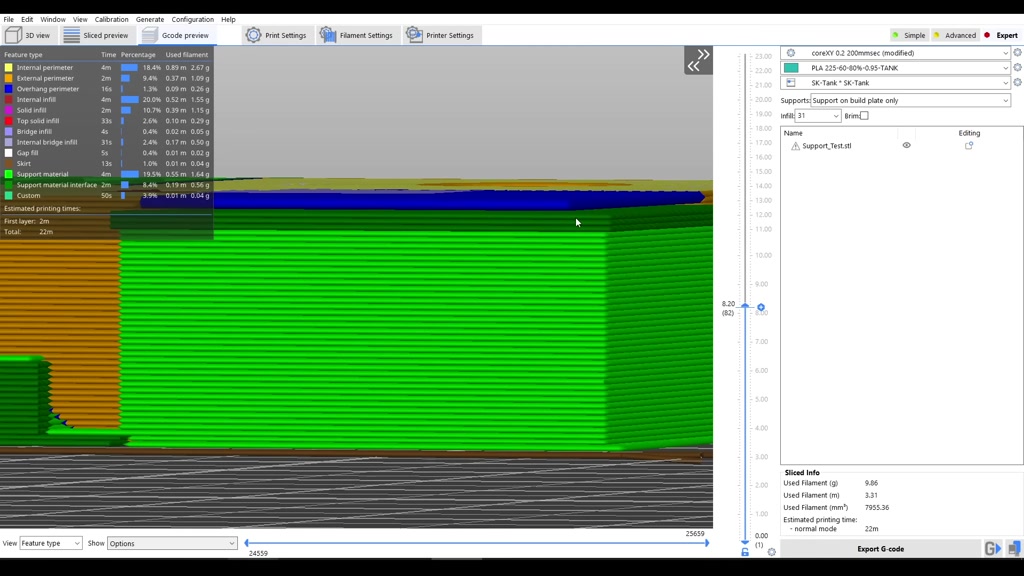
above this finally our most important
#

parameter to tune which is the air Z Gap
#
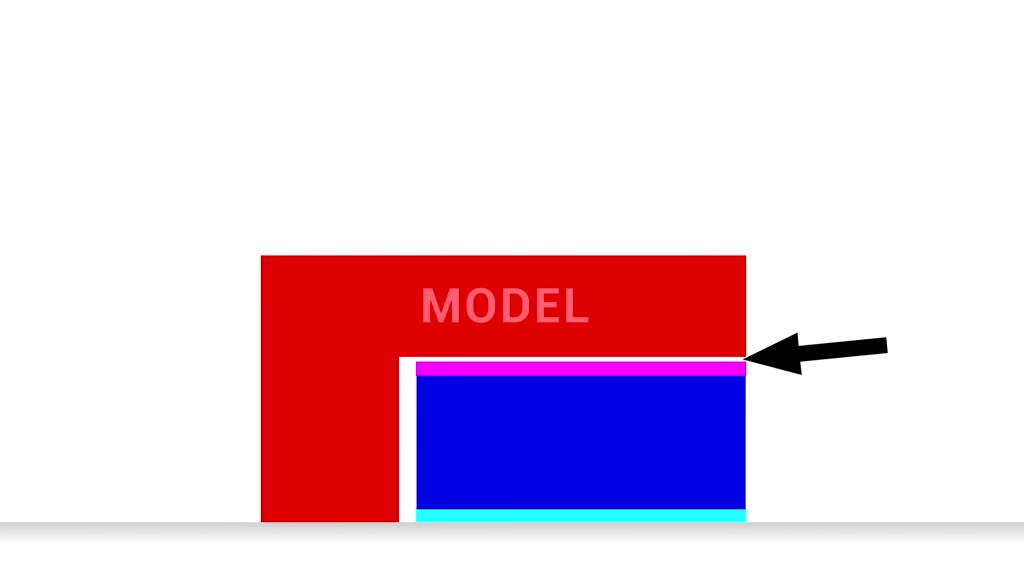
in between the interface and the model
#
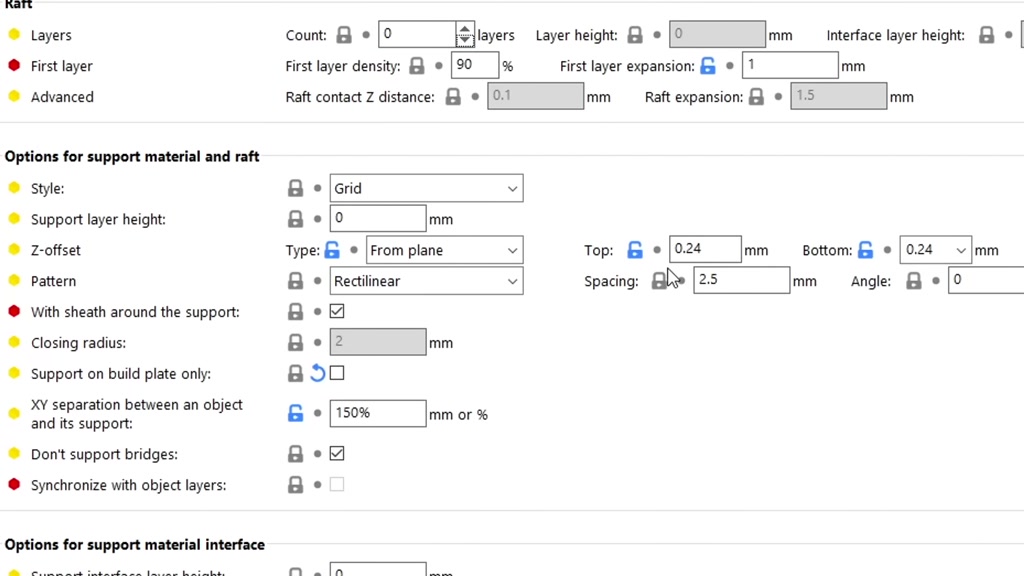
pressure slicer derivatives called this
#
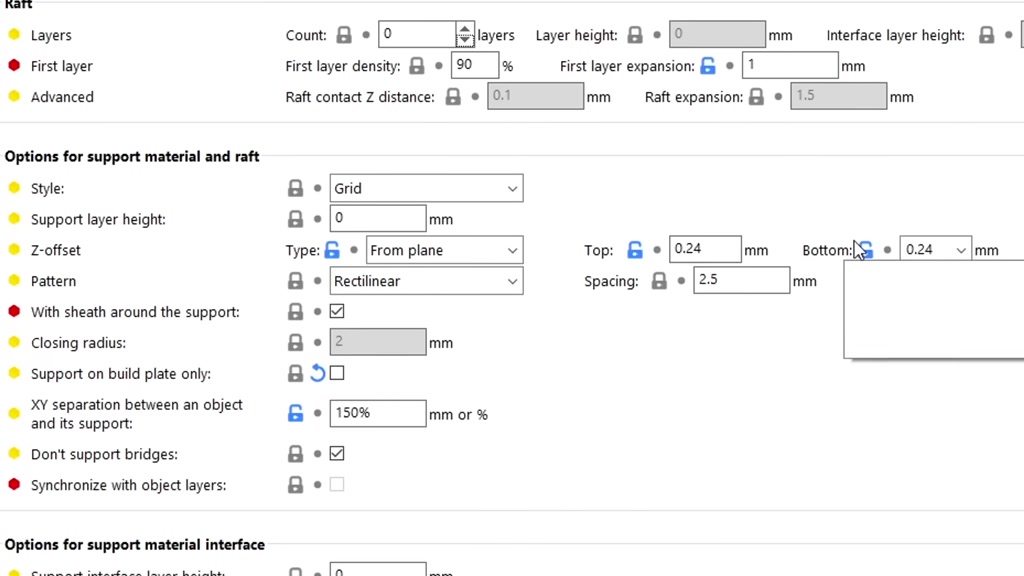
does it offset and we have a value for
#
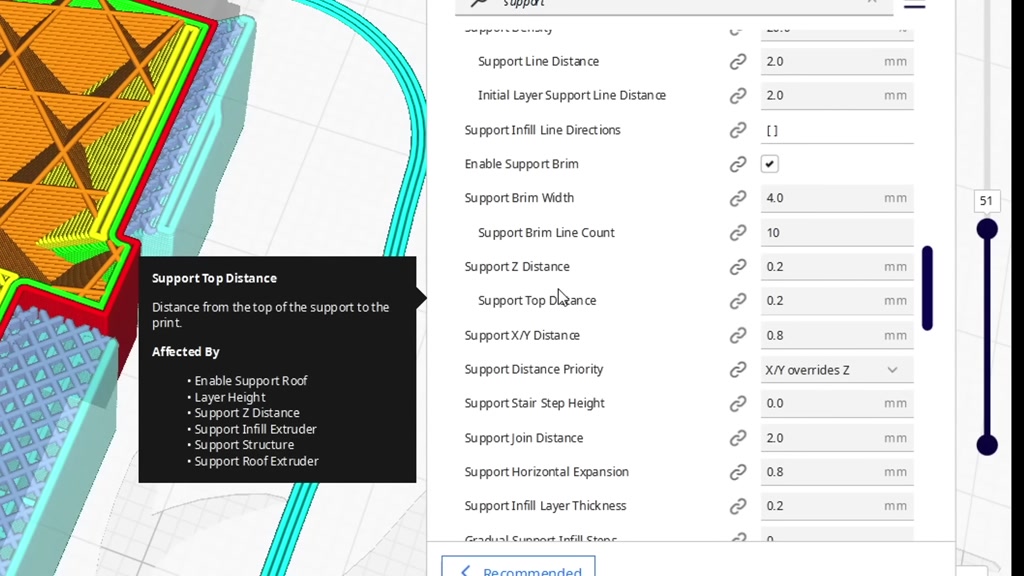
top and bottom Cura callsys the support
#

Z distance and simplify 3D calls this
#
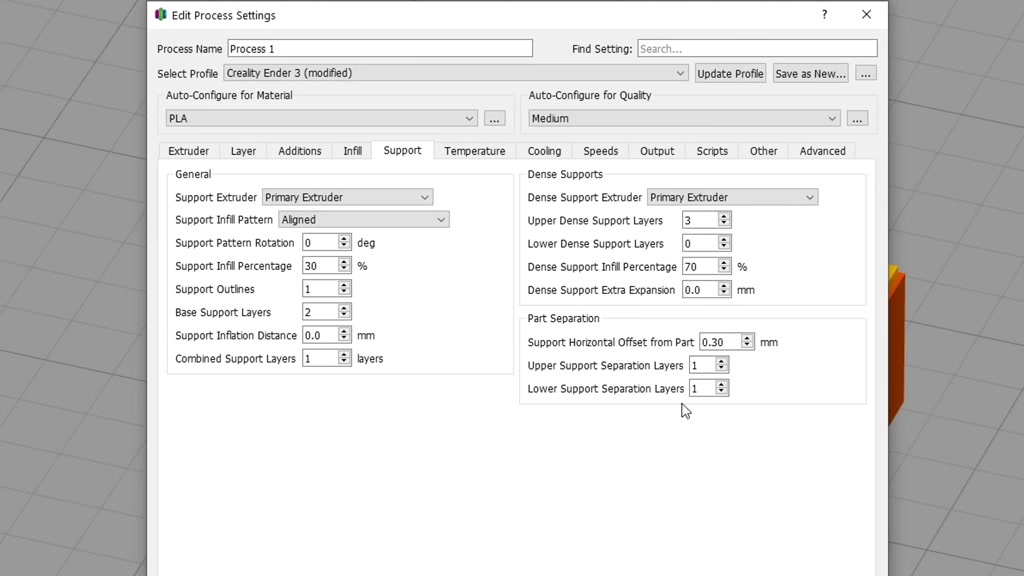
the upper and lower support separation
#

layers unique to this slicer because
#

it's not measured in millimeters when we
#

see a bottom said distance this is
#

talking about the Gap where support is
#

built on top of the model and relates to
#
the air gap in between the model and the
#

lower interface these vertical air gaps
#
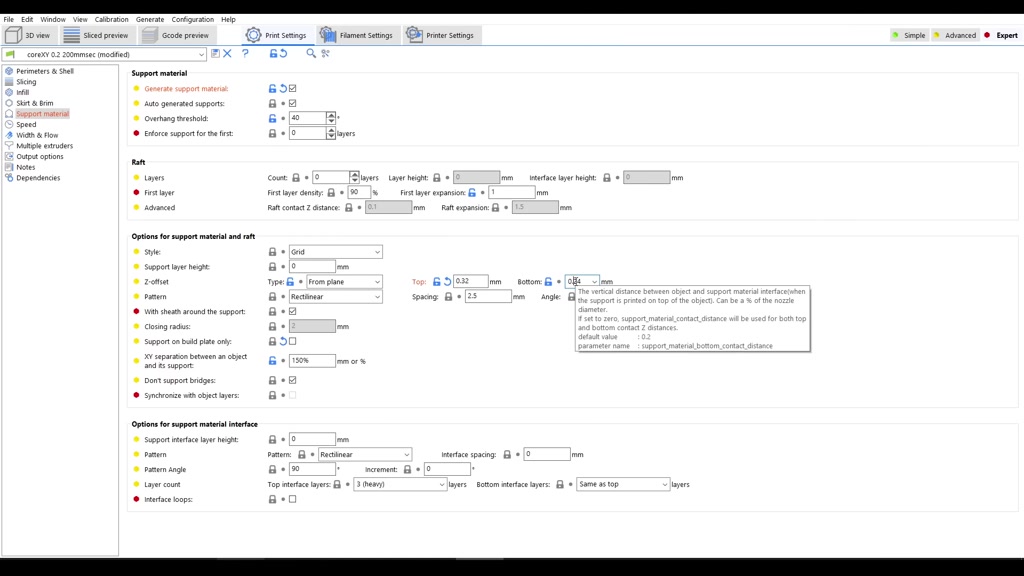
are a setting you should do some trial
#
and error test prints with
#
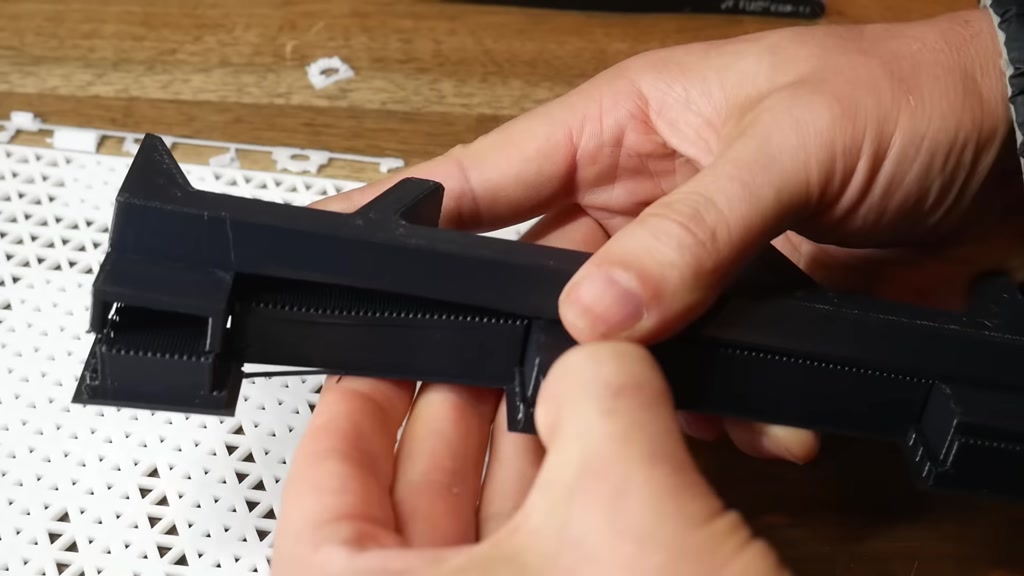
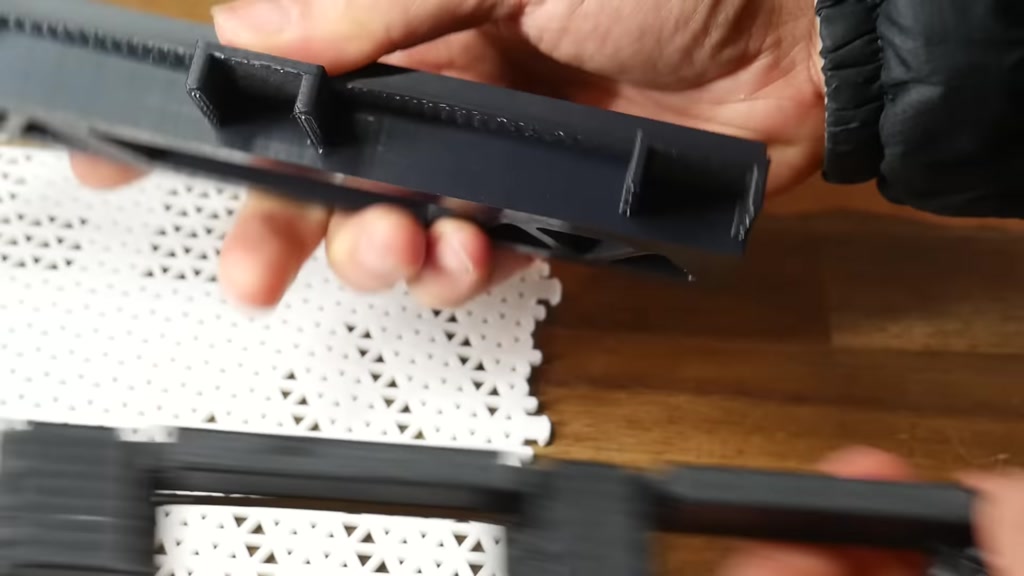
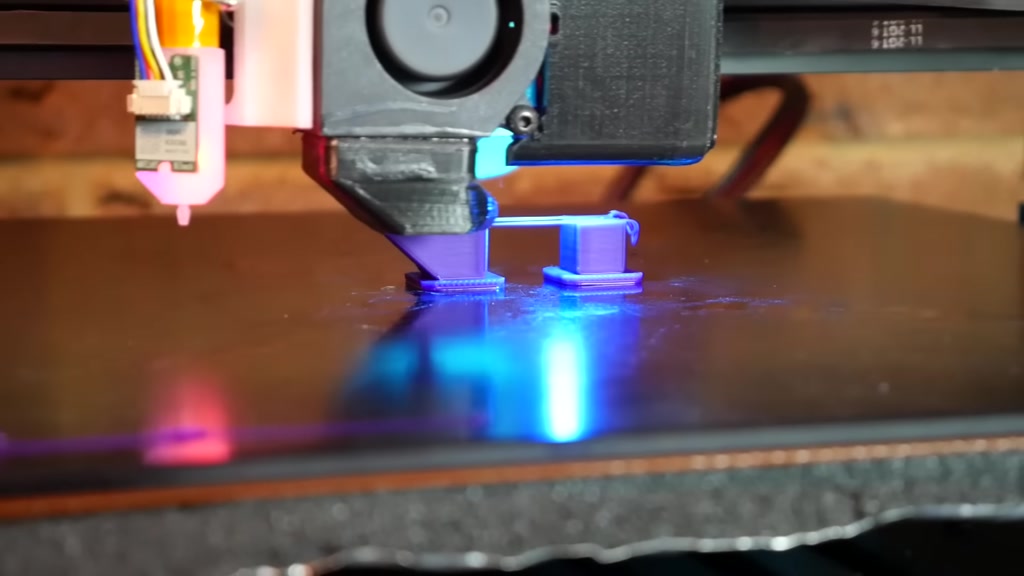
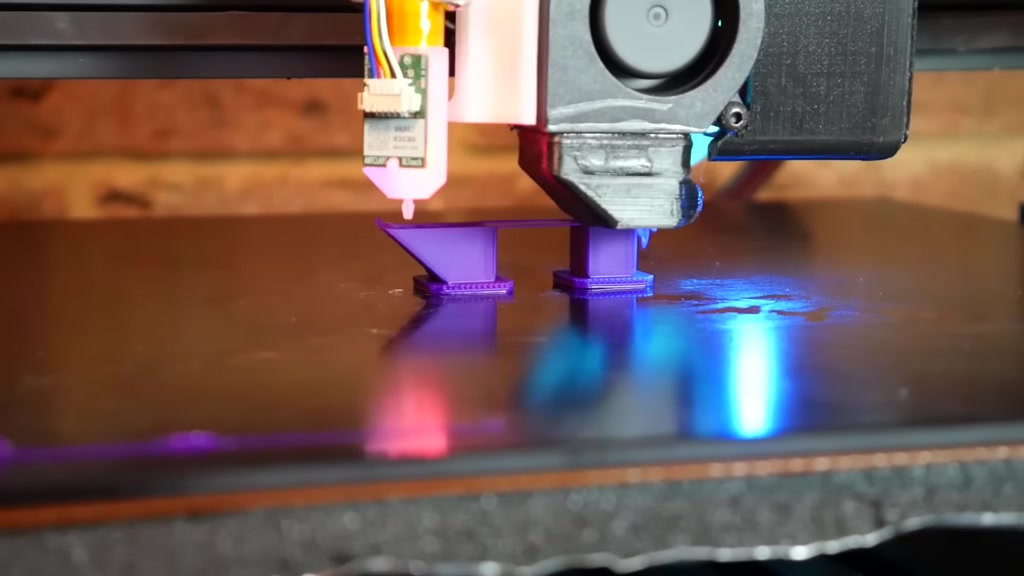
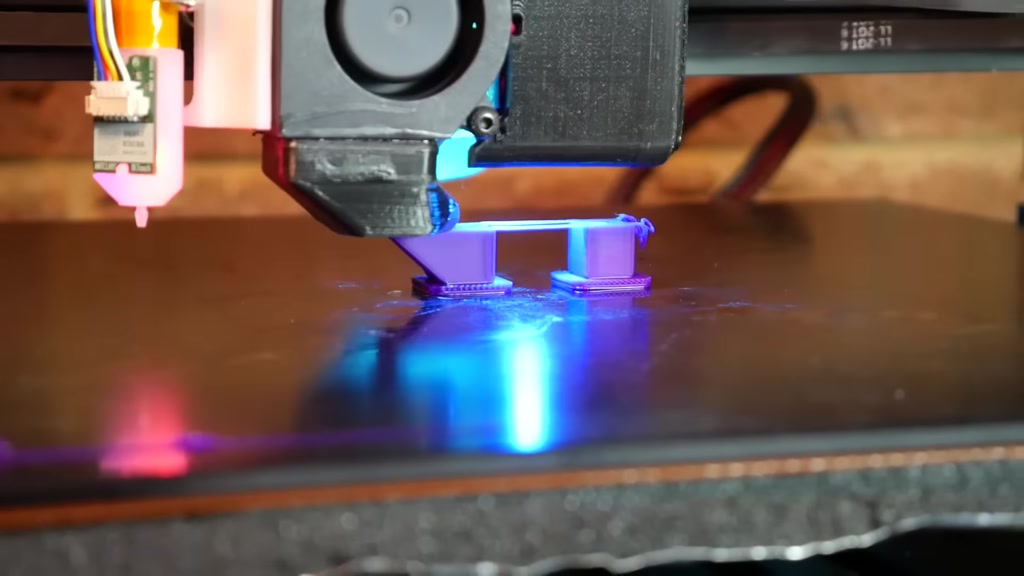
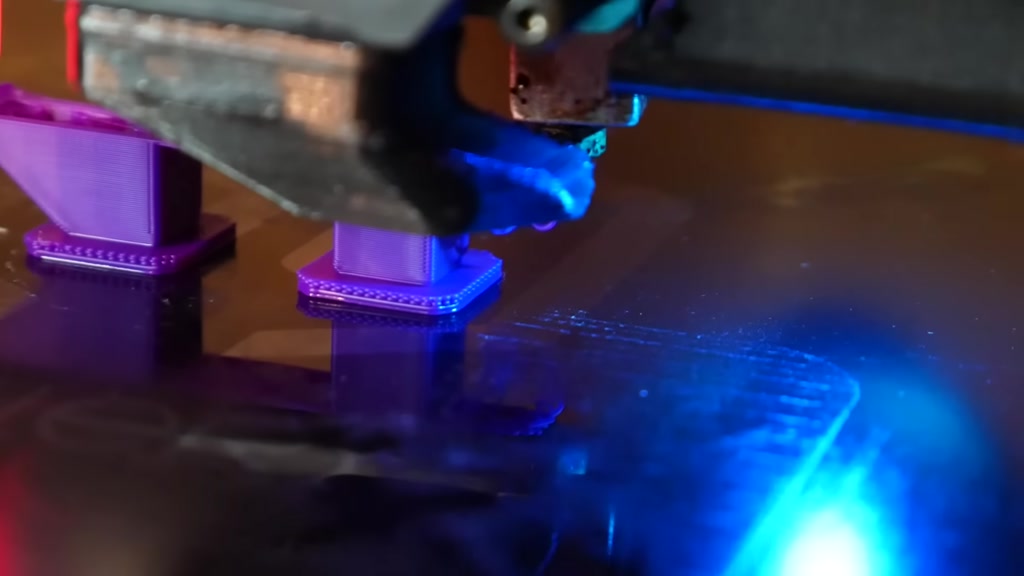
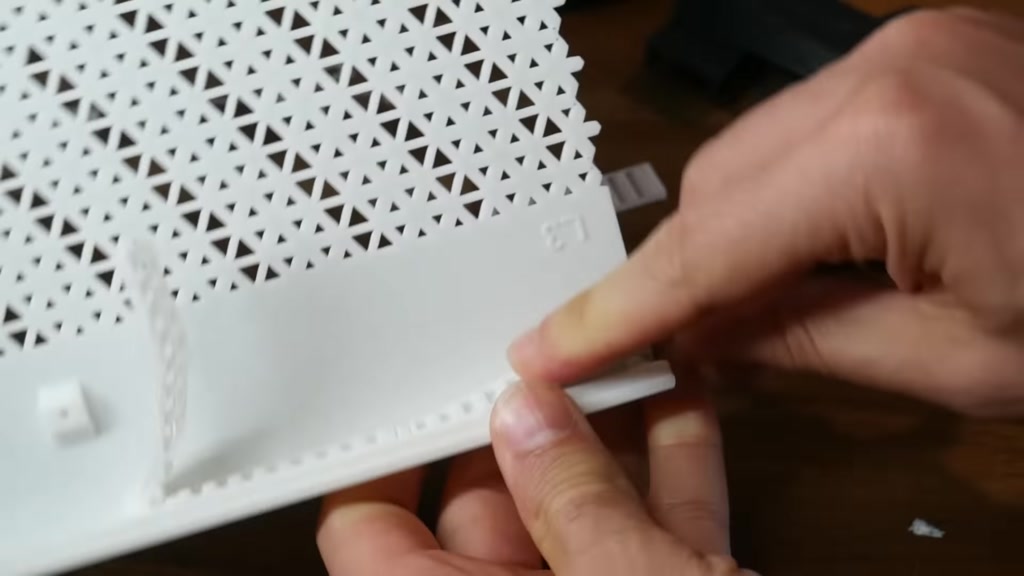
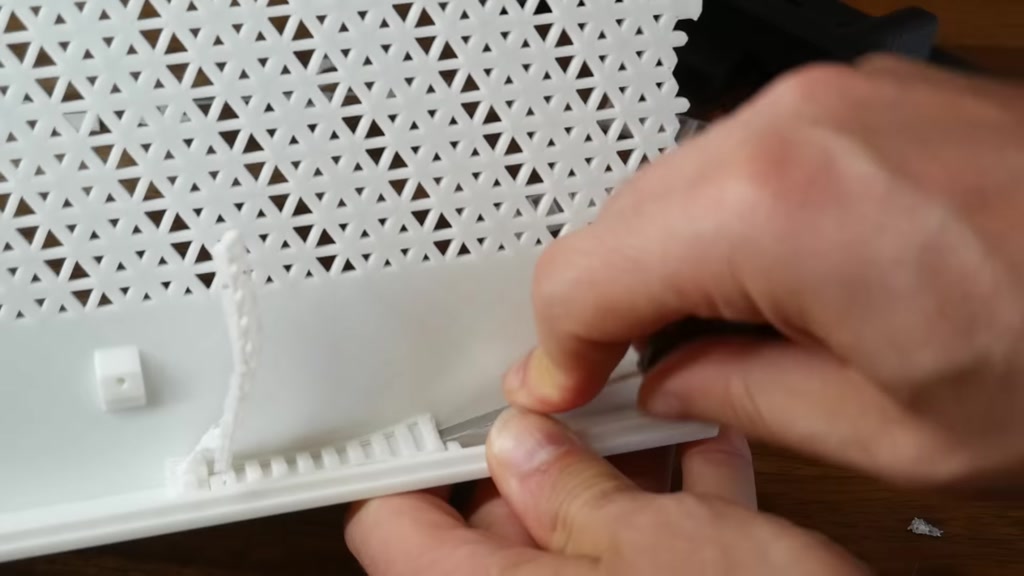
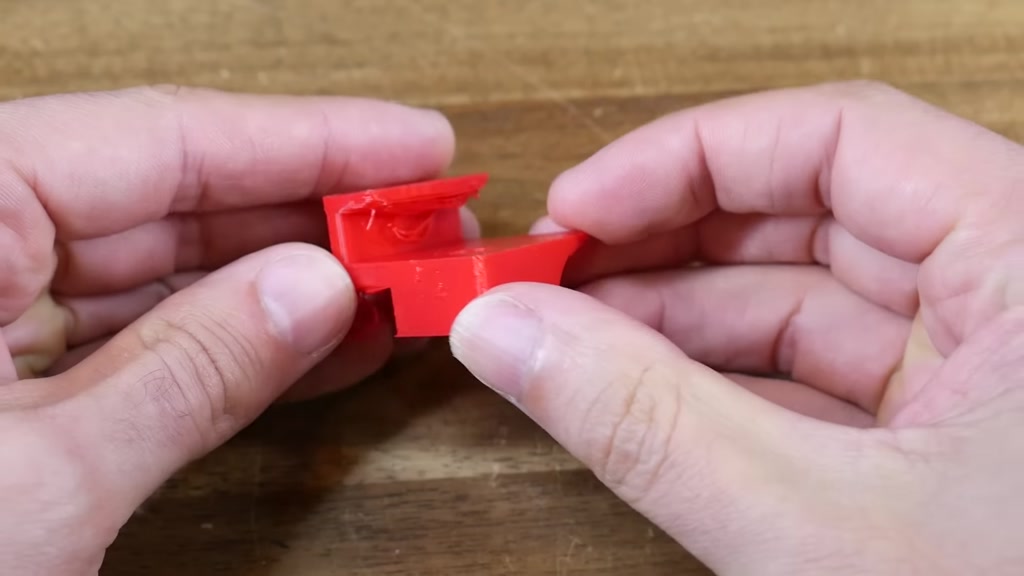
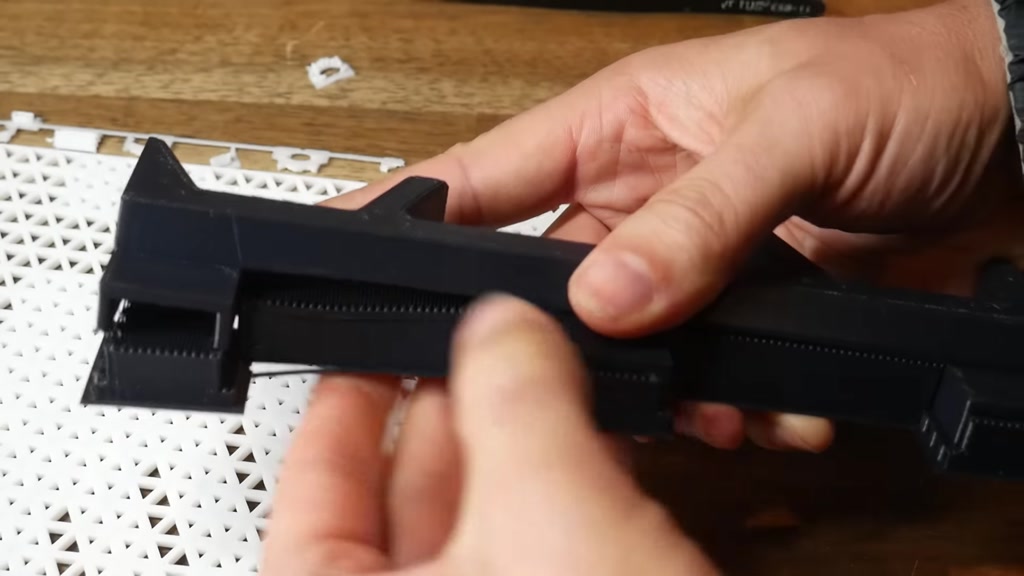
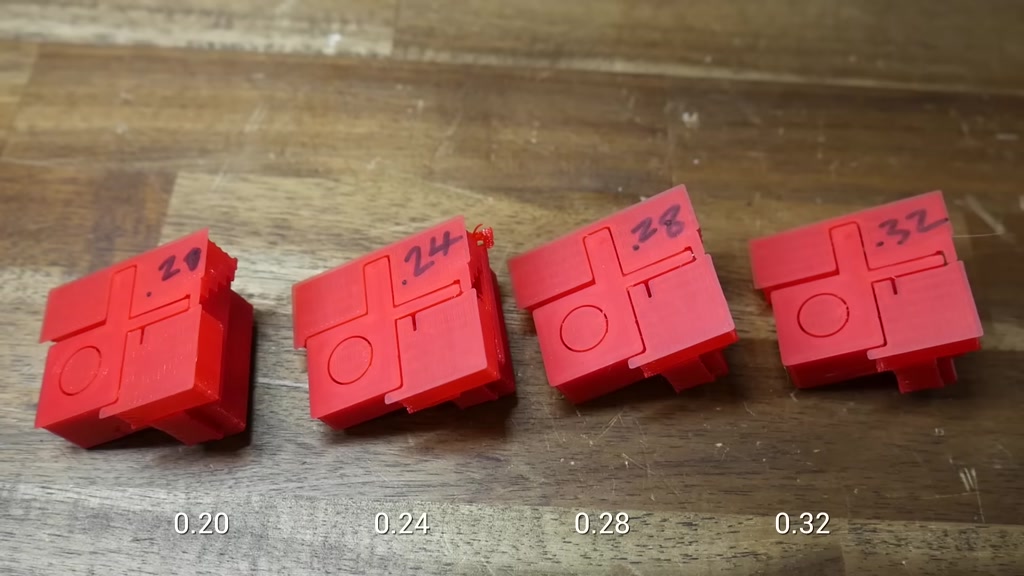
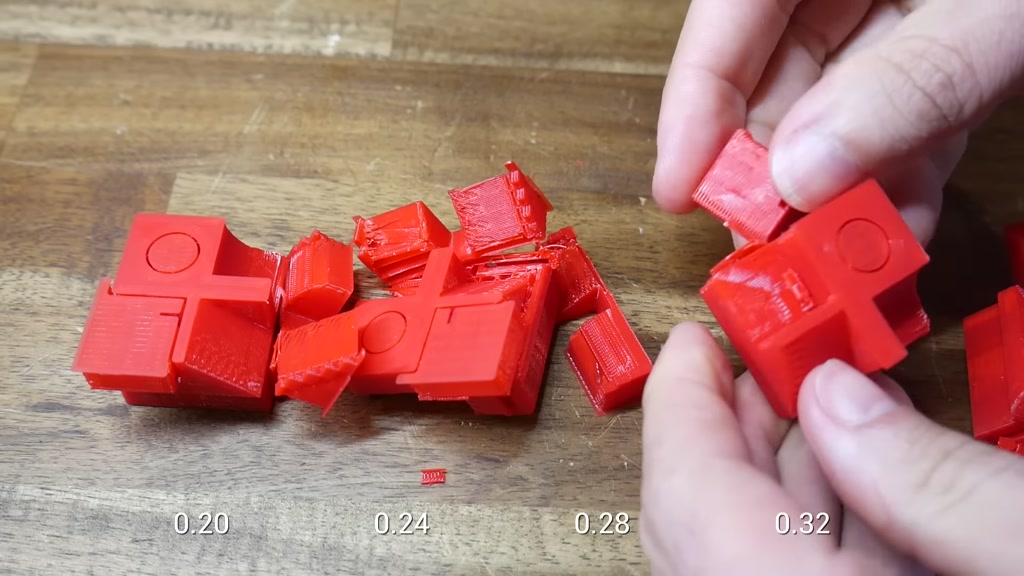
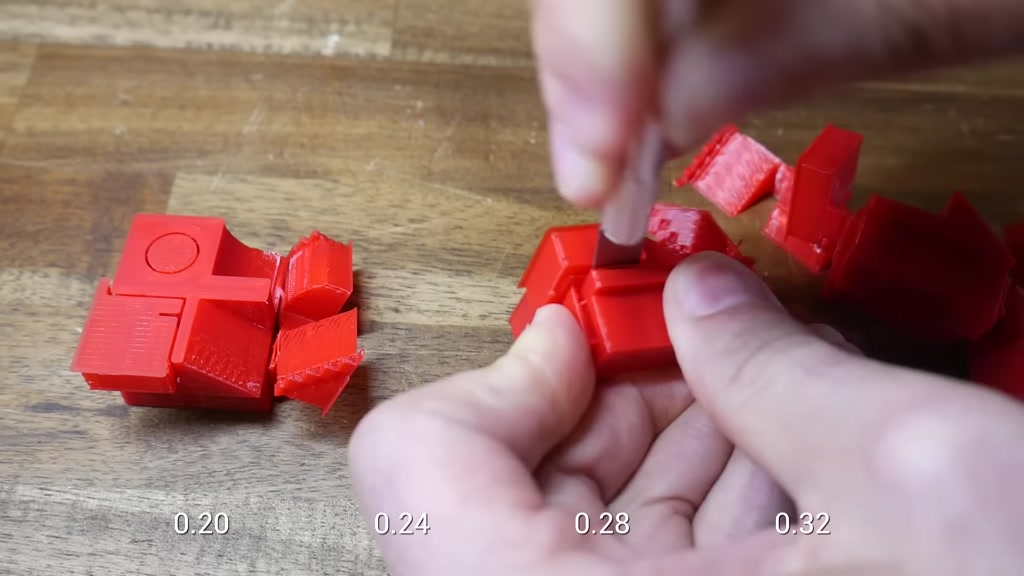
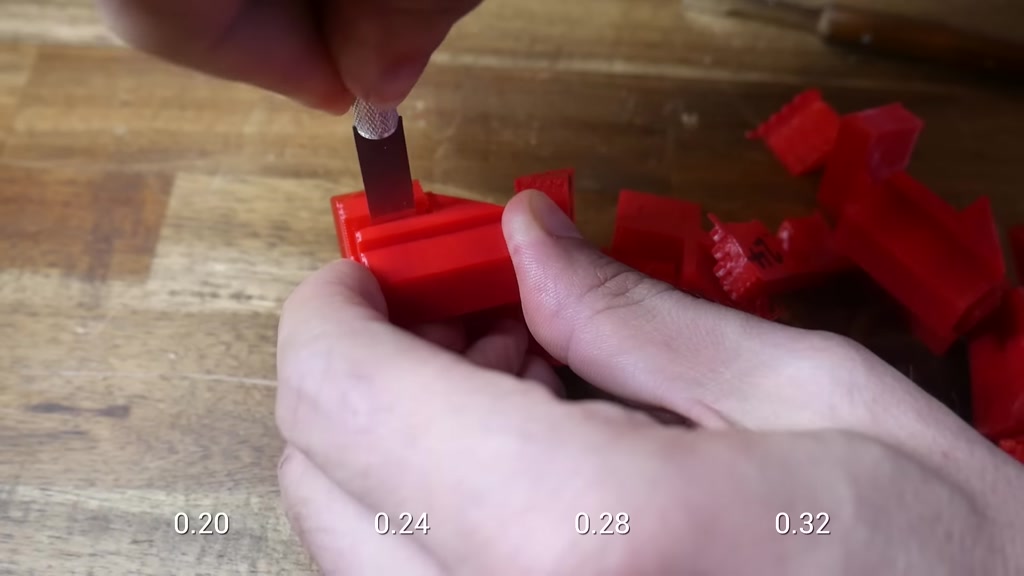
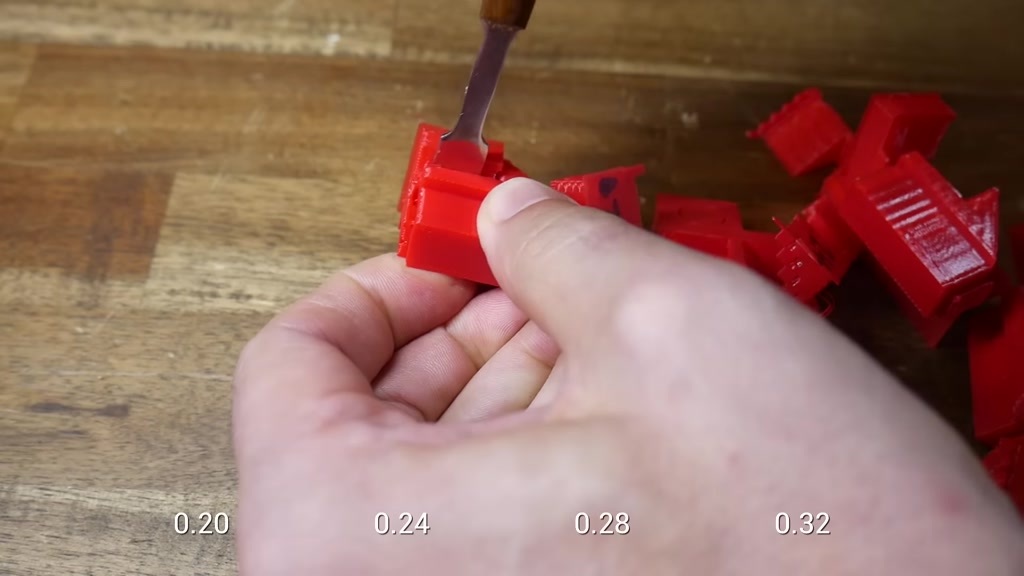
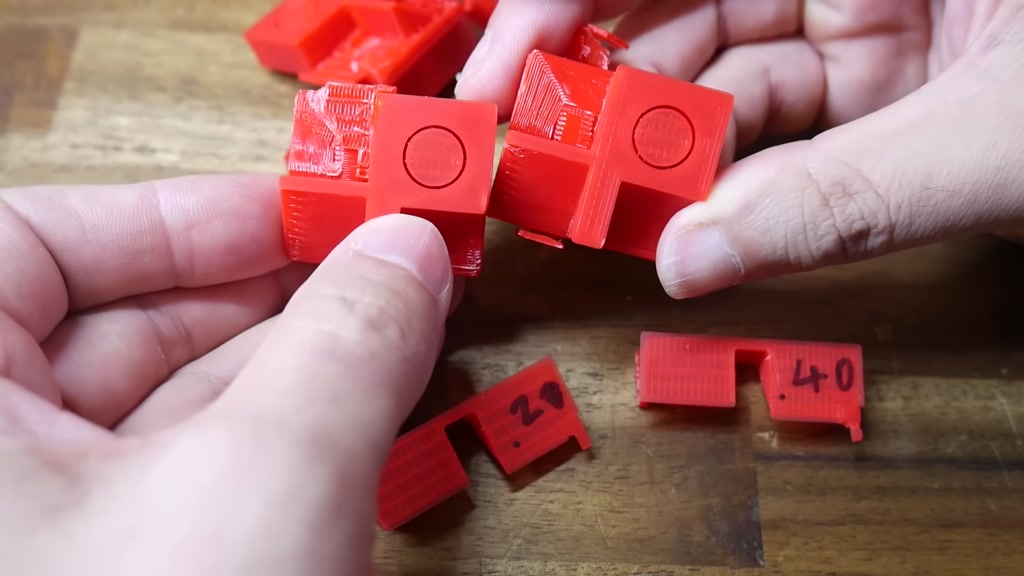
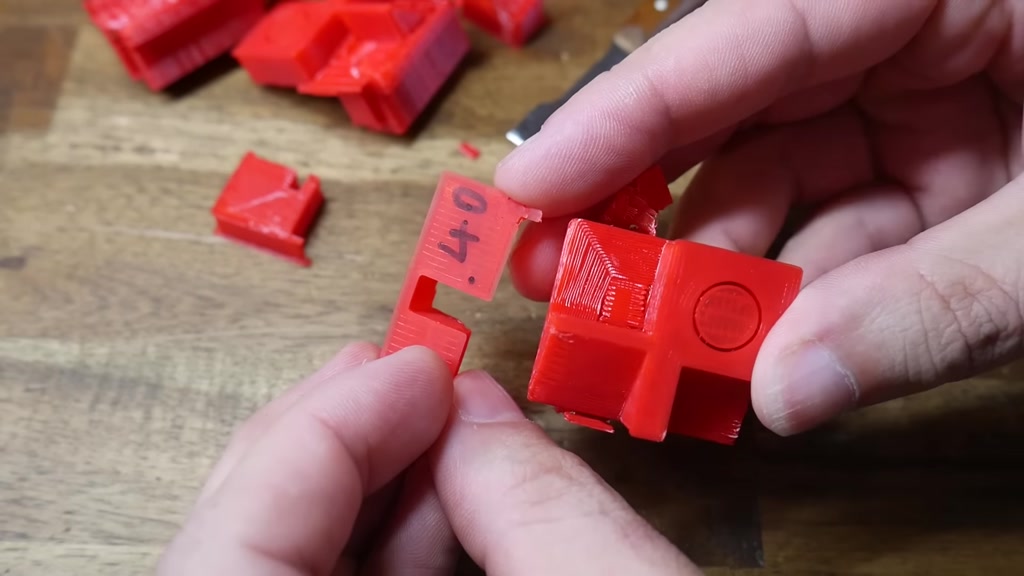
here we can see a series of test prints
#
where I experimented with the air gap to
#
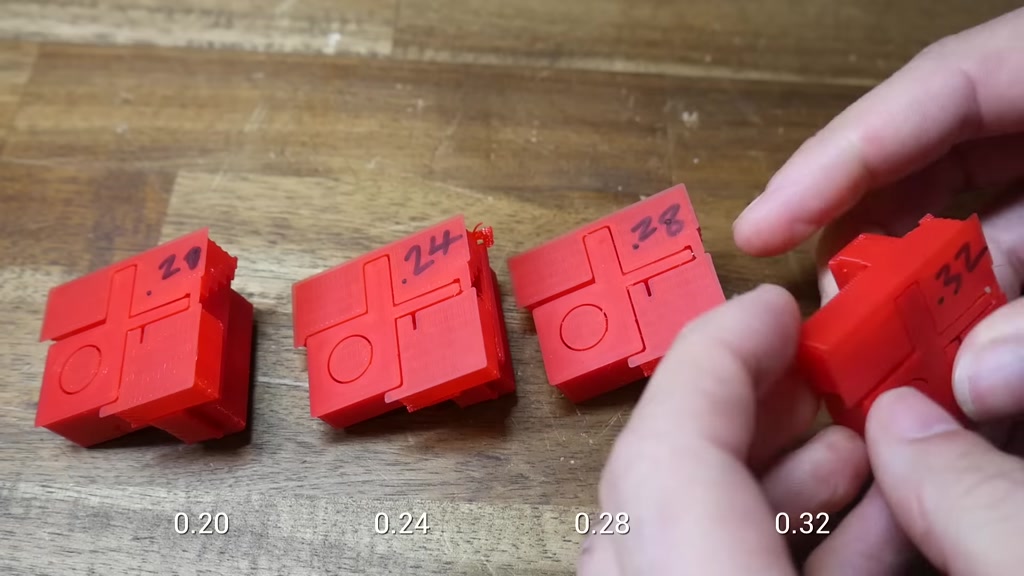
try and find the best setting for the
#
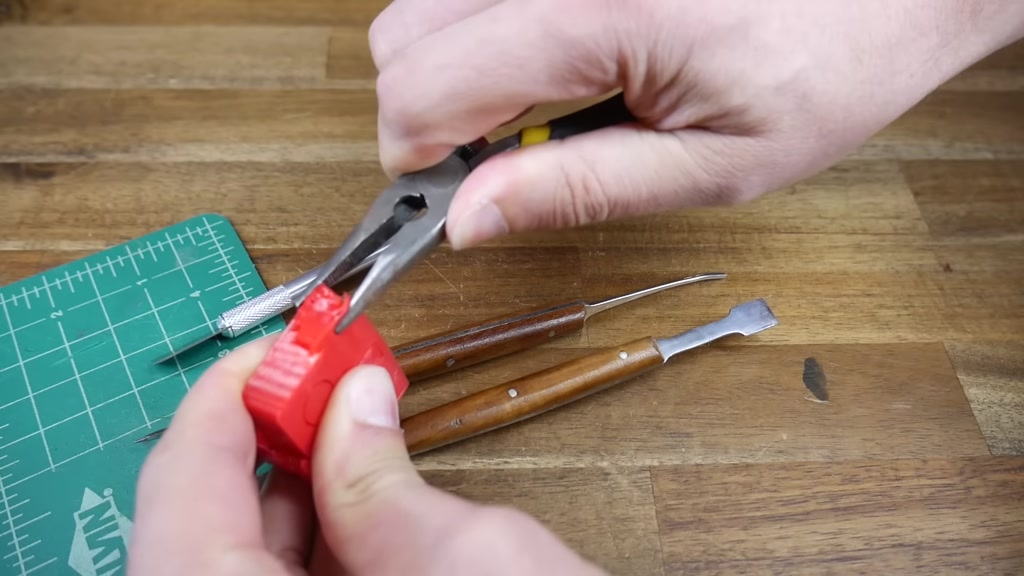
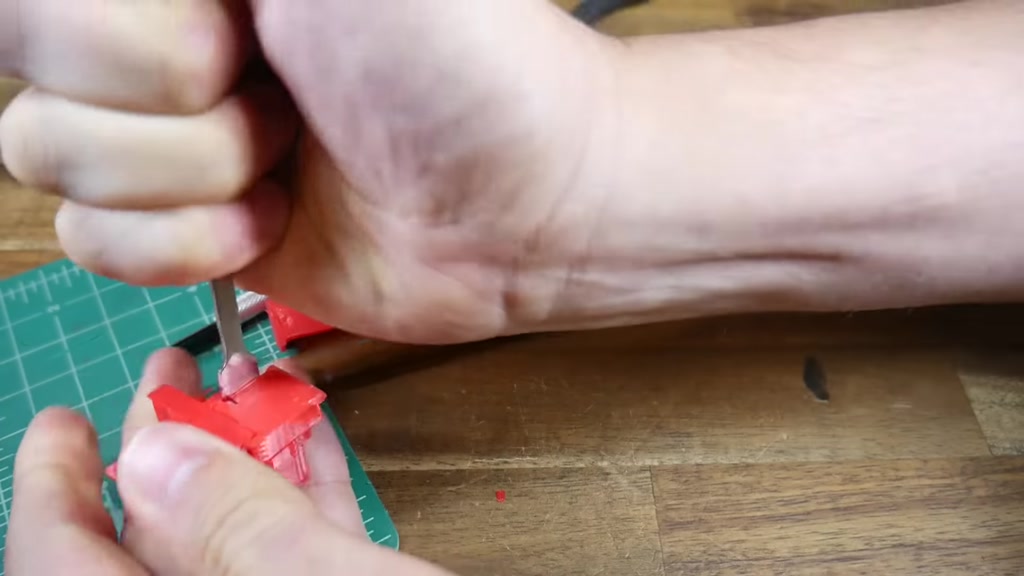
sloped parts of the model the removal of
#
the support material is actually quite
#
similar the larger of the two gaps can
#
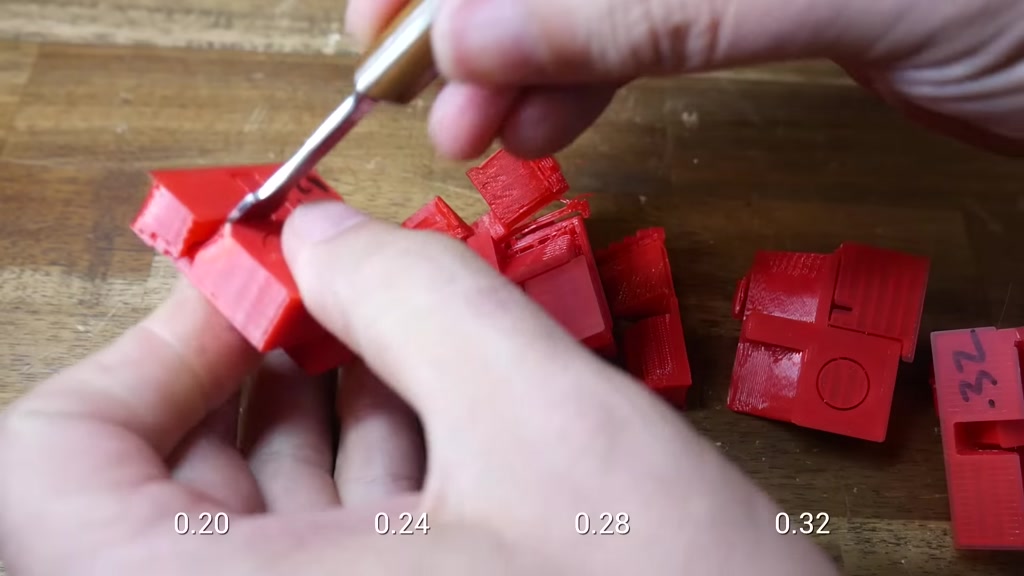
be removed completely by hand but as we
#

head to the tighter two we need a tool
#
to get them going and then the final
#

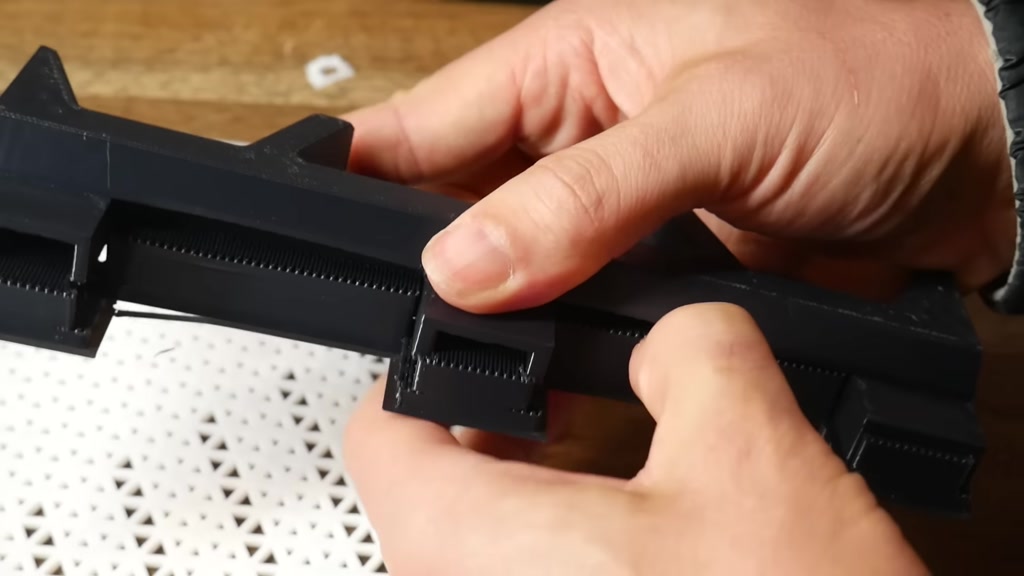
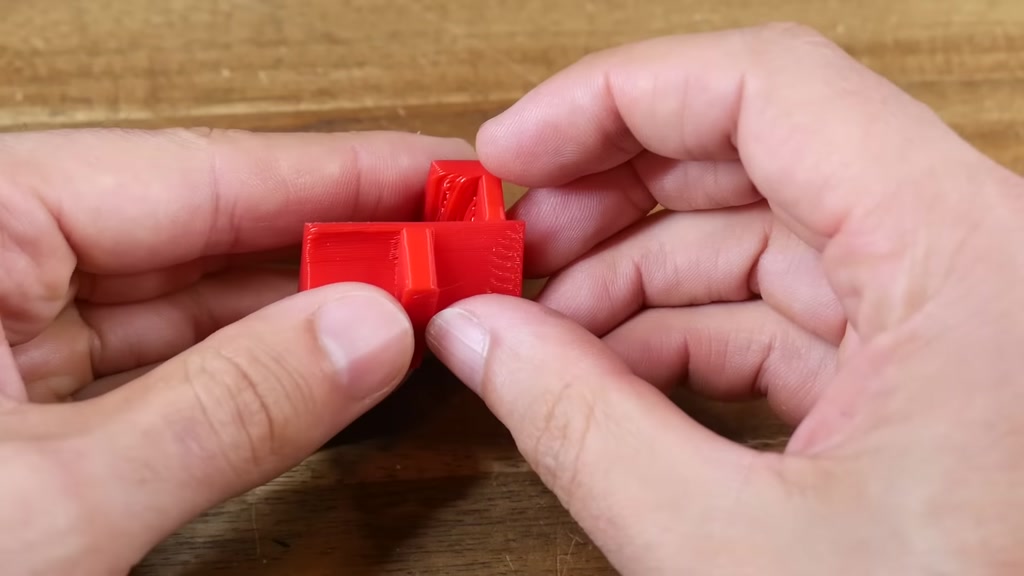
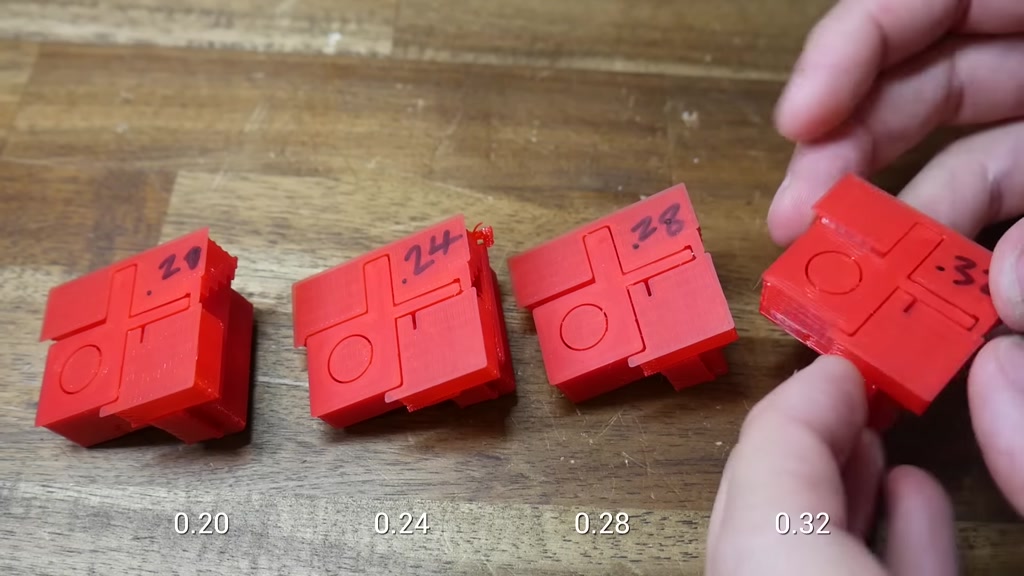
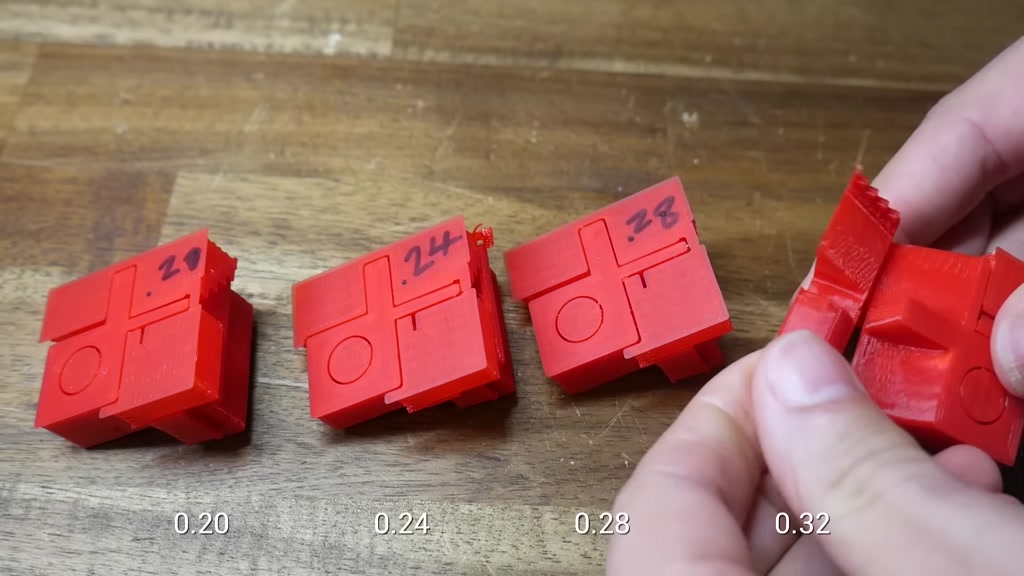
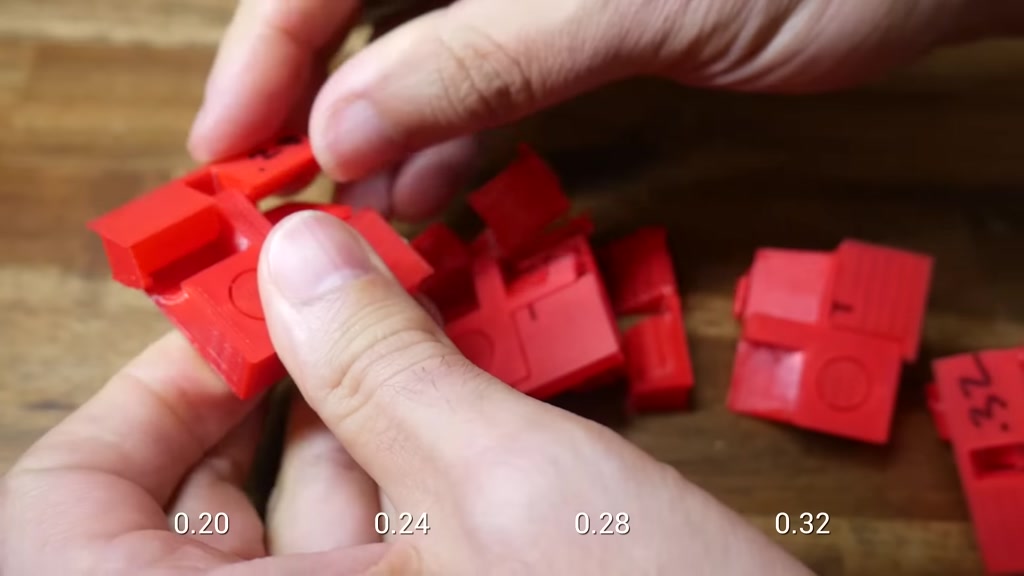
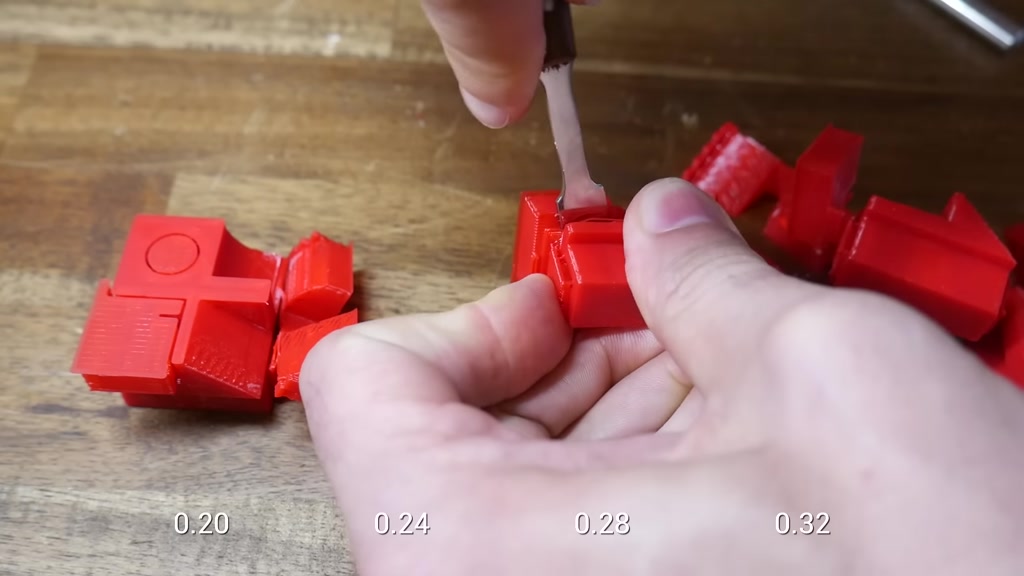
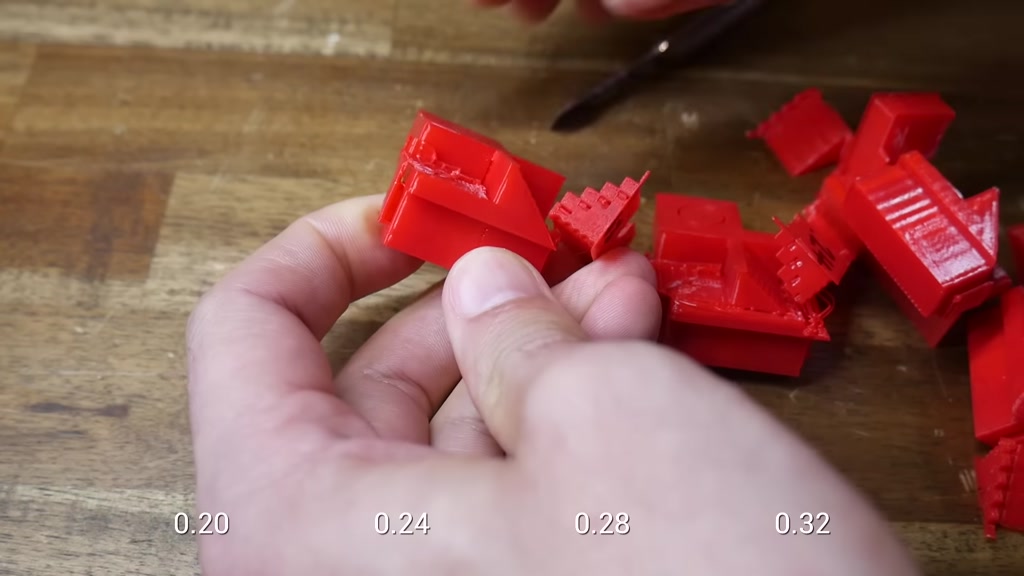
peel happens with our fingers when it
#
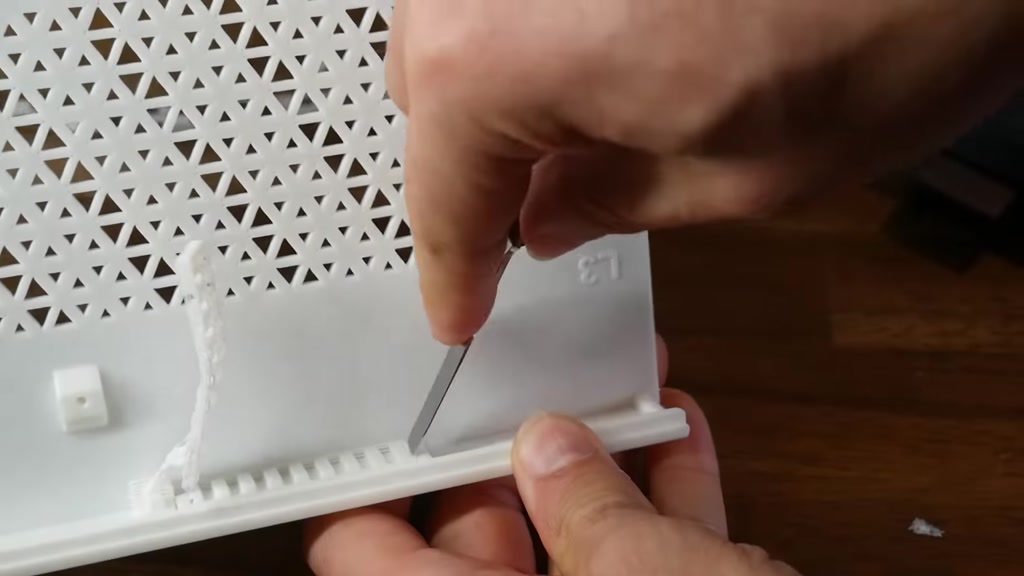
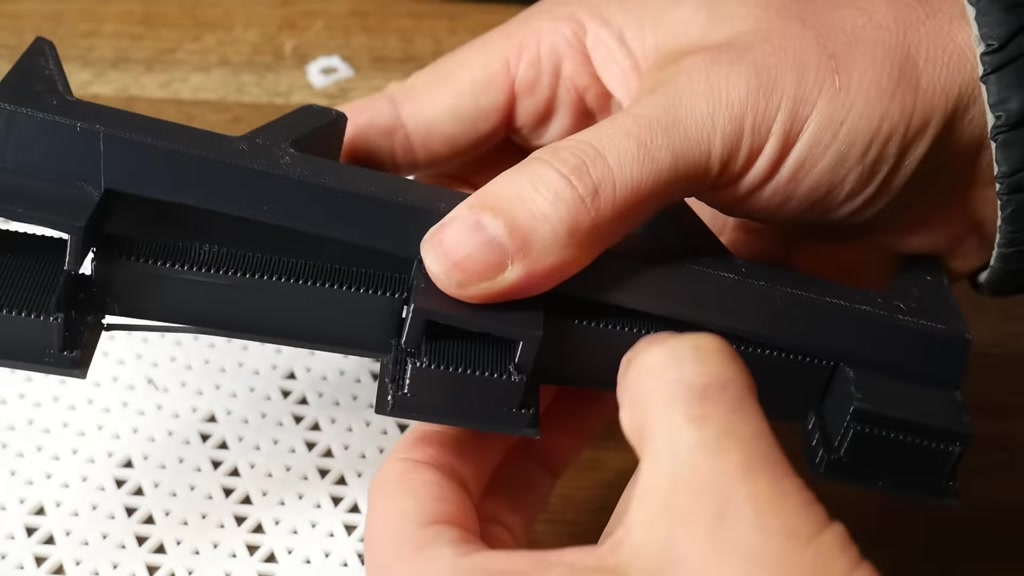
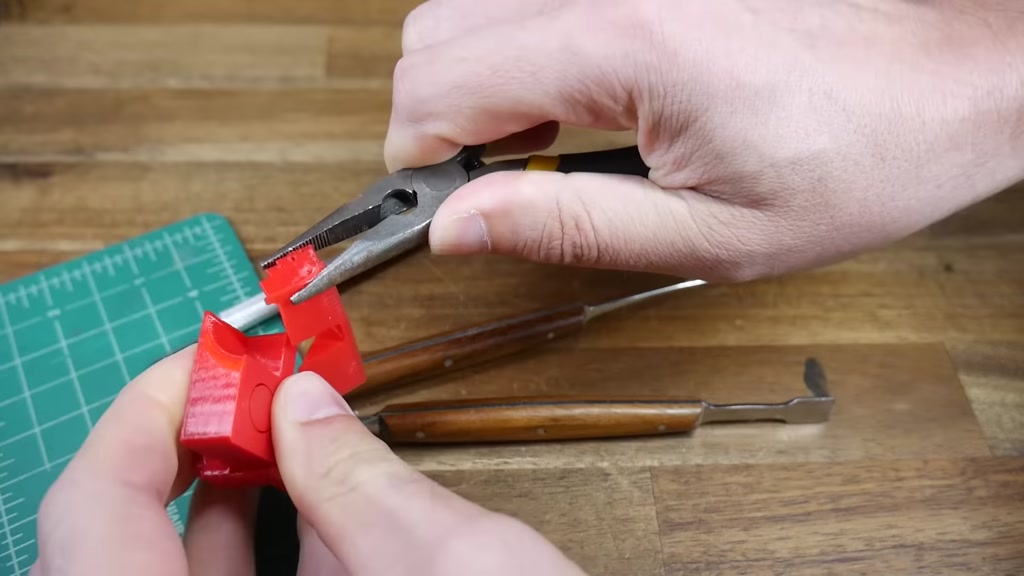
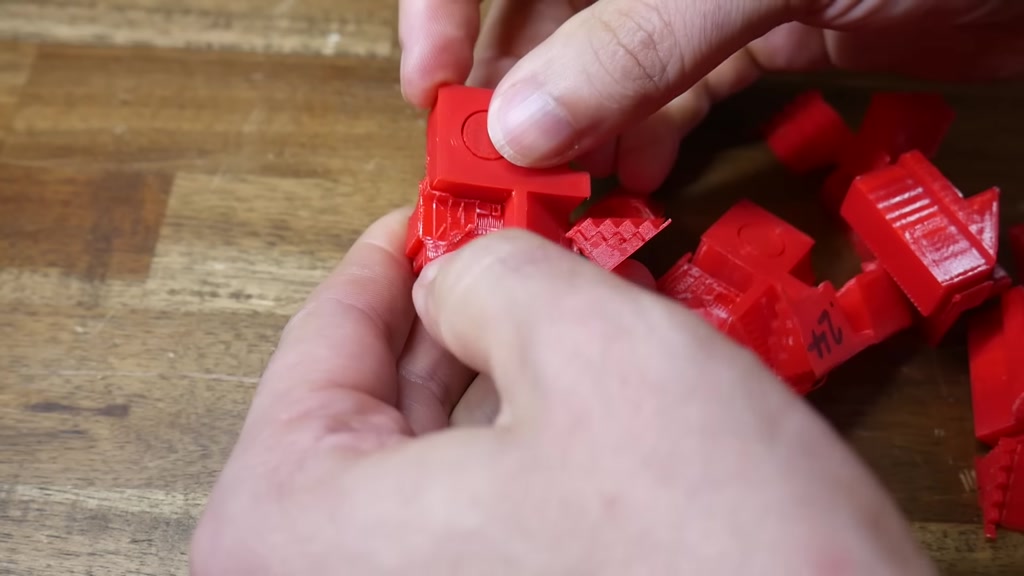
comes to the 90 degree section however
#
the difference is more apparent with the
#
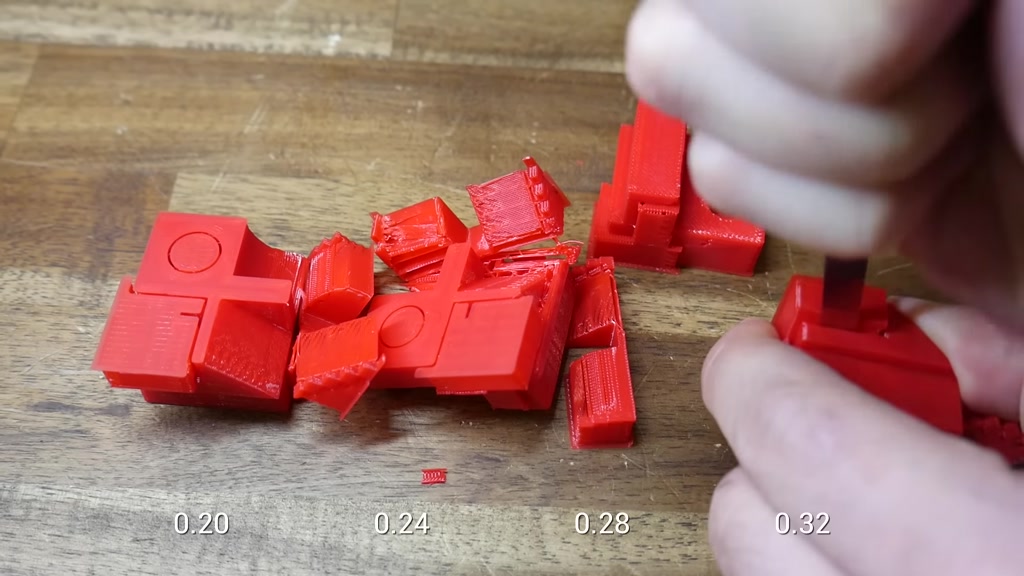
largest gap that's room to slide the
#

tool down and get the peel separation
#
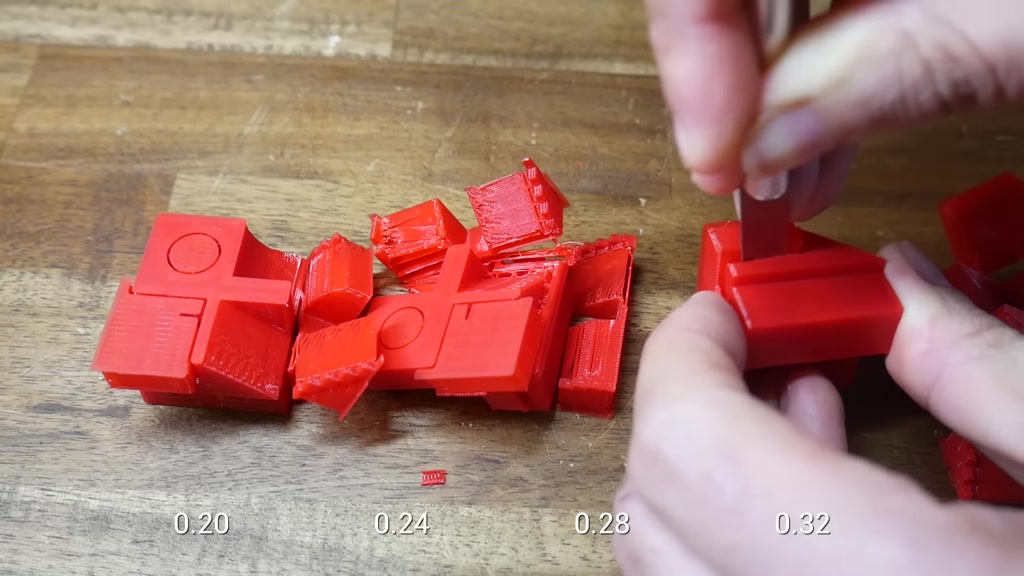
started but from the second largest gap
#
we need to use a flat scalpel to get in
#
between the two halves and pry the
#

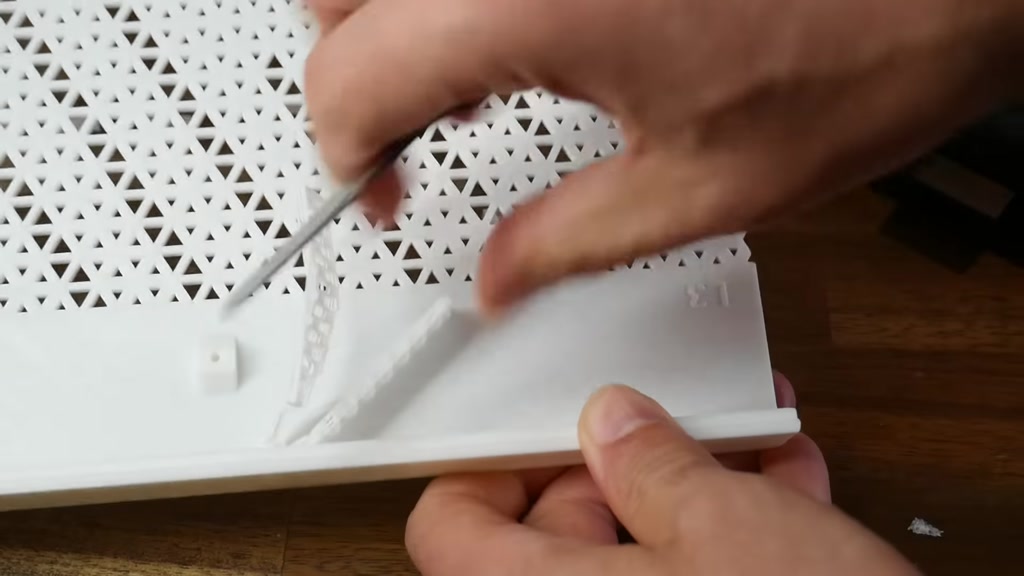
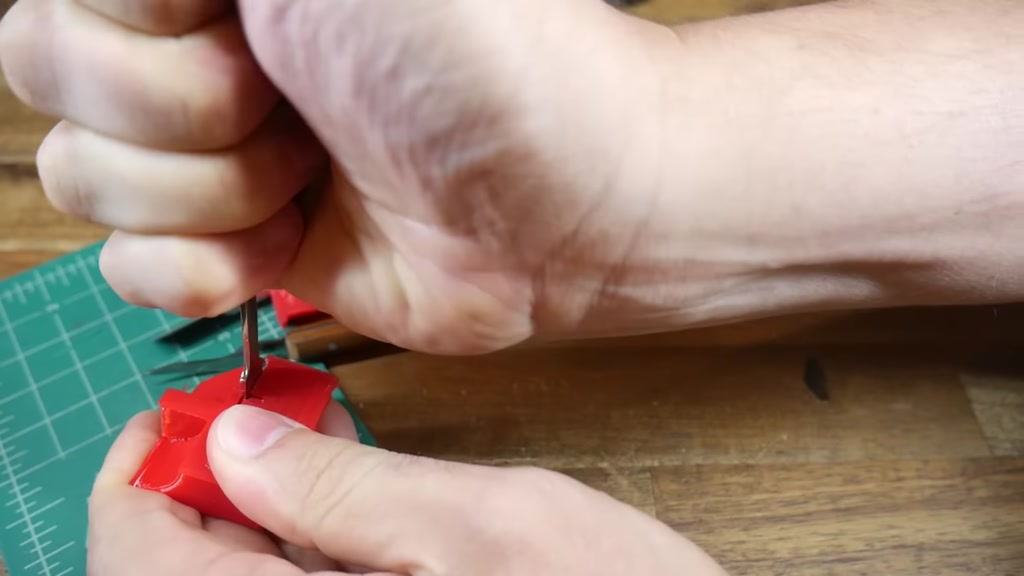
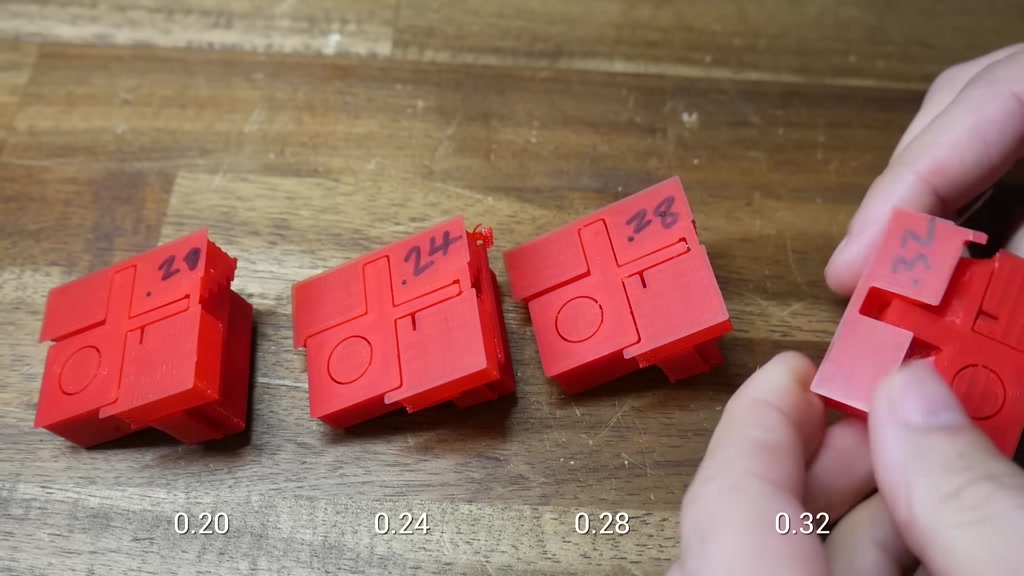
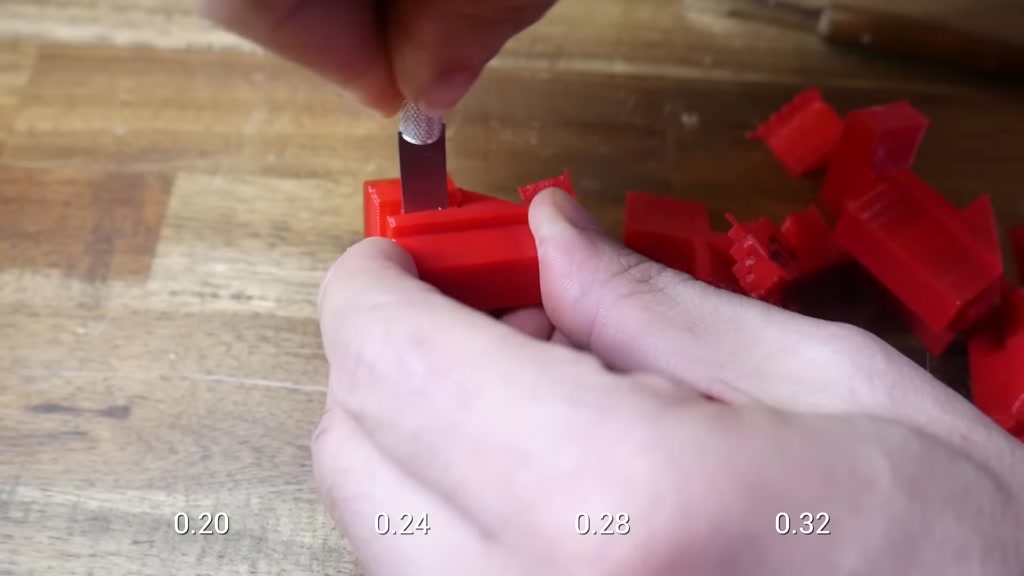
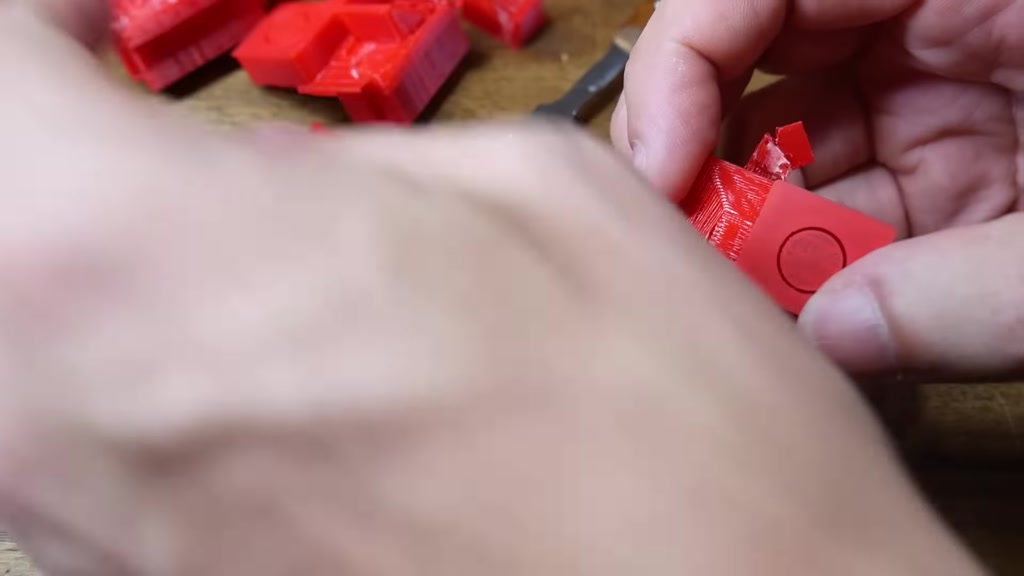
support Material off however we can see
#
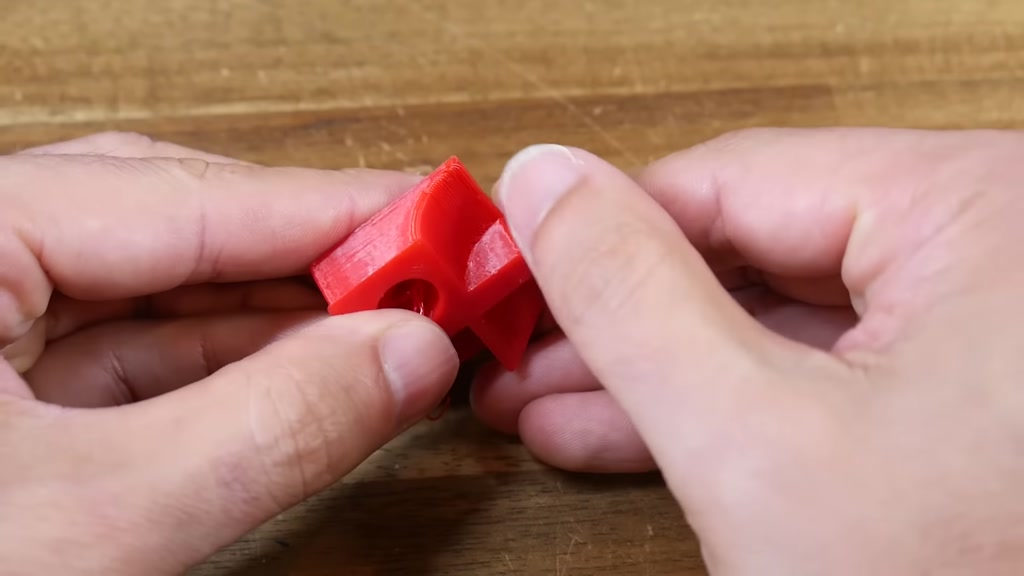
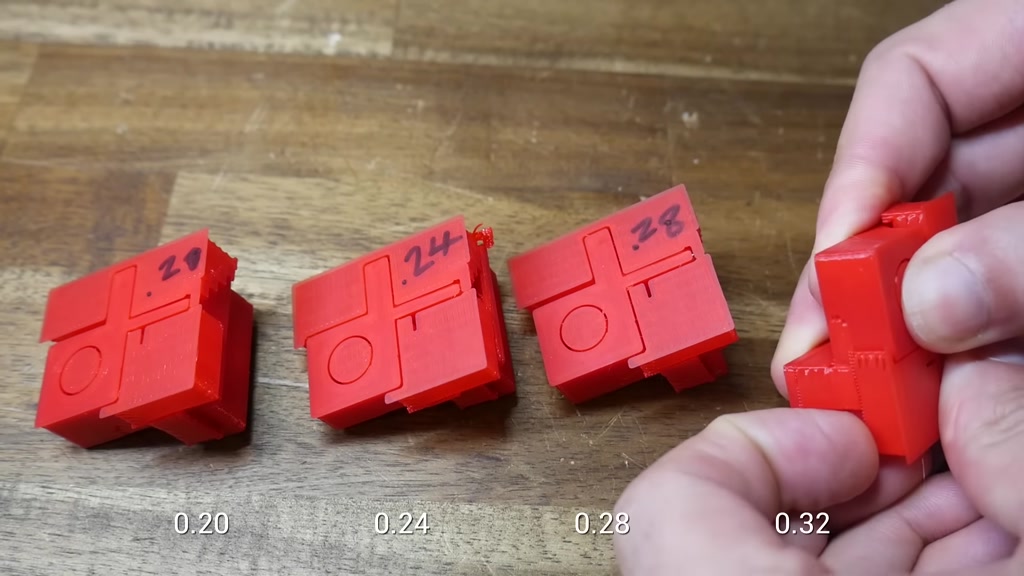
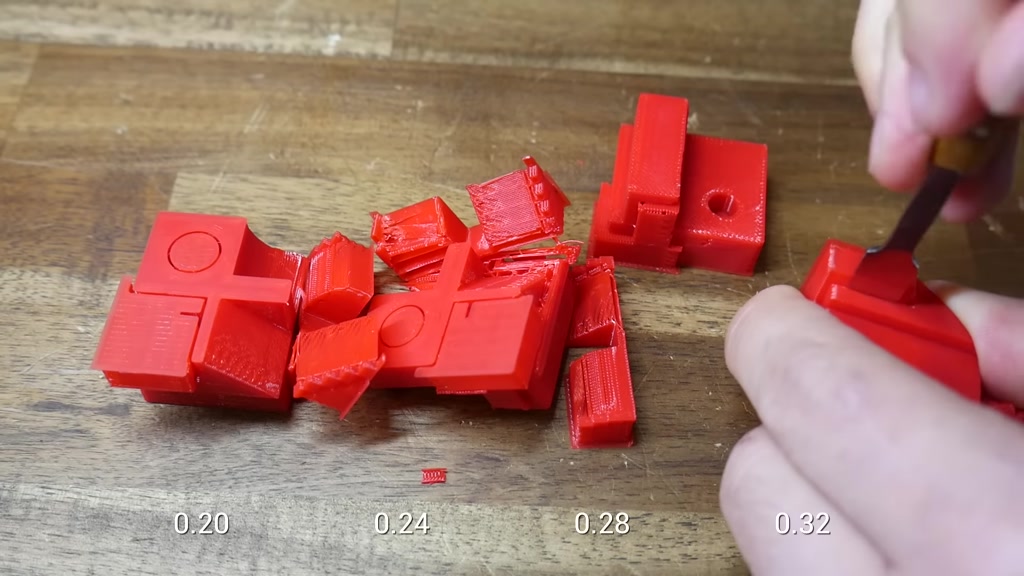
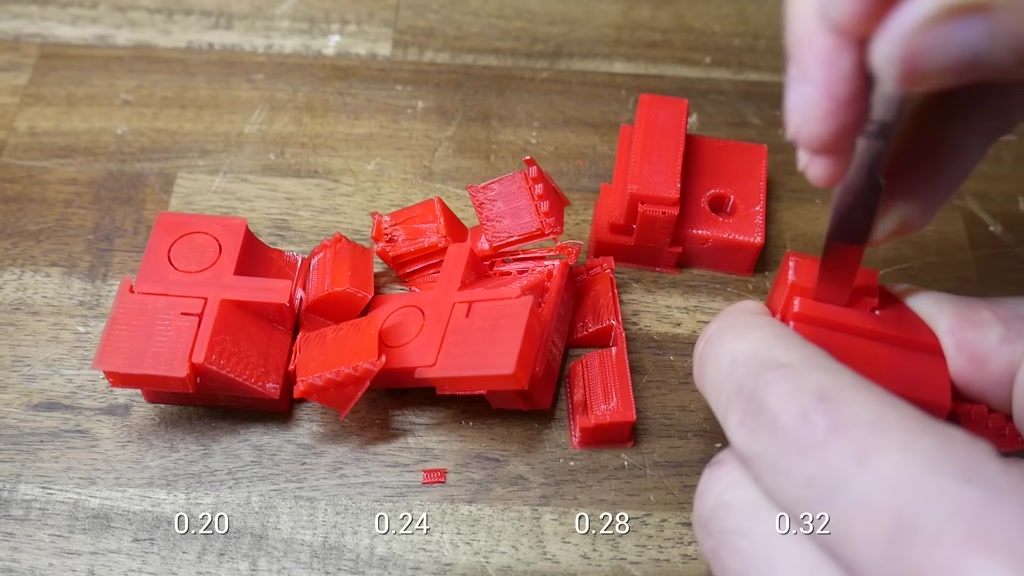
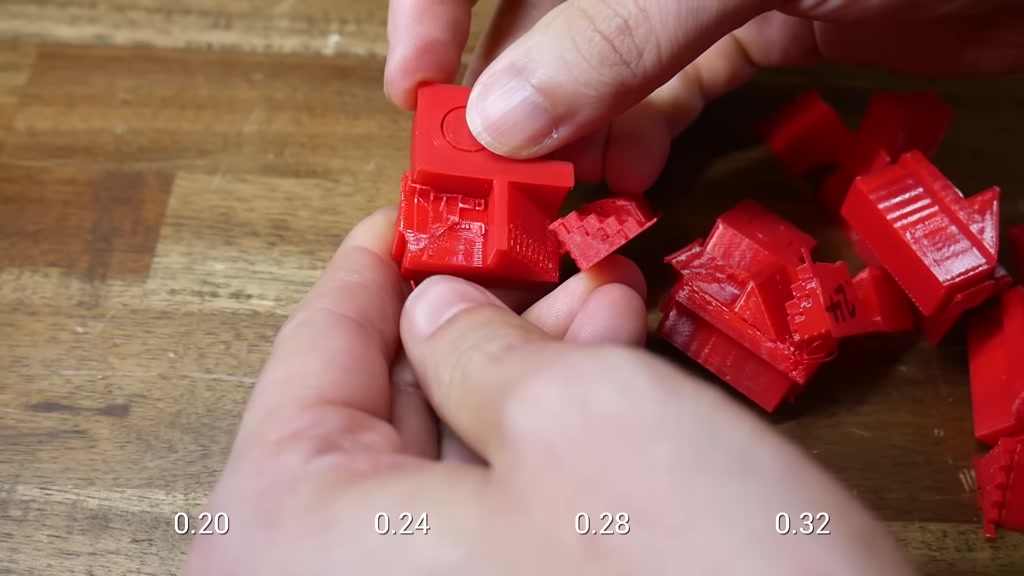
that the separation is not entirely
#
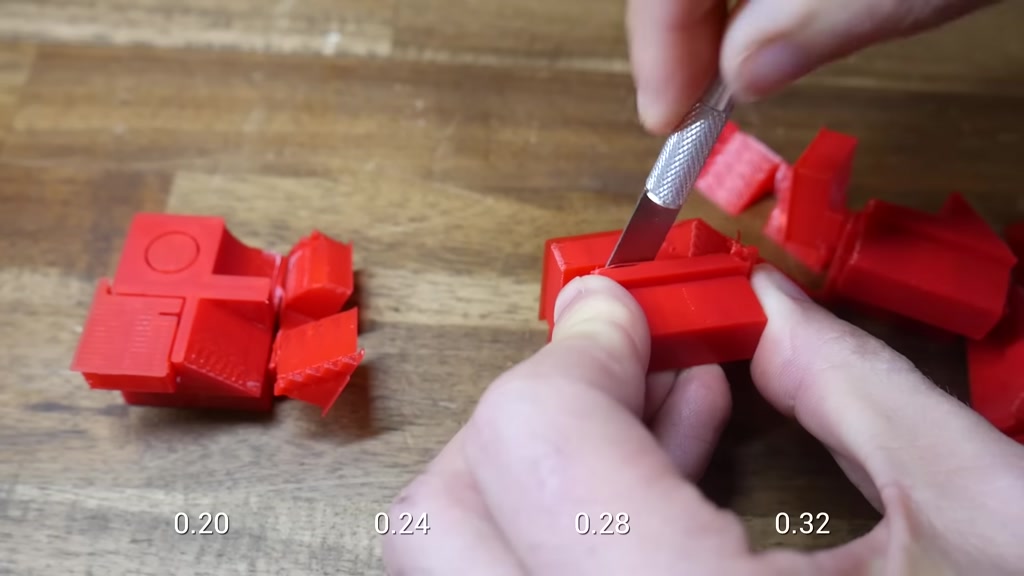
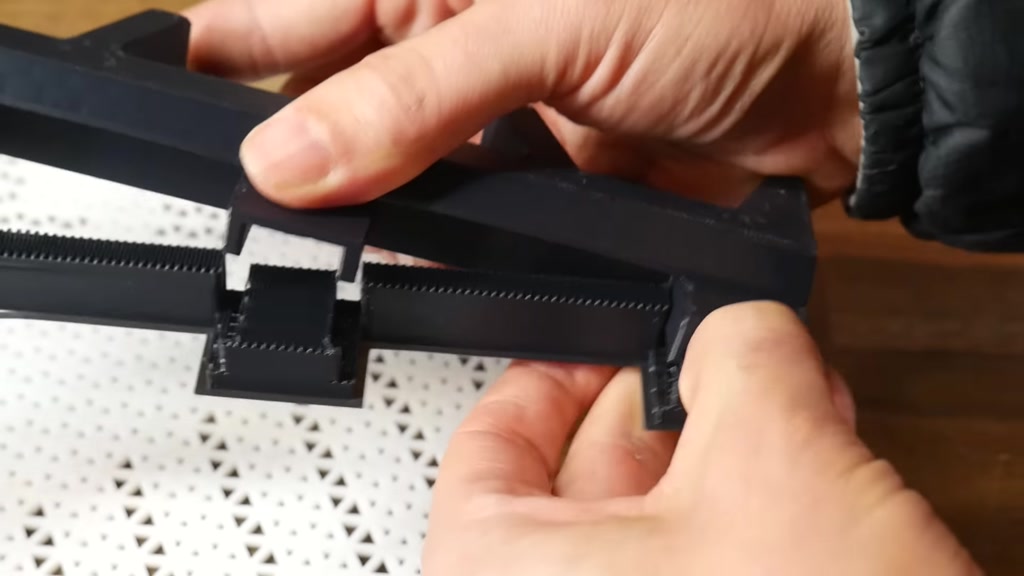
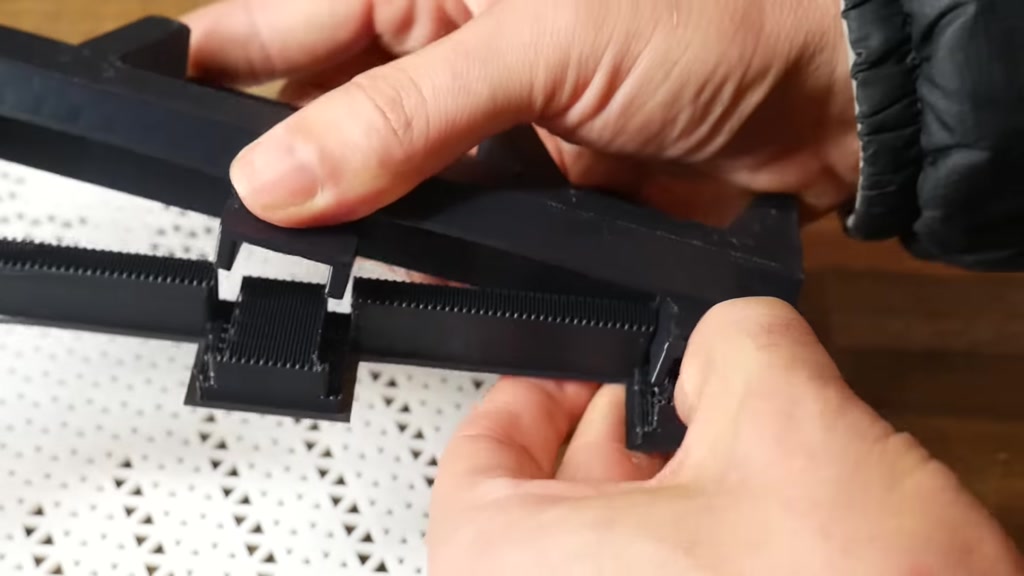
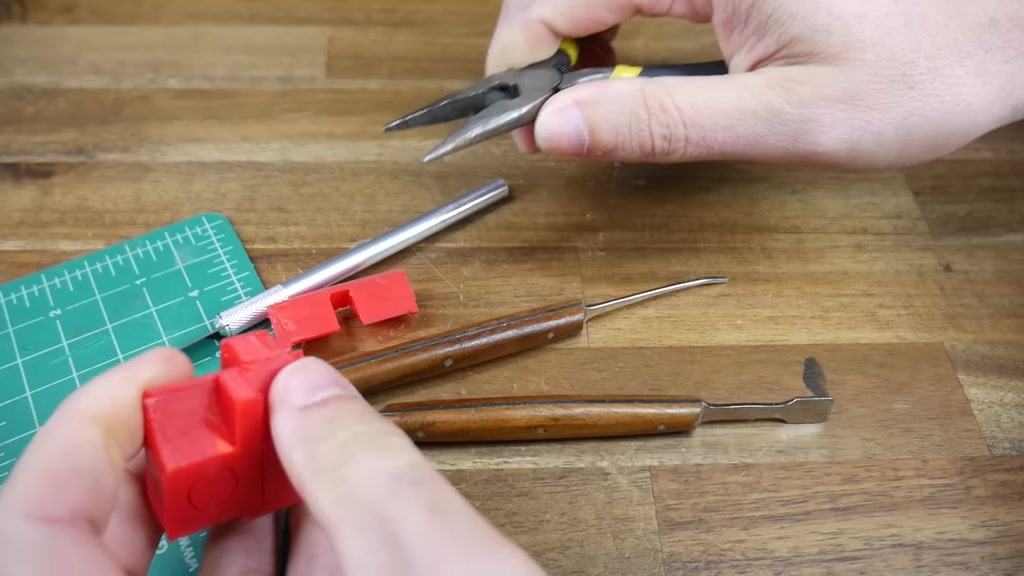
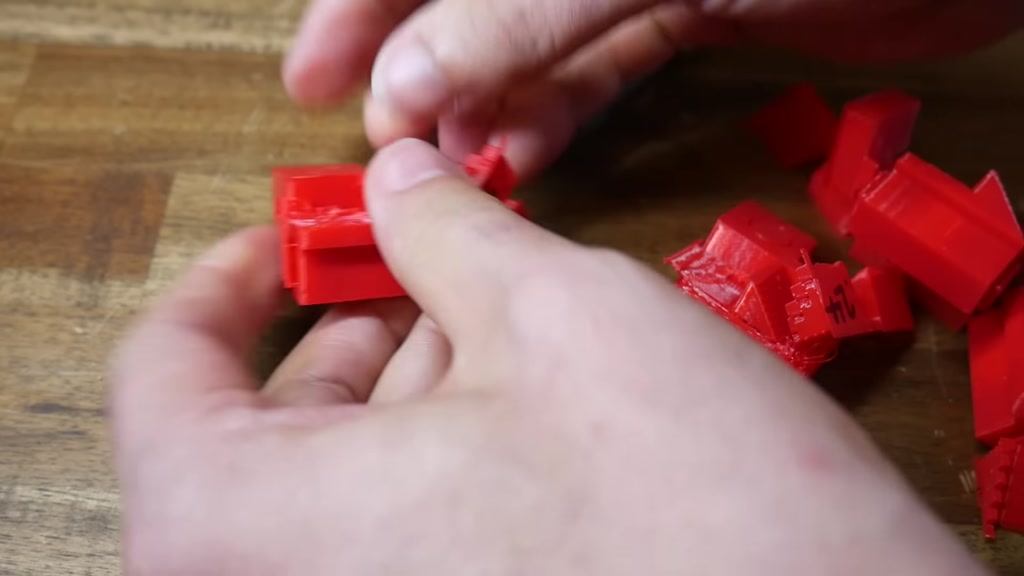
clean the second tightest once again
#
requires a blade to get in between the
#
two and it feels like I'm cutting a
#
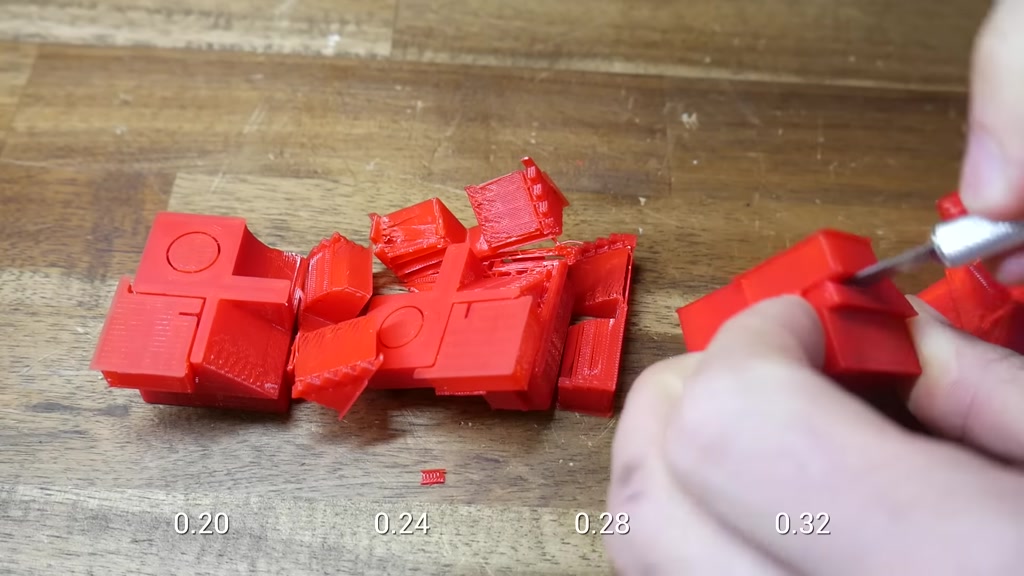
little bit instead of just separating
#
the support material after this initial
#
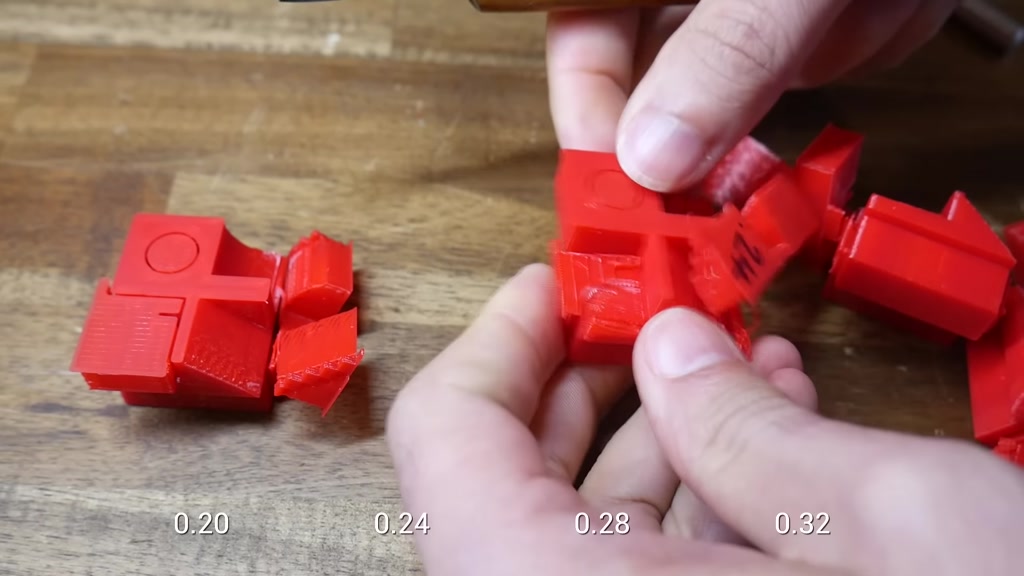
phase I can get my pry tool in to get it
#
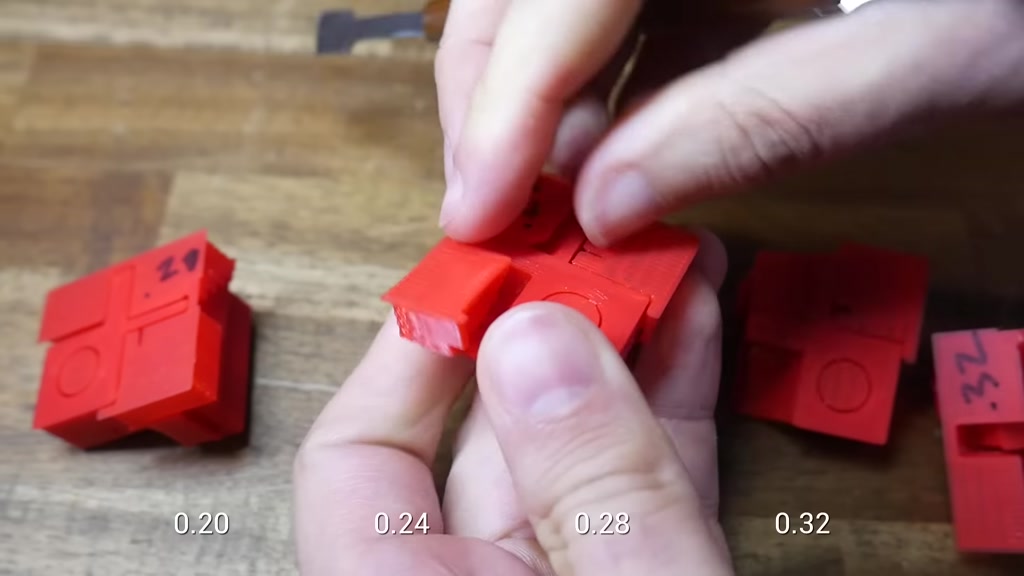
off but once again the separation is not
#
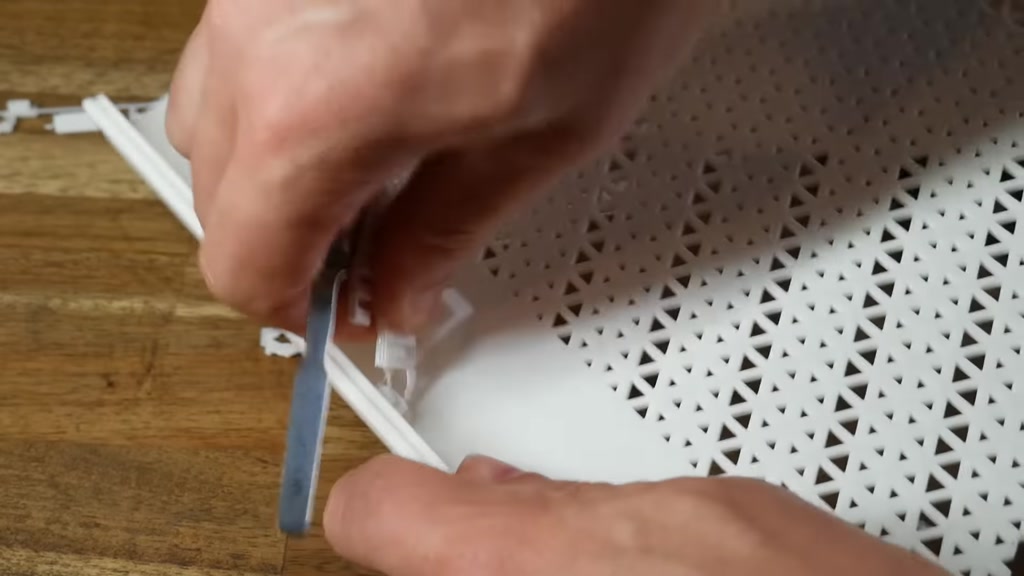
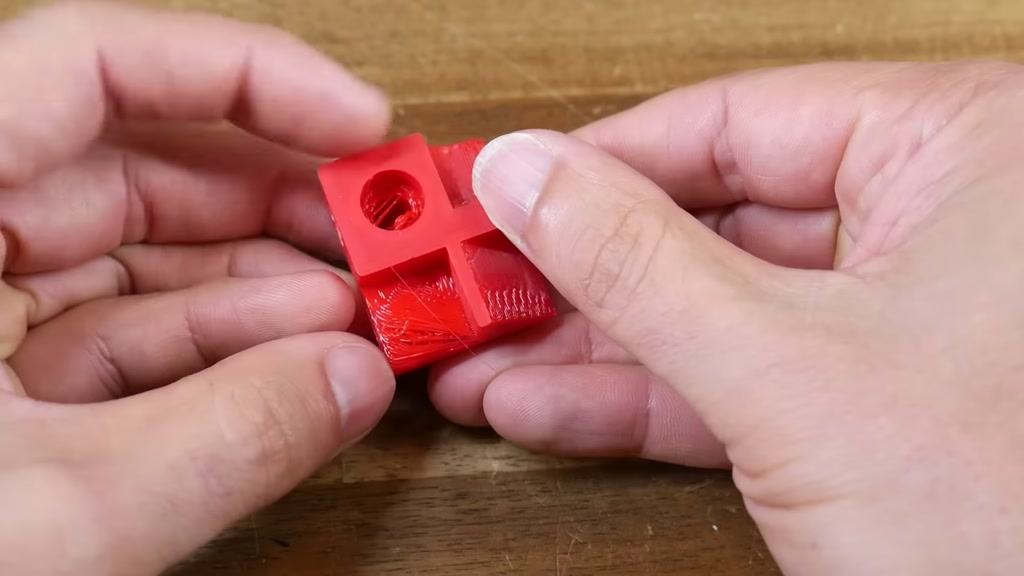
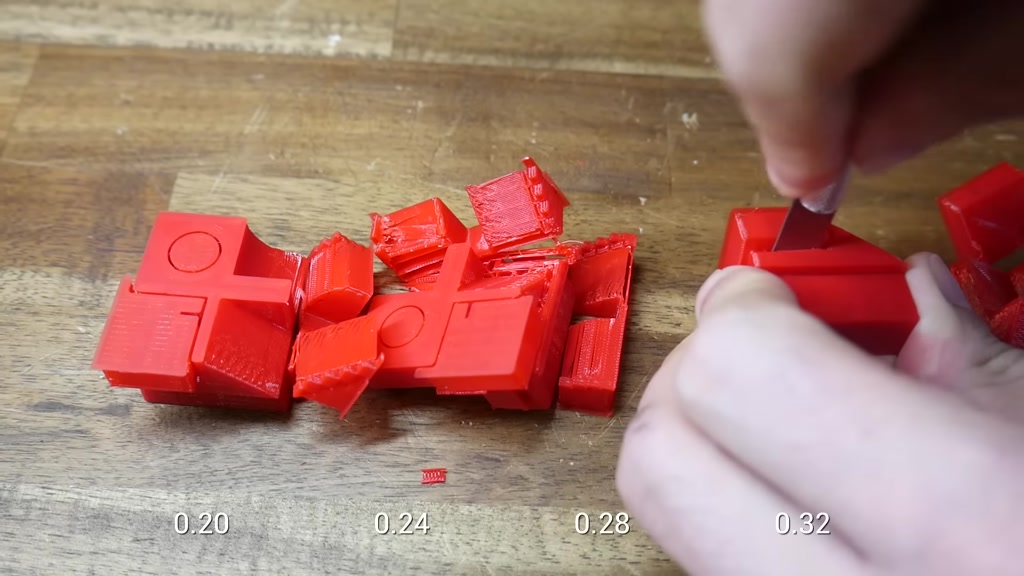
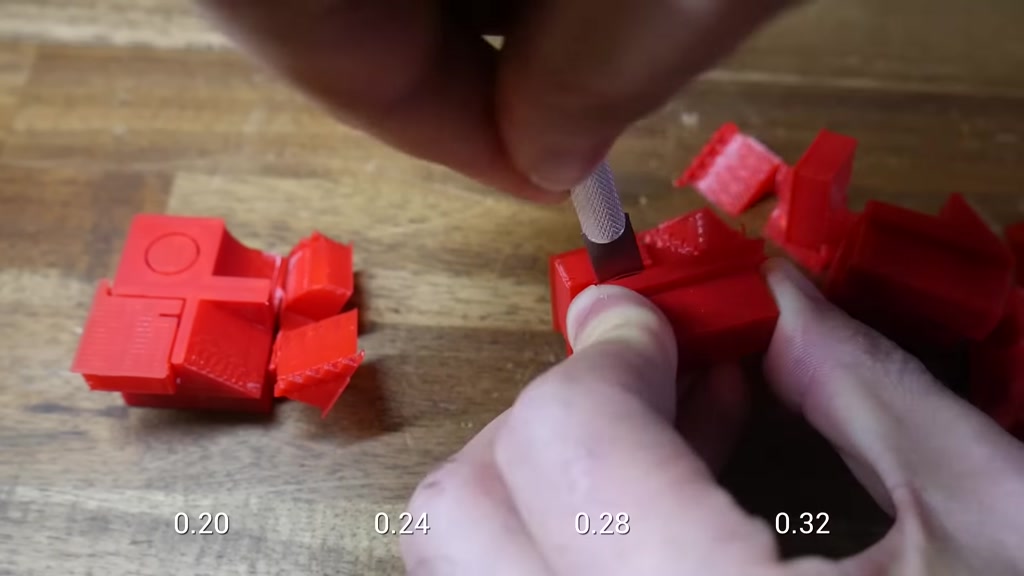
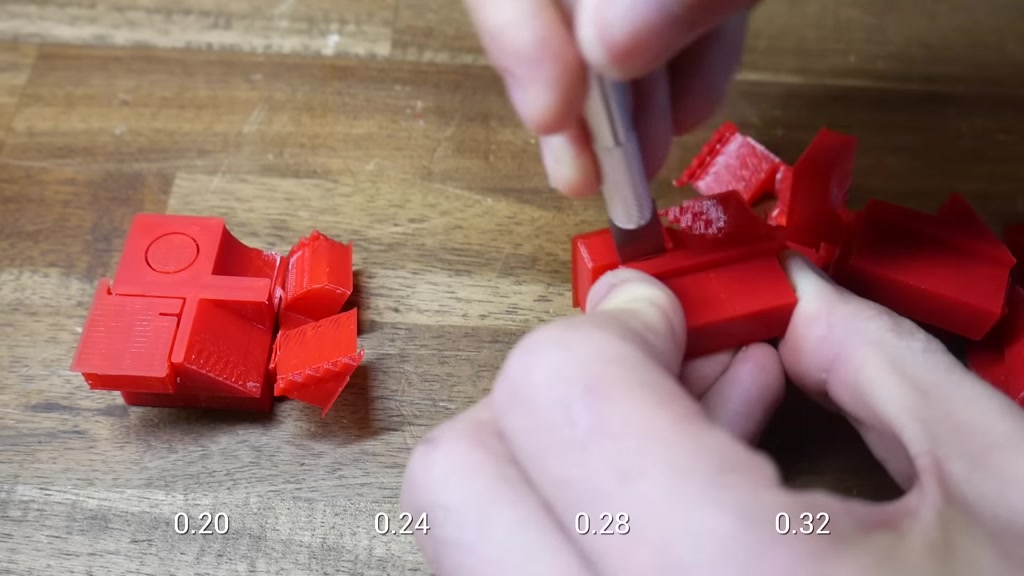
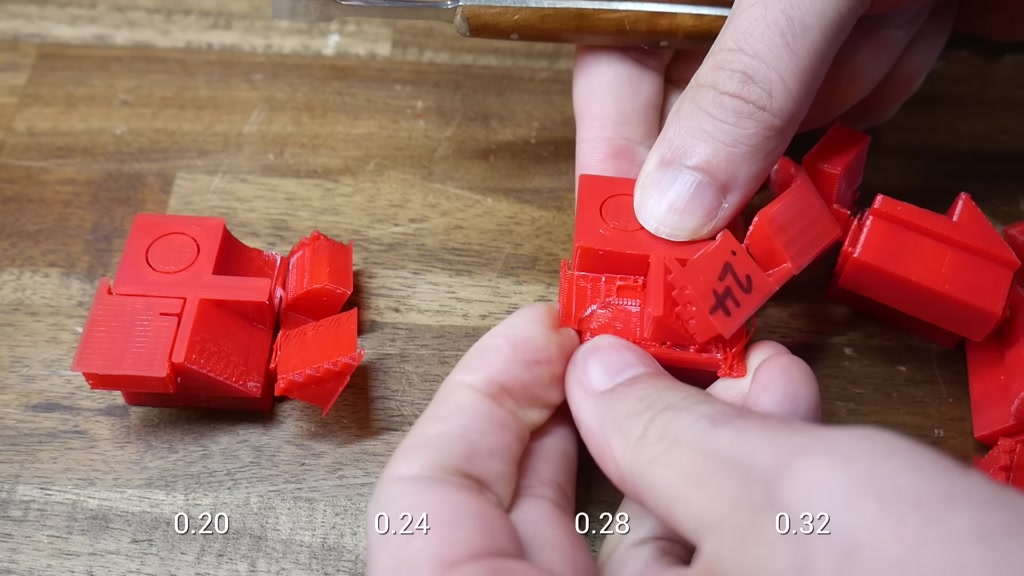
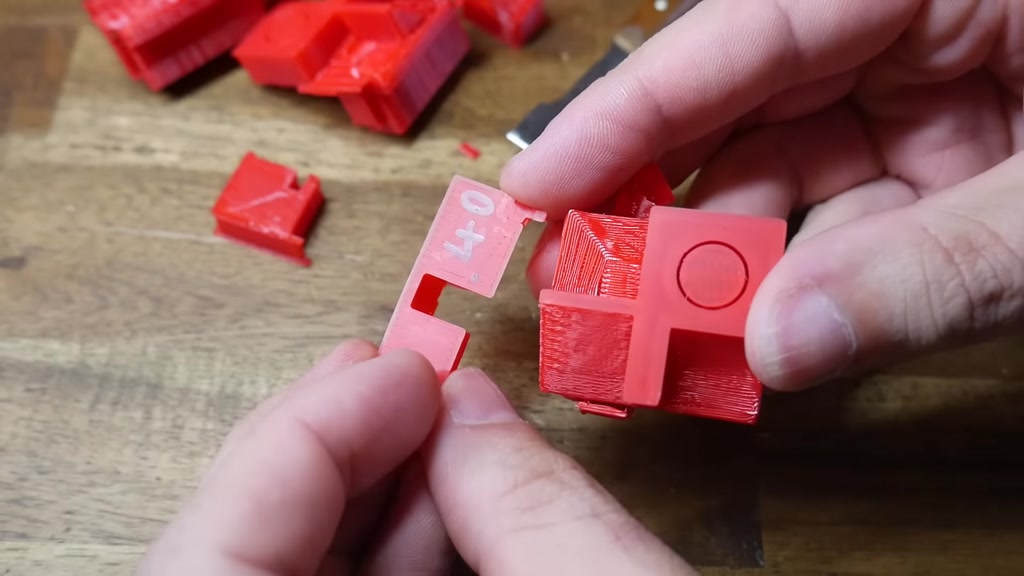
very clean this smallest Gap is quite
#

difficult because it's hard to even get
#
the tip of the blade in to start
#
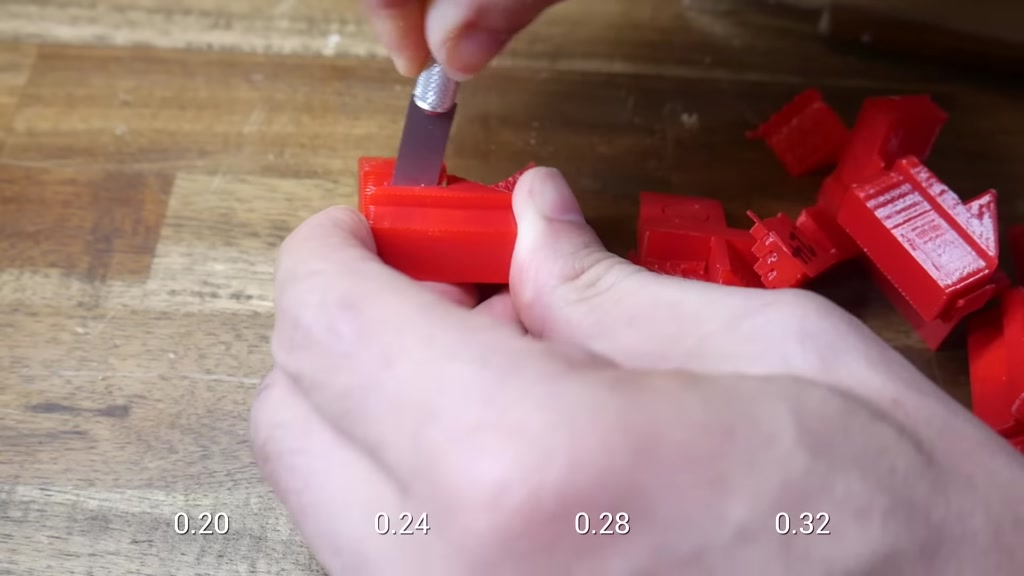
separating the support section
#
eventually after a lot of cutting and
#
wiggling and then using the pry tool I
#
get the support Material off but there's
#
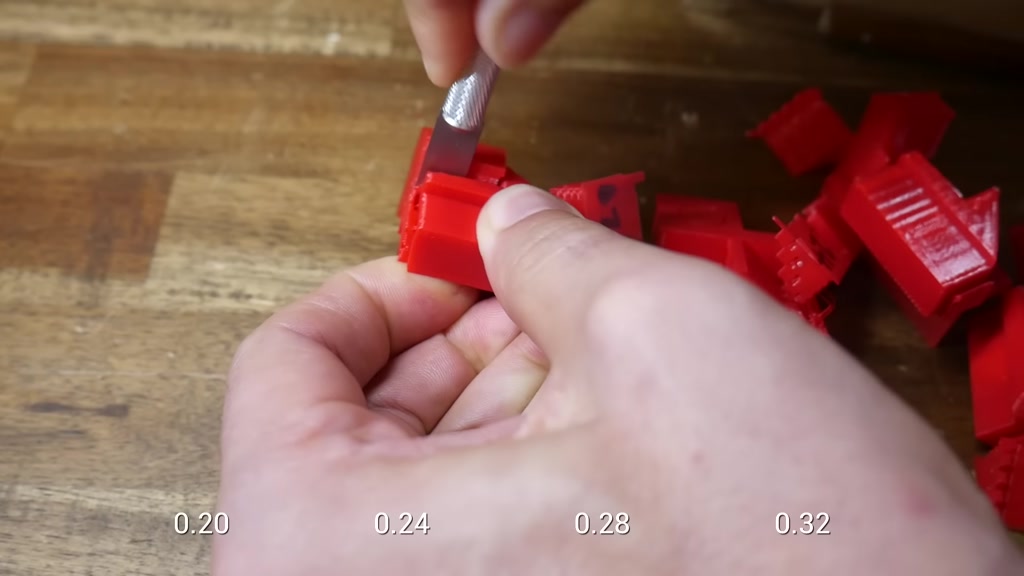
quite a lot of it left on the underside
#
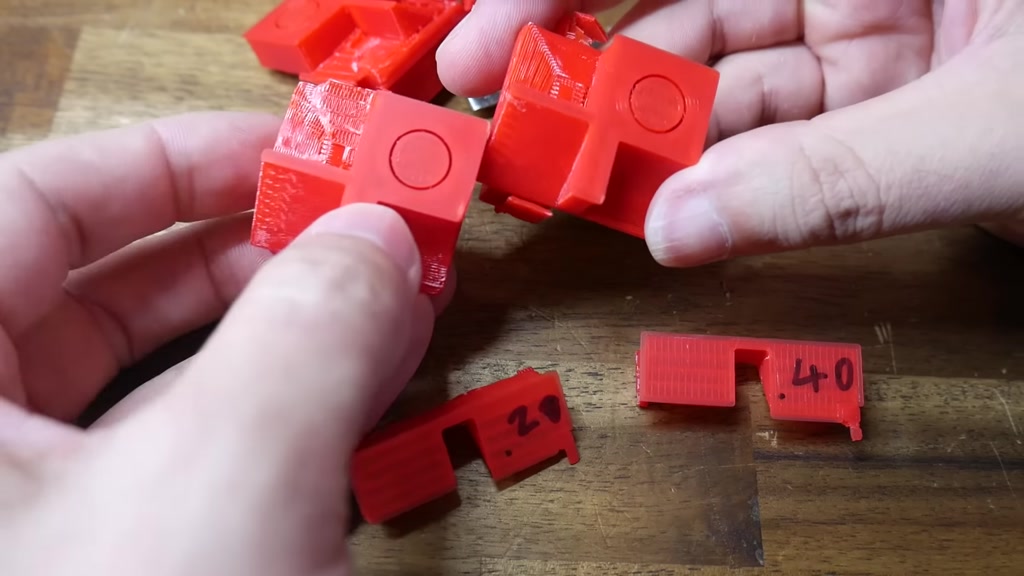
of the model and this is the compromise
#
where we're trying to find The Sweet
#
Spot to small the Gap and will have nice
#
flat layers but the support material
#
will be difficult to get off cleanly too
#
big a gap the support material will peel
#
off easily but the layers will droop and
#
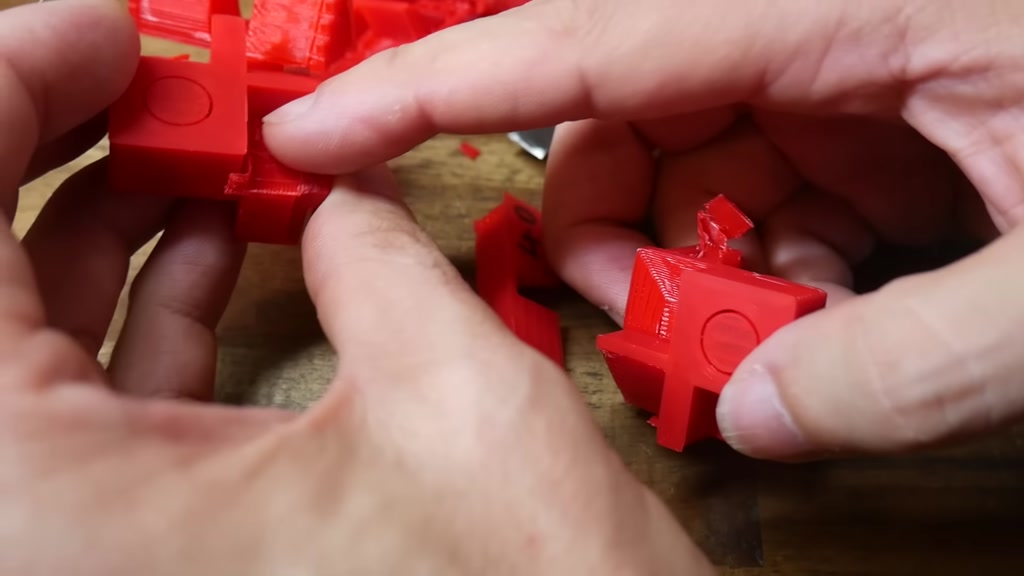
not exactly be flat each printer is
#

different and it's all about finding
#
that Goldilocks zone in the middle
#
there are many more settings than this
#
between the different slices but what
#
we've covered so far I think are the
#

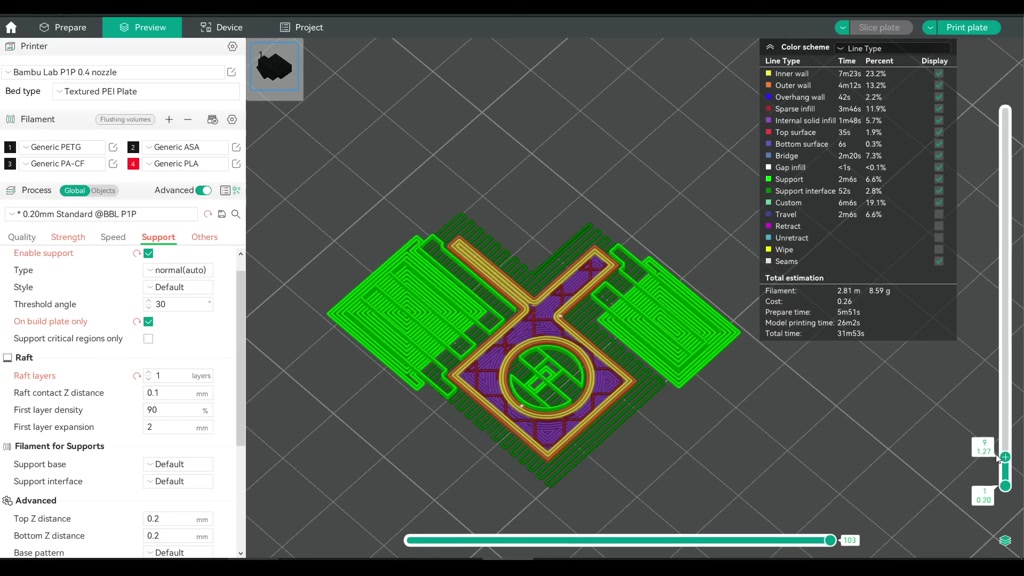
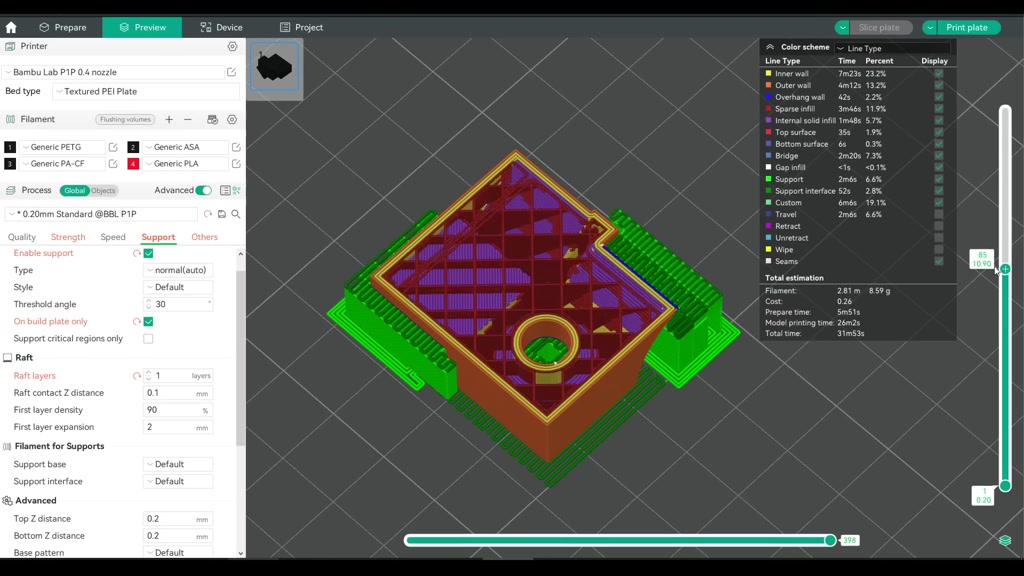
most important ones so far we've looked
#

at traditional support material but what
#

about tree or organic if traditional
#

supports are like scaffolding on a
#

building site then organic or tree
#

supports are like thick fines growing
#
around a structure here's a comparison
#
with traditional supports versus tree
#
supports and you can see that approach
#
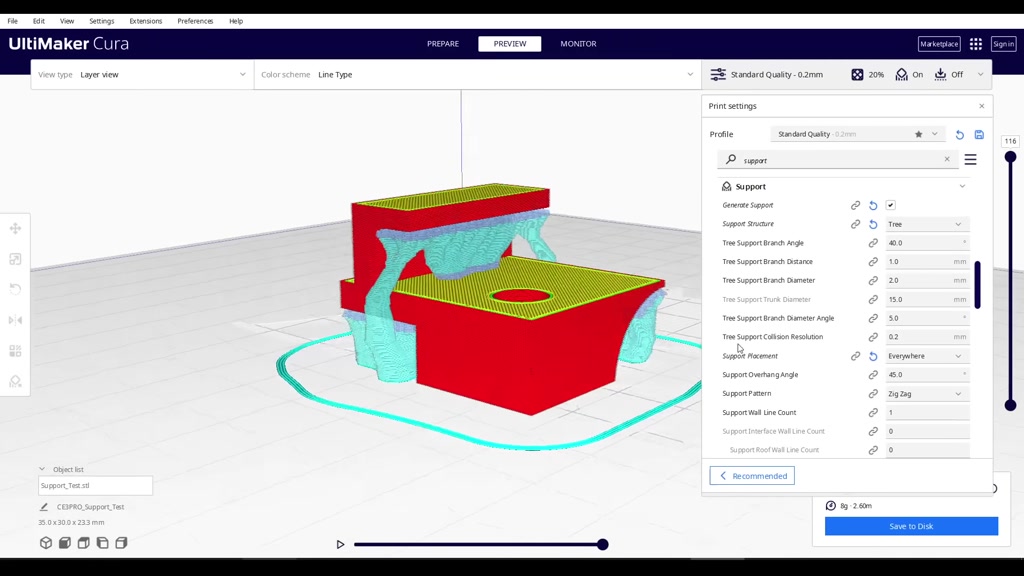
is entirely different even though they
#
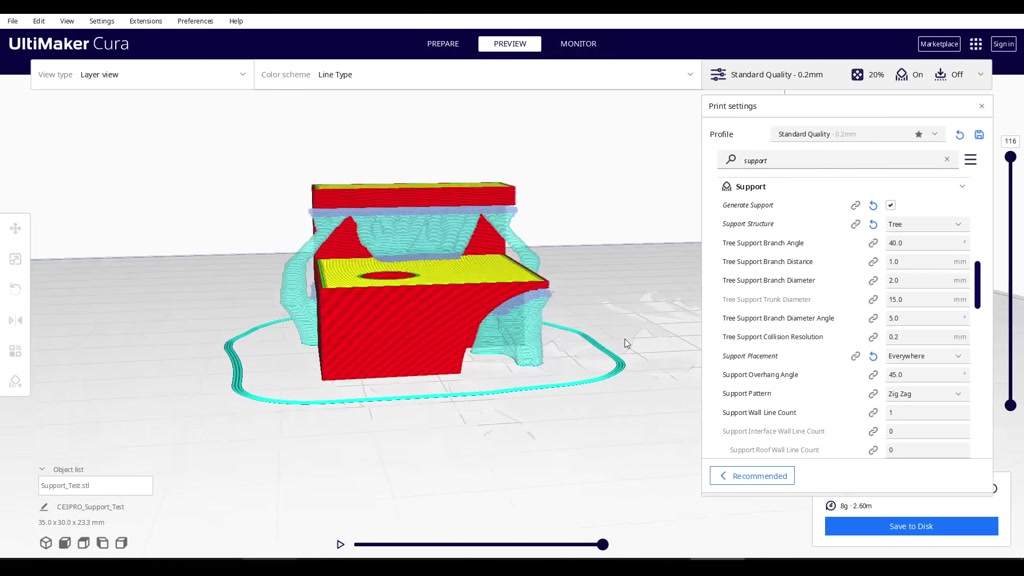
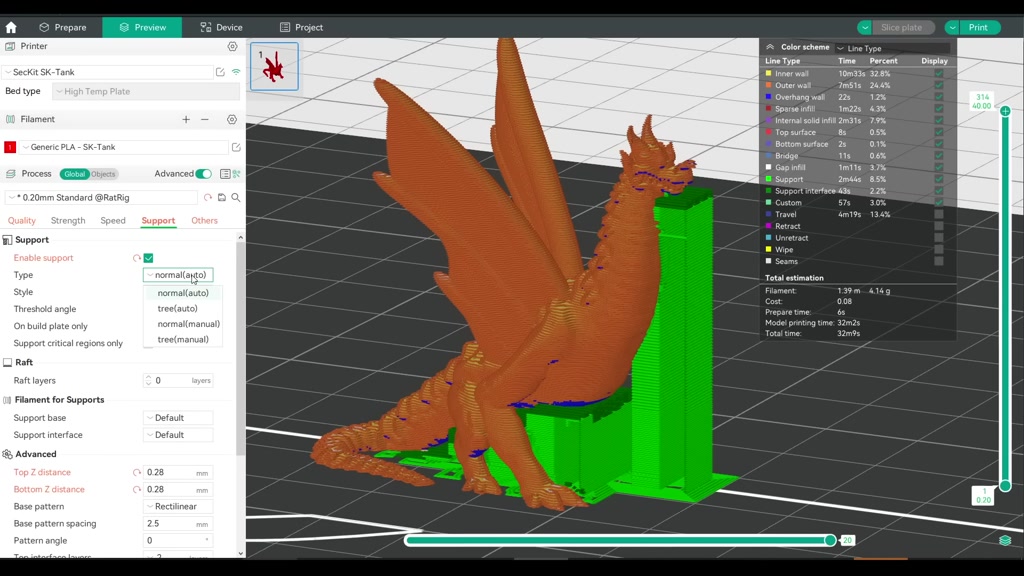
still complete the same task in Cura we
#
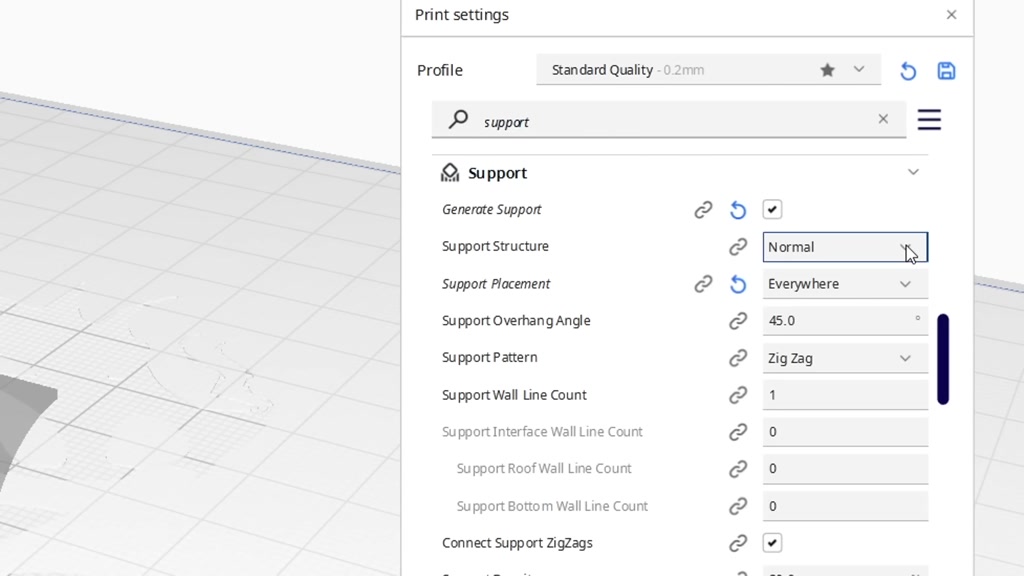
select this by changing support
#

structure from normal to Tree in bamboo
#
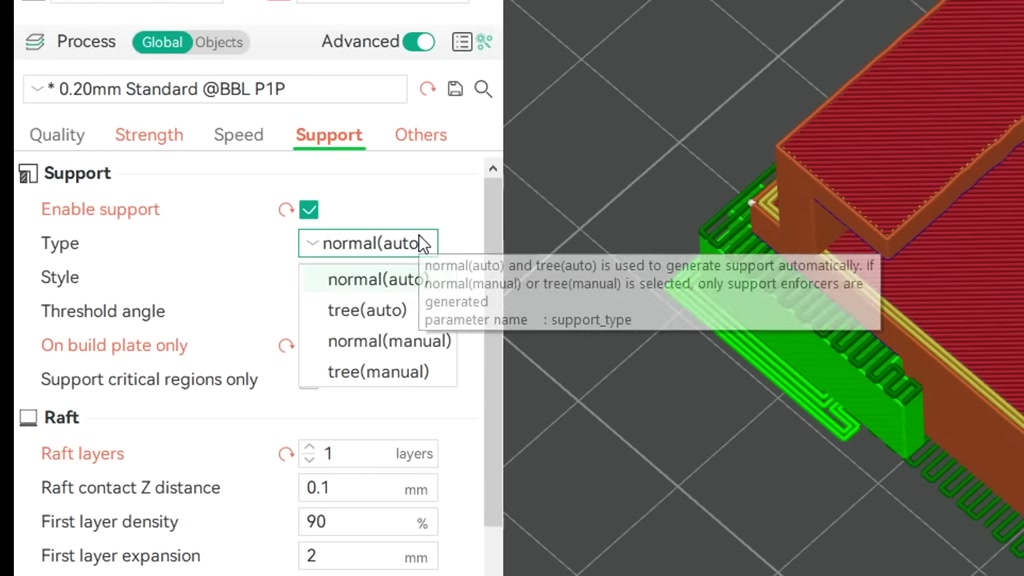
studio and orca slicer we change the
#
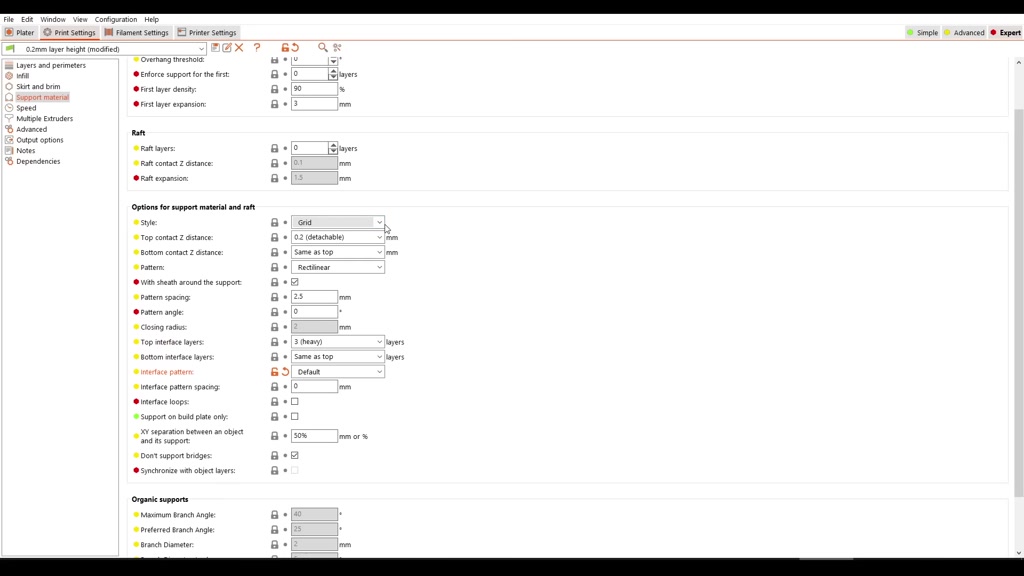
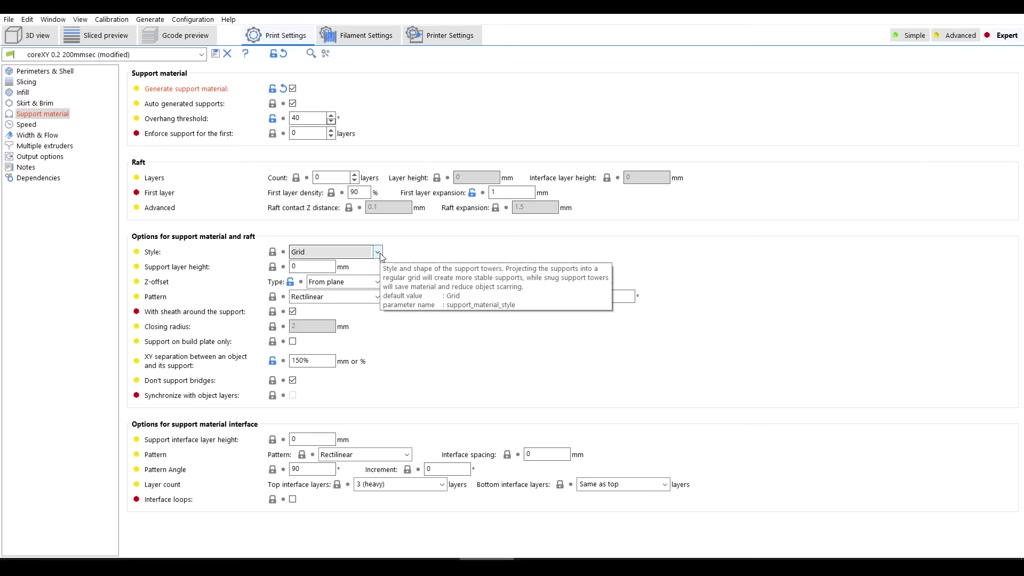
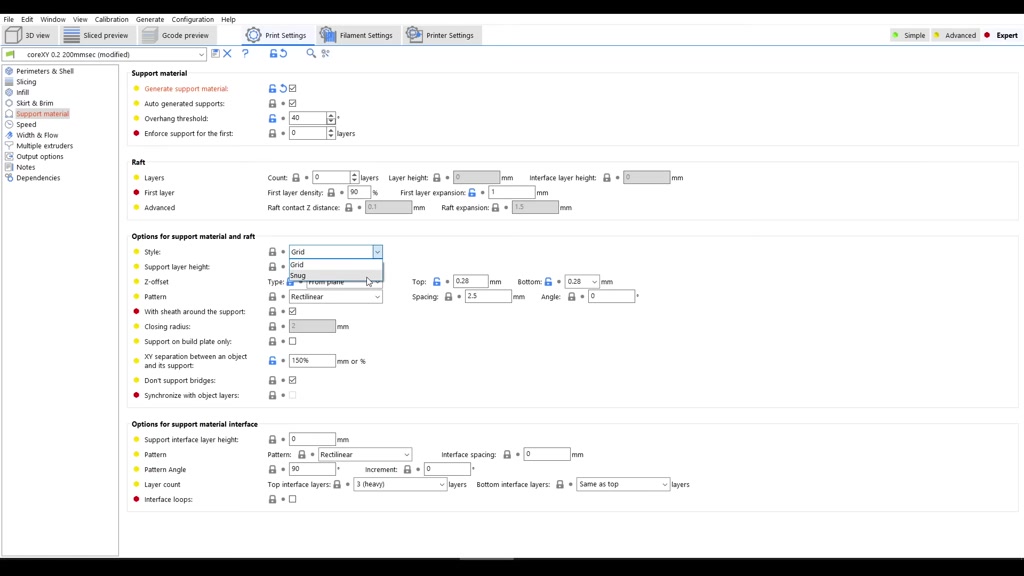
type from normal to tree and prusa
#
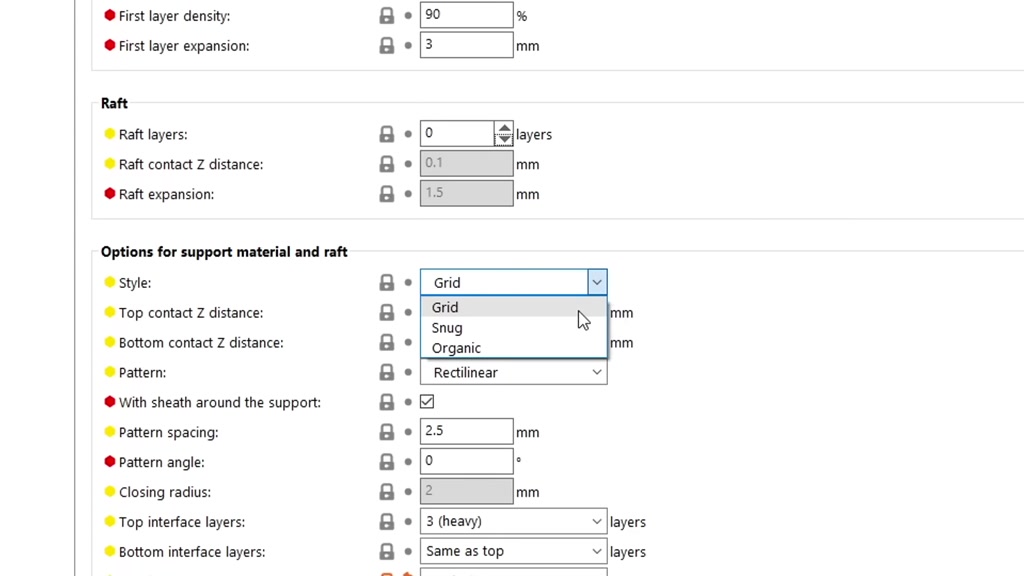
slicer will now let you change the style
#
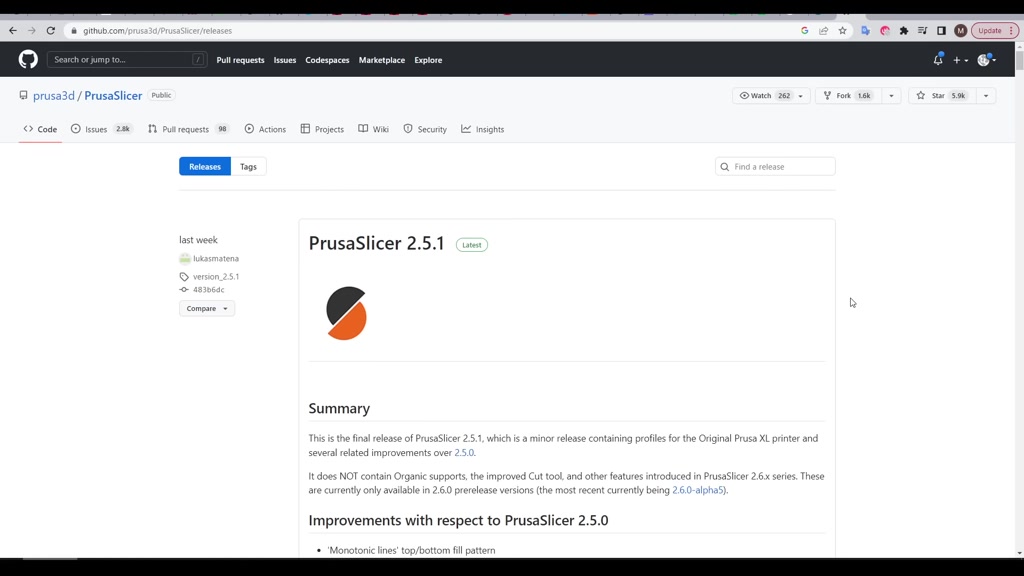
from grid to organic but at the time of
#
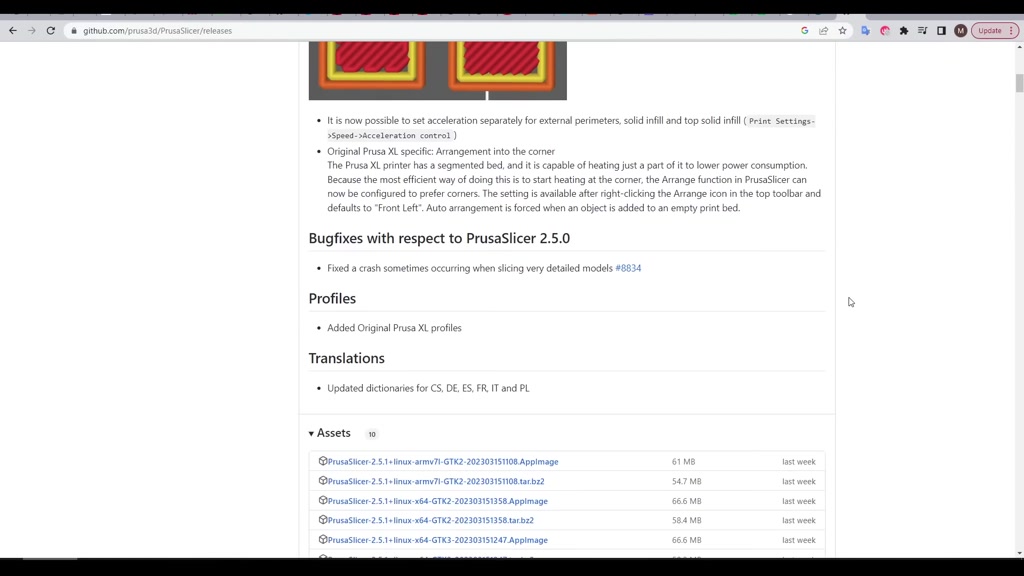
recording you have to scroll past the
#
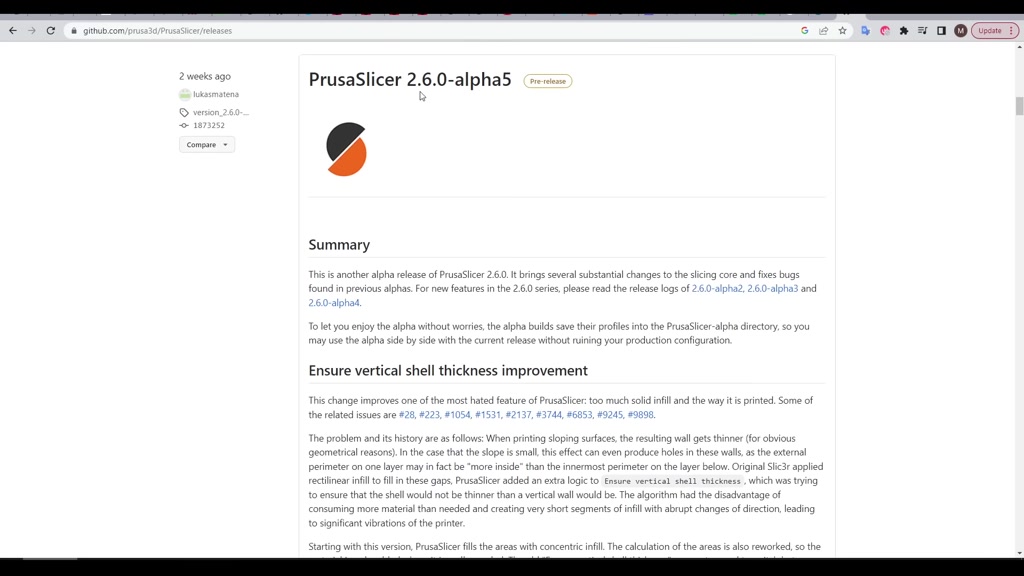
stable release and download one of the
#
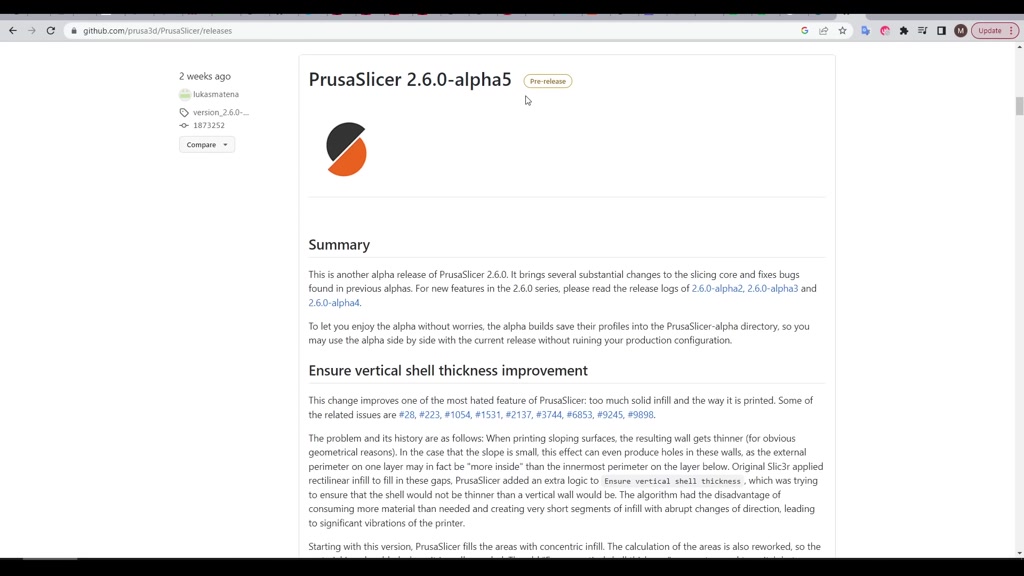
2.6 Alphas for this feature to be
#

included organic supports aren't
#
currently offered in simplify 3D and
#
super slicer doesn't have them either
#
but hopefully this will be included
#

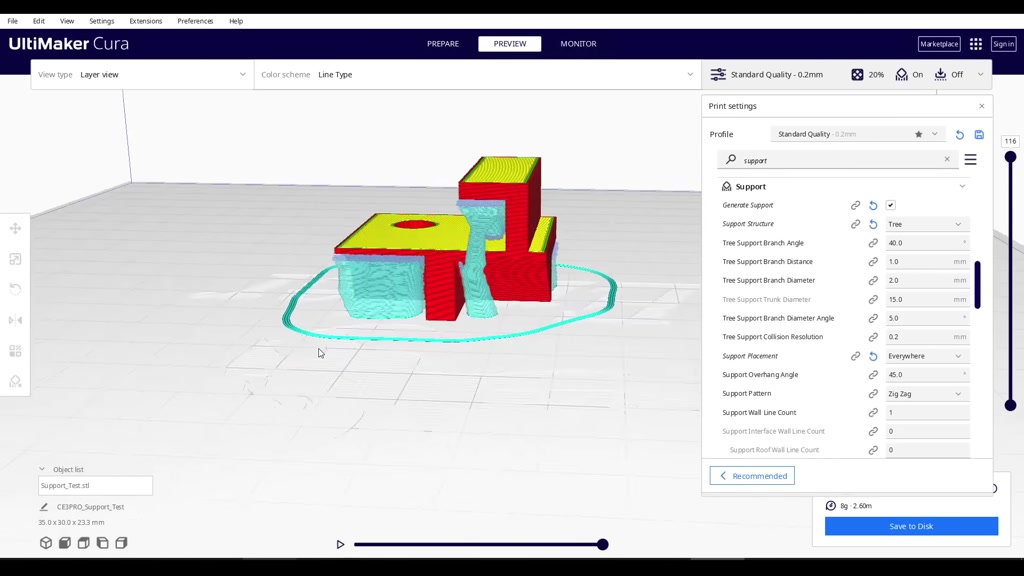
later on tree supports might look
#
different but they still have the same
#
structure as traditional with a raft on
#
the bottom a midsection that flows more
#

organically and of course an interface
#
layer on top to touch the underside of
#
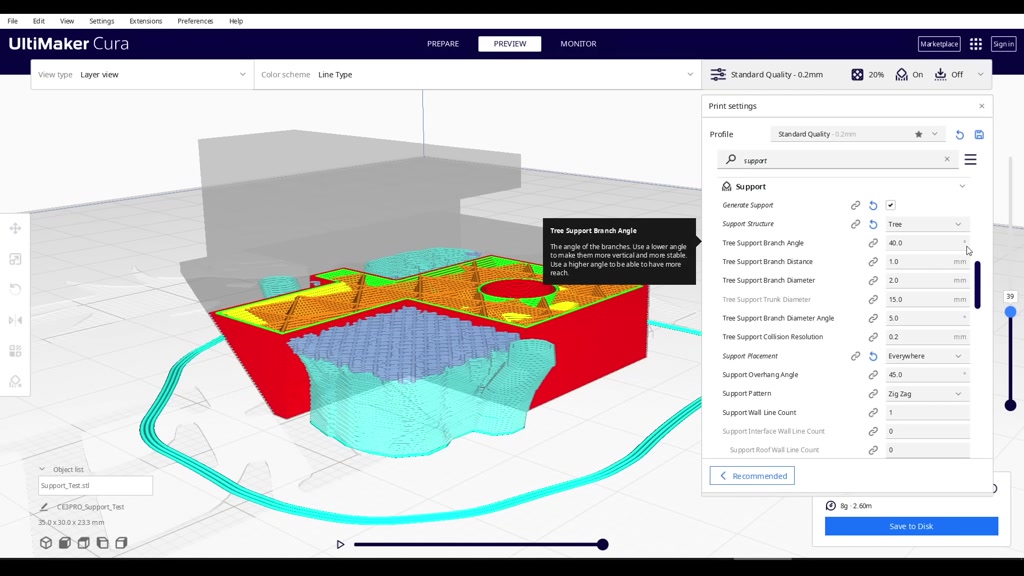
the model when you switch to them in
#

Cura you get some specific settings for
#
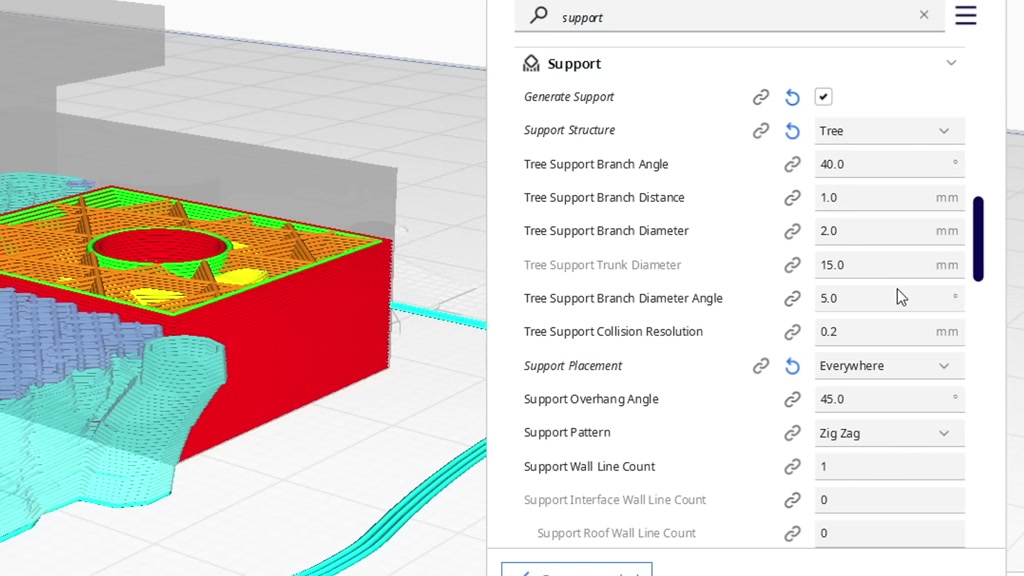
angles and minimum and maximum
#
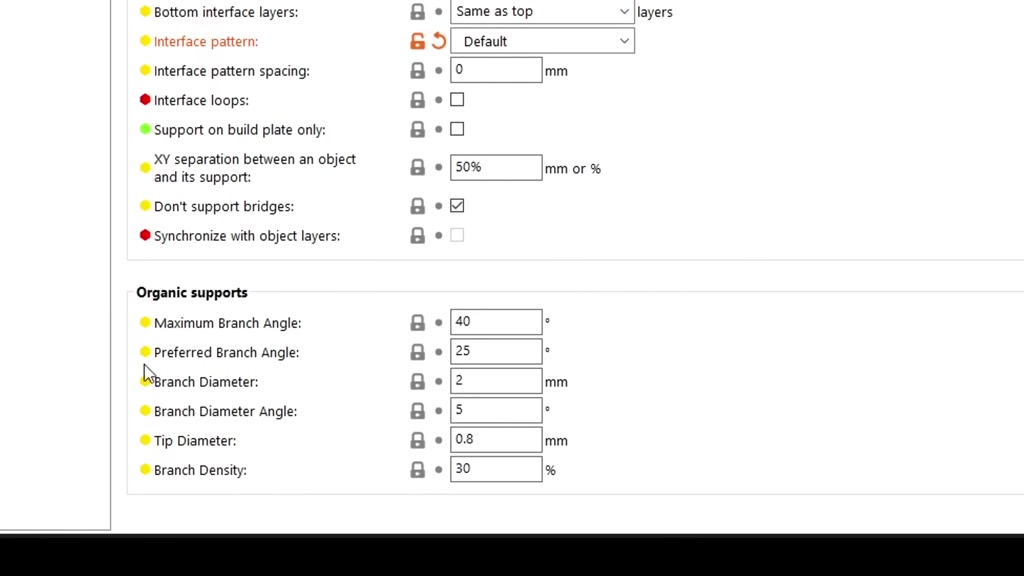
thicknesses and in prusa slicer we have
#

this section at the bottom with exactly
#

the same type of thing the real question
#
is when to use them and I would argue
#

that our existing test model is not
#
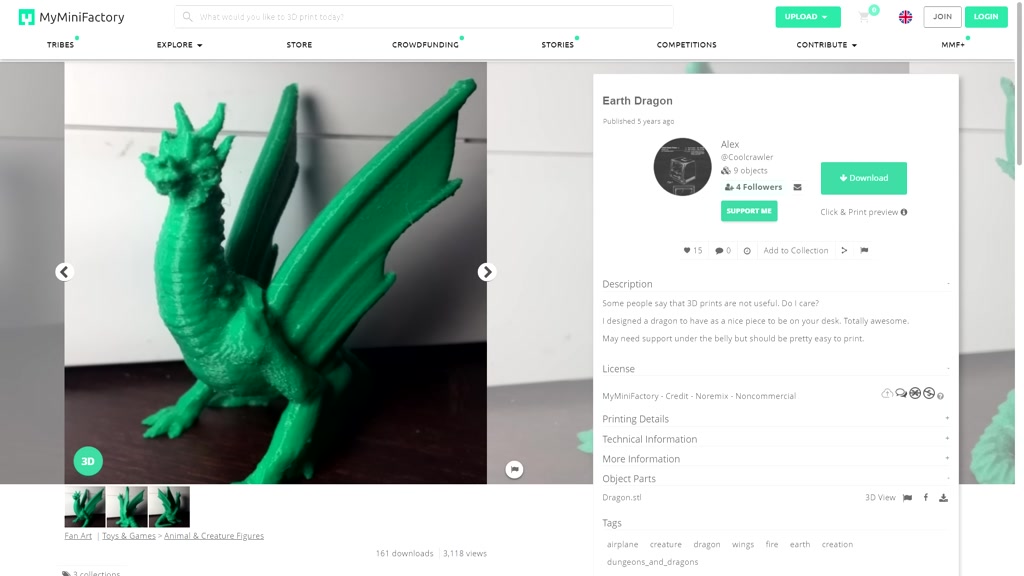
ideal so how about something more
#

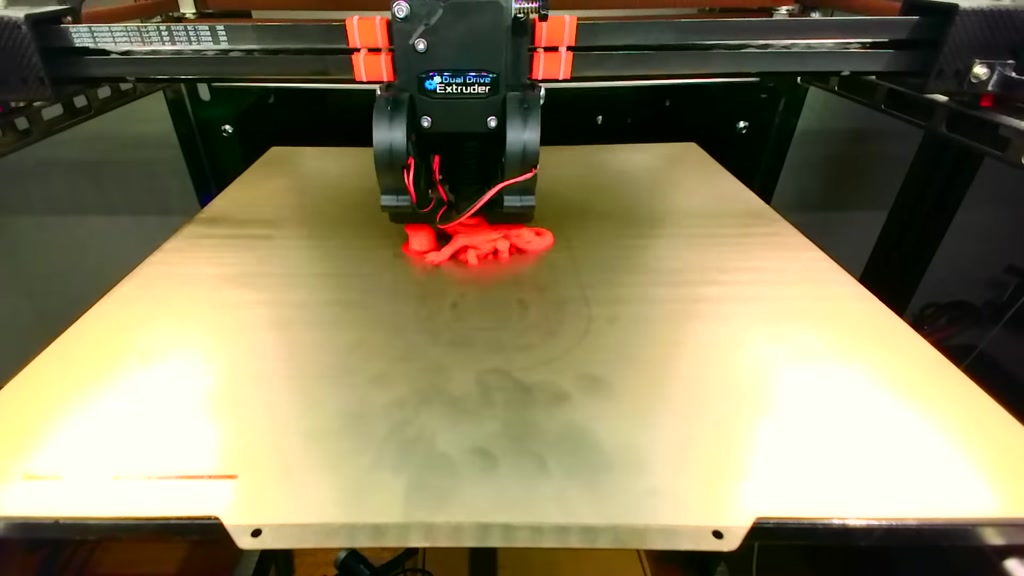
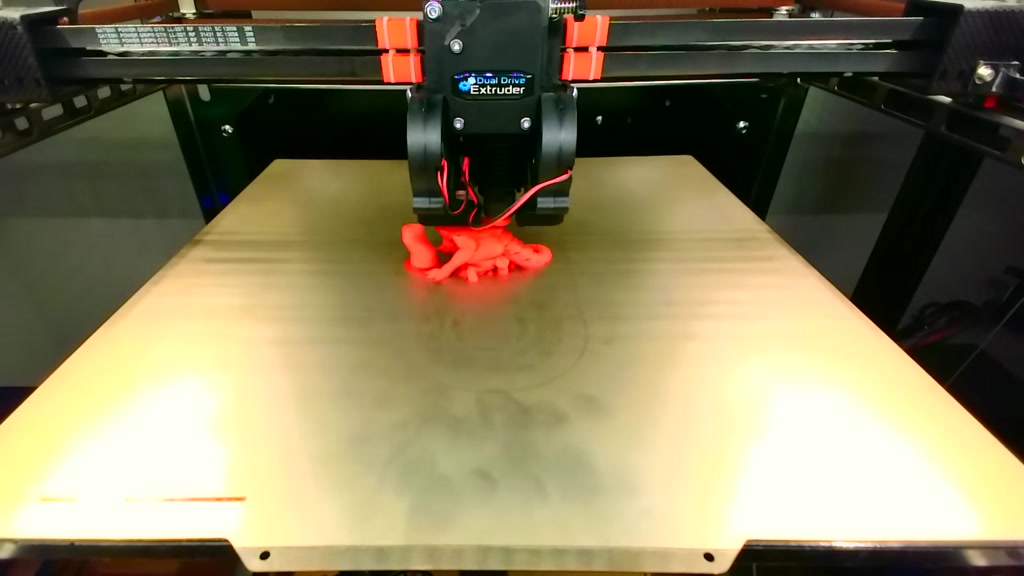
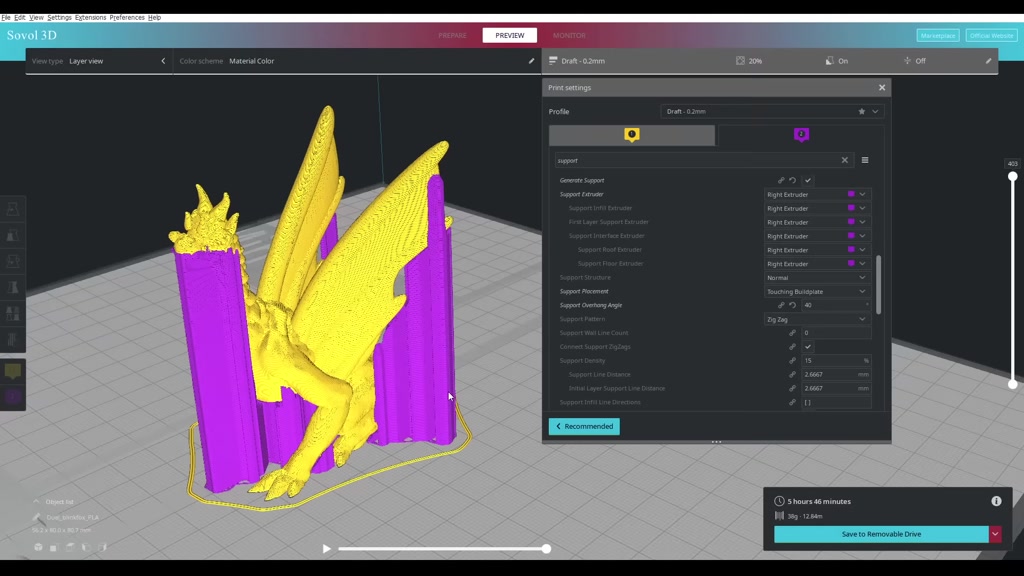
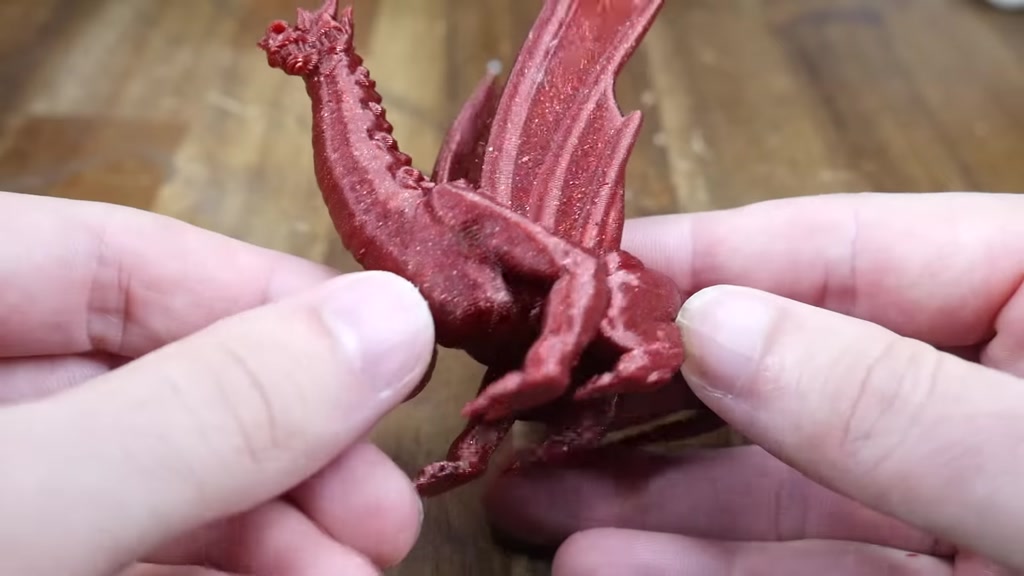
organic in the form of this Earth Dragon
#
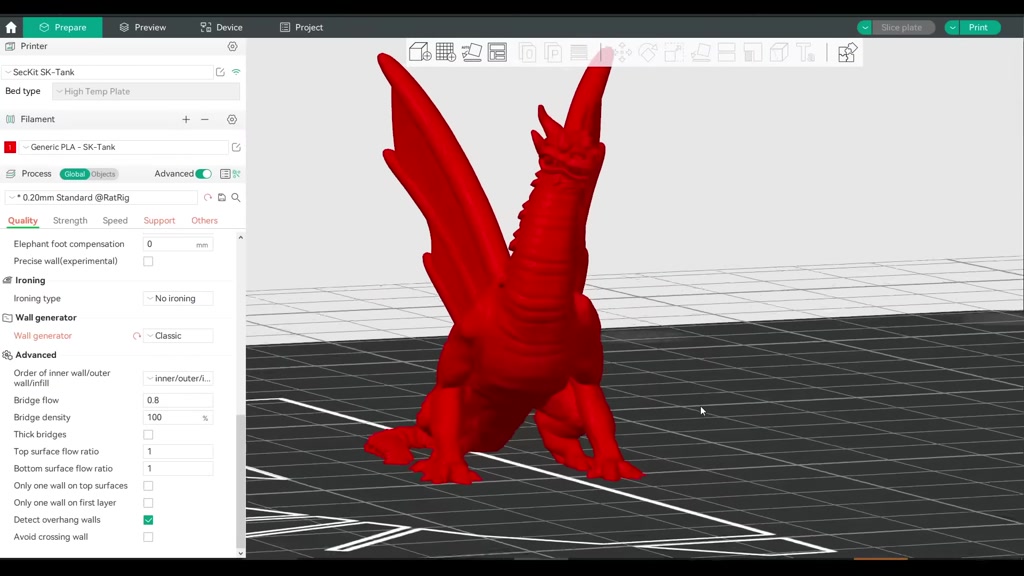
by Alex this dragon has some large
#
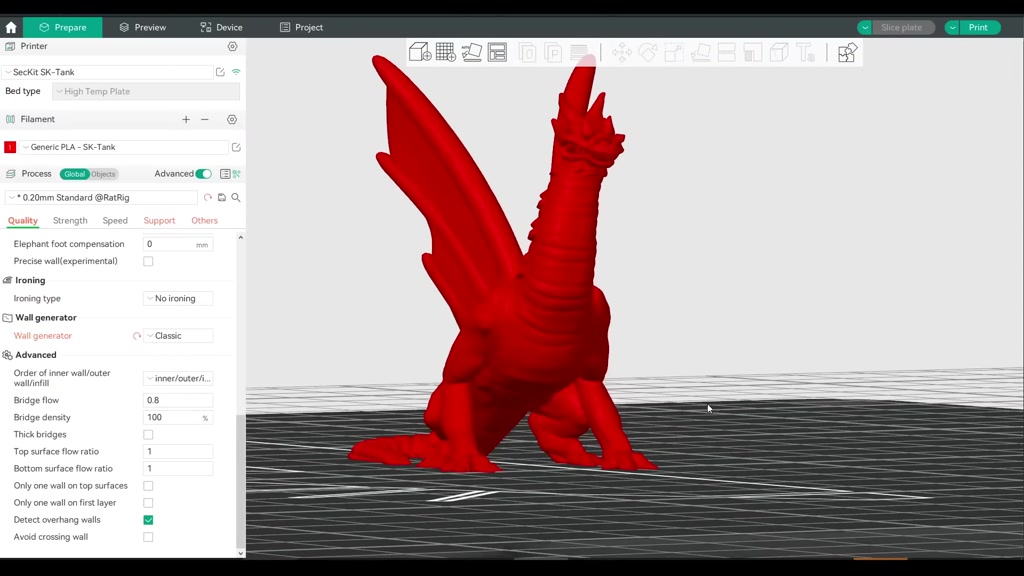
overhangs and clearly needs support
#
underneath but looking at traditional
#

supports this becomes quite awkward as
#
they struggle to match these Contours so
#
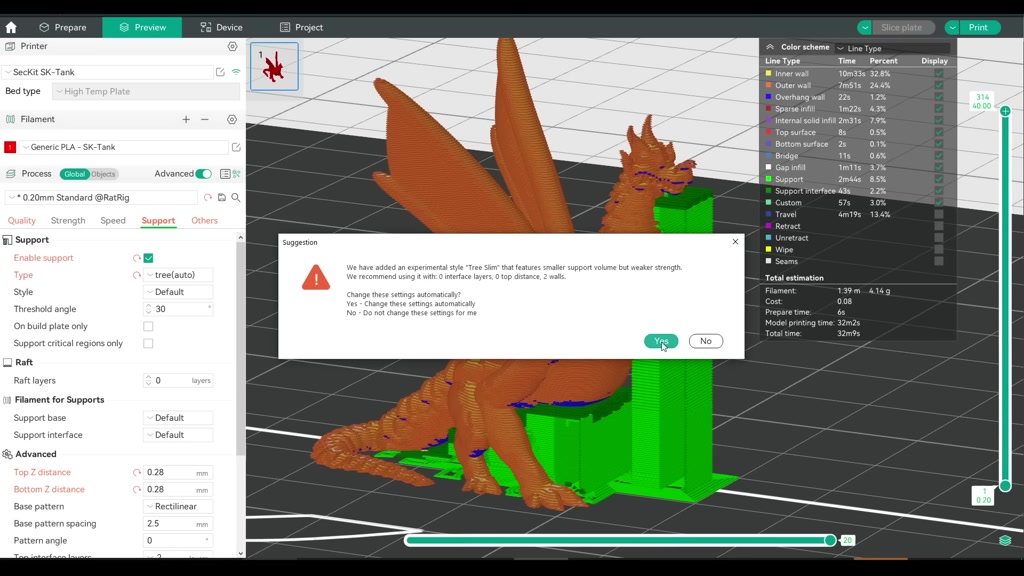
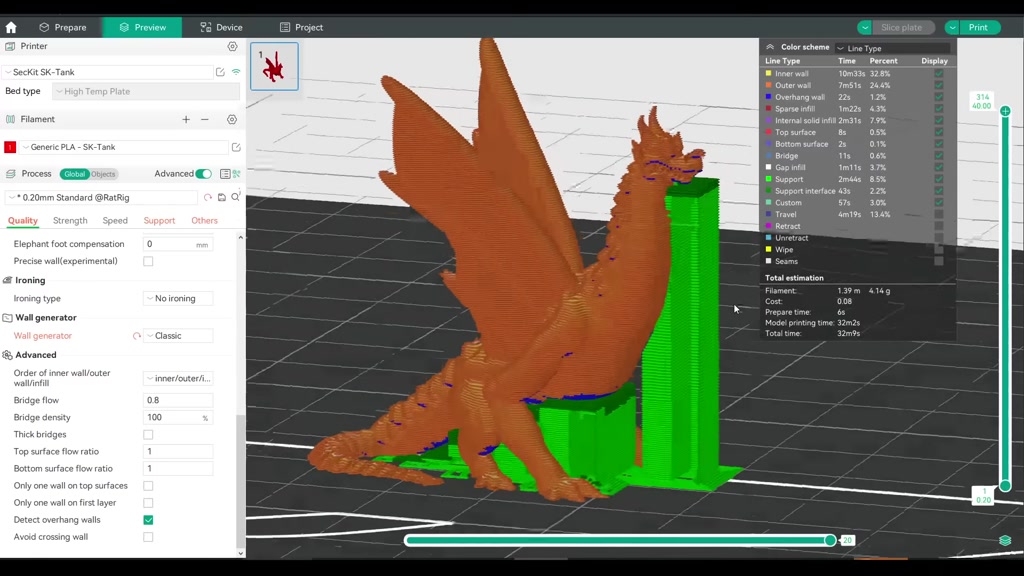
let's change them over to tree except
#

the recommended settings and slice again
#
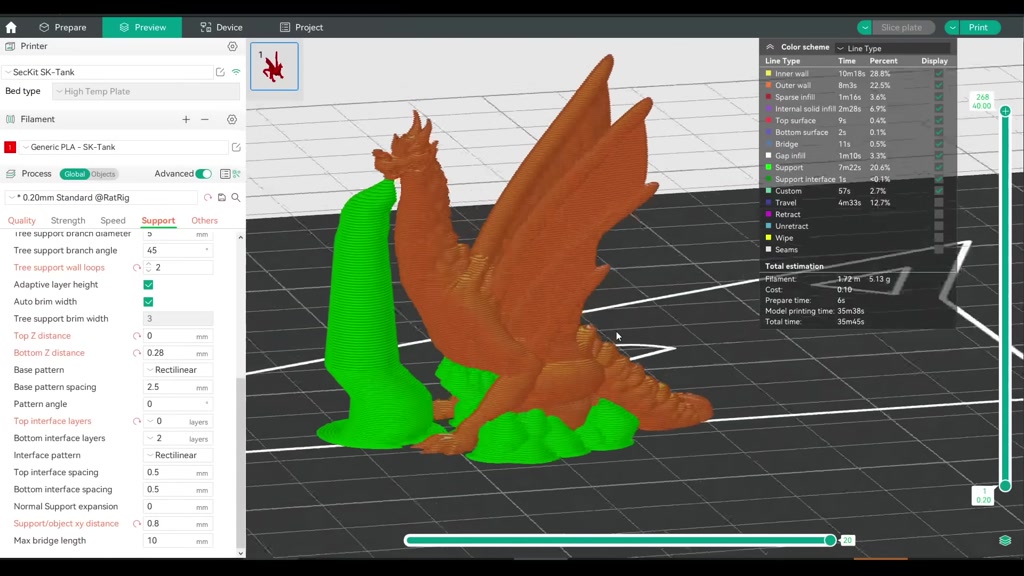
already we can see that this looks
#
completely different so there's nothing
#
left to do but to print a test to see
#
how easy it is to remove fun fact this
#
might be the first print I've ever
#
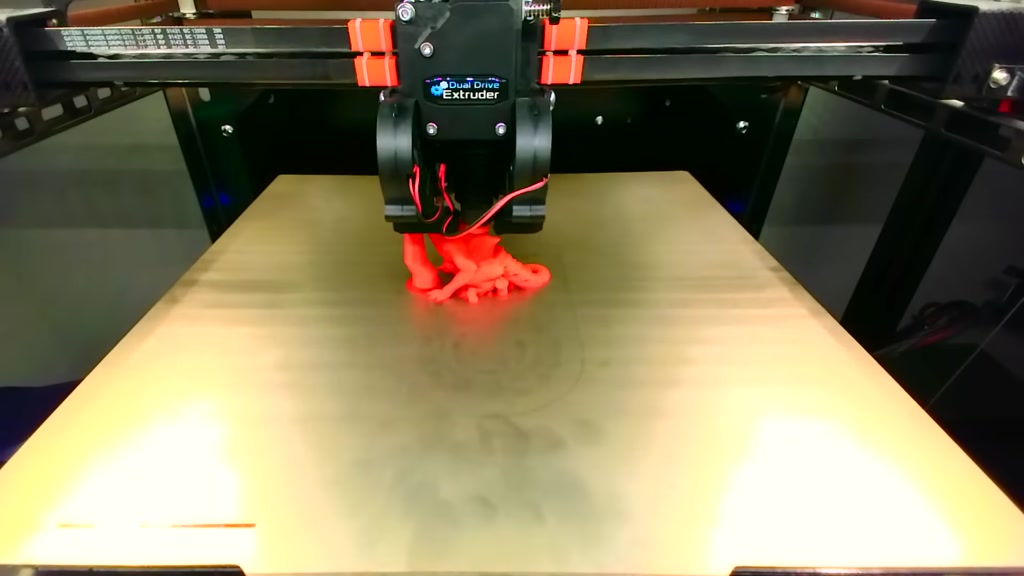
completed with three supports but I use
#

the settings that I already tuned in for
#
this printer most importantly the Z air
#
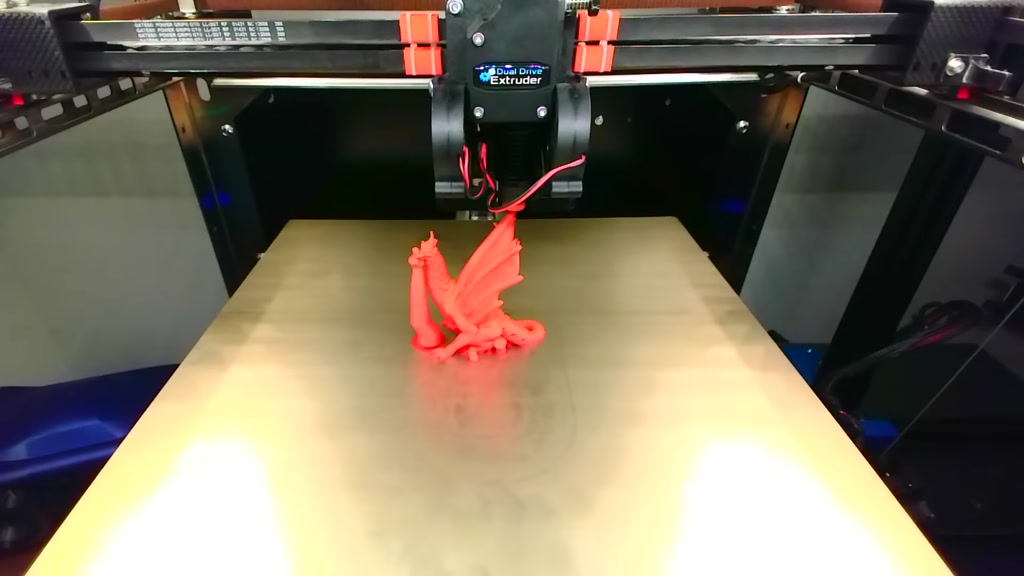
gap between the interface and the model
#

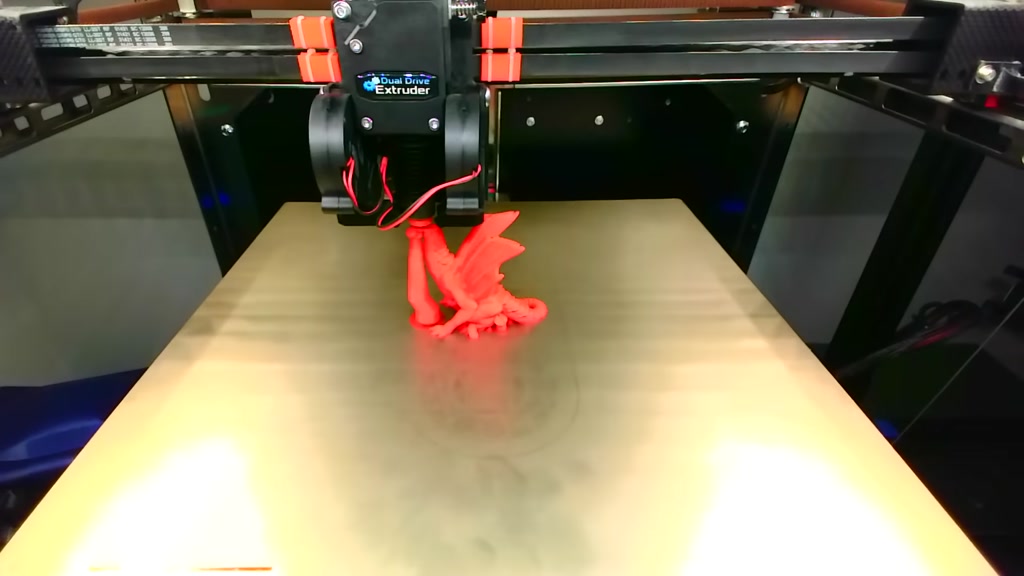
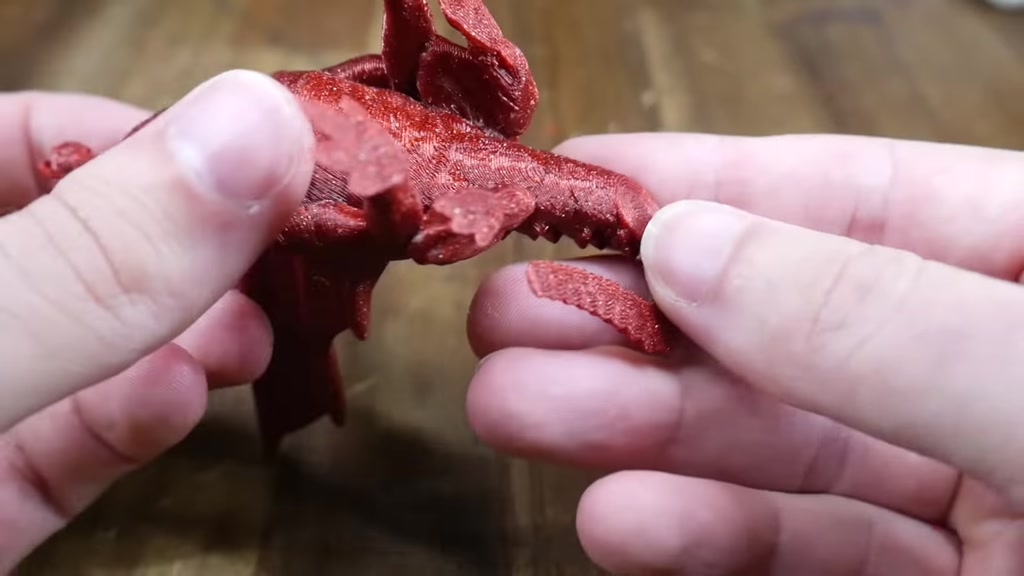
in my opinion this process turned out
#

really well and most of the support
#
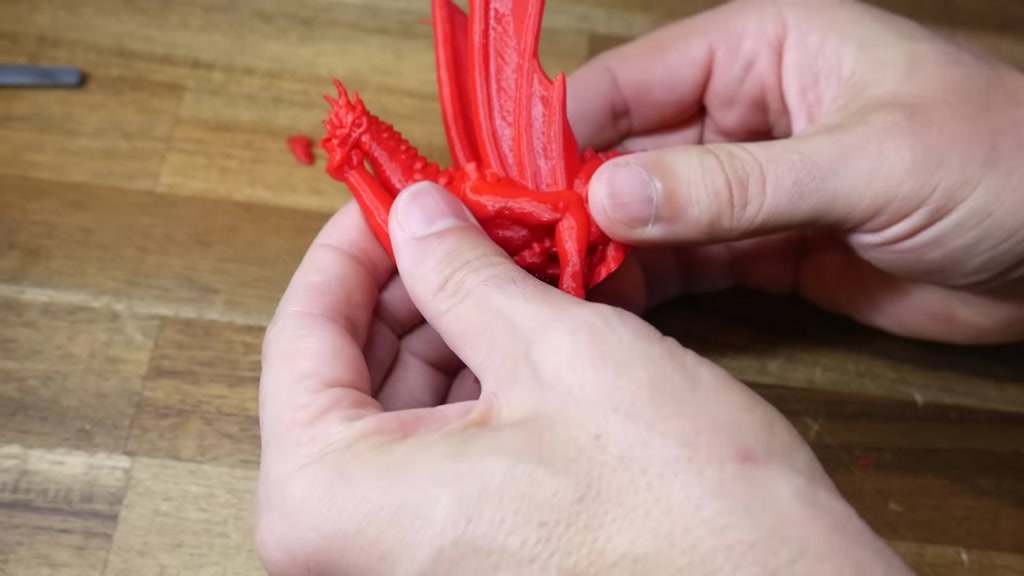
material could be removed just by
#
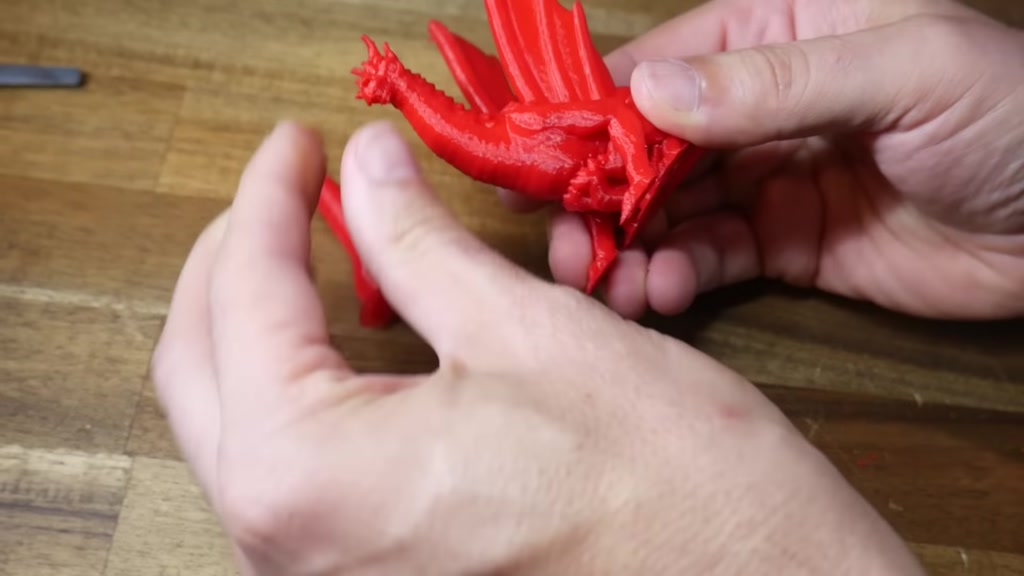
pulling it in the right direction with
#
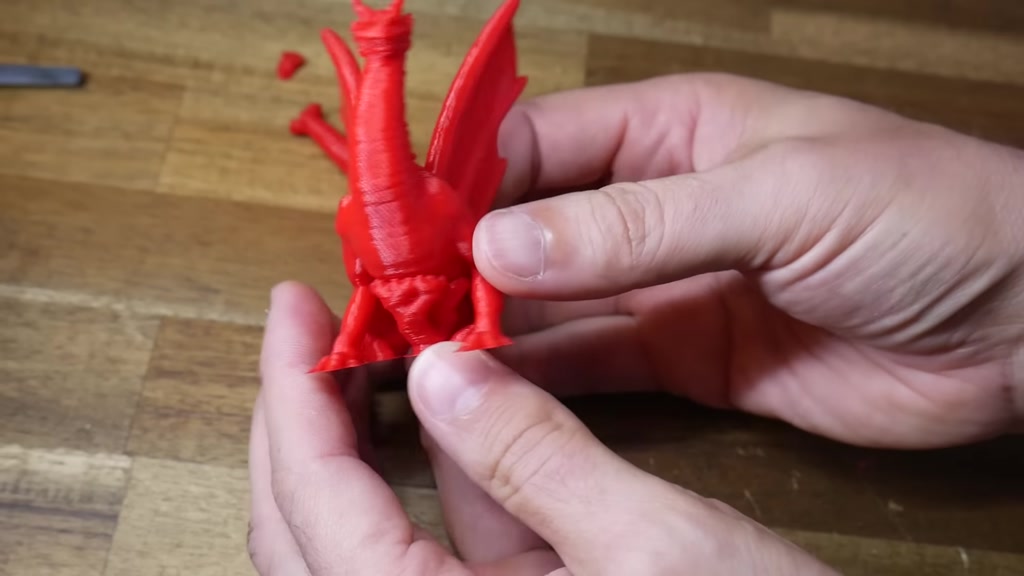
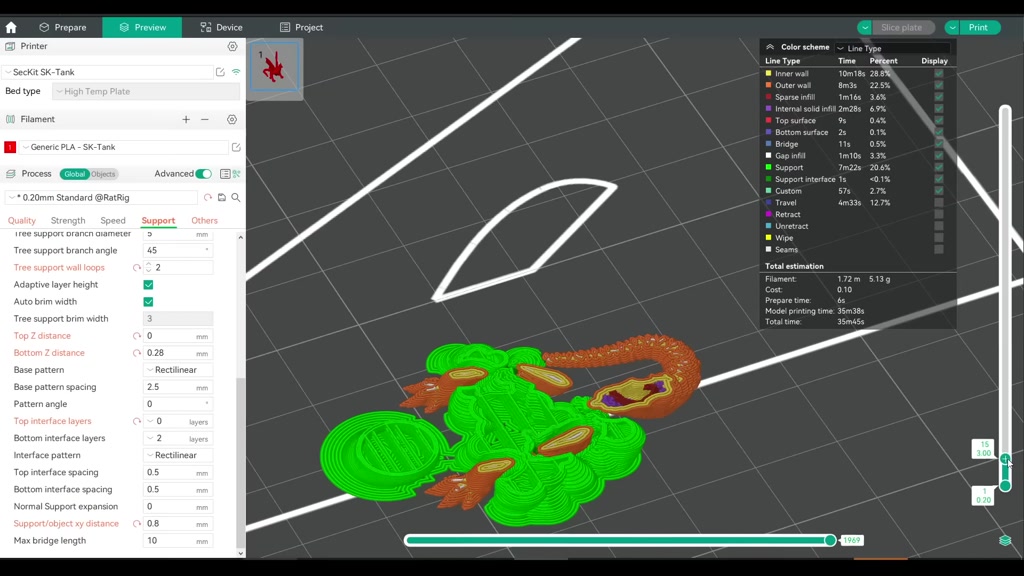
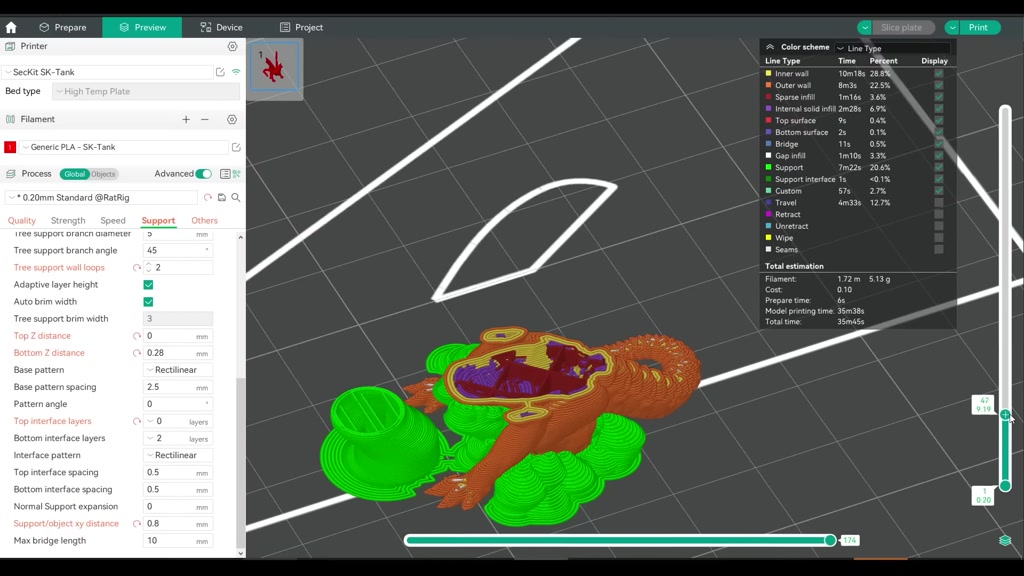
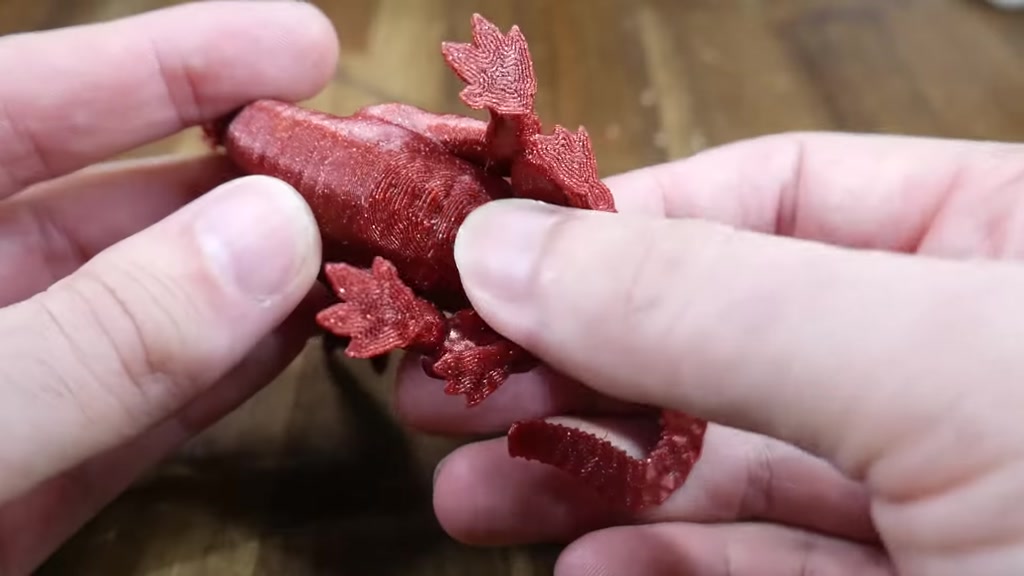
my fingers we can see that the organic
#
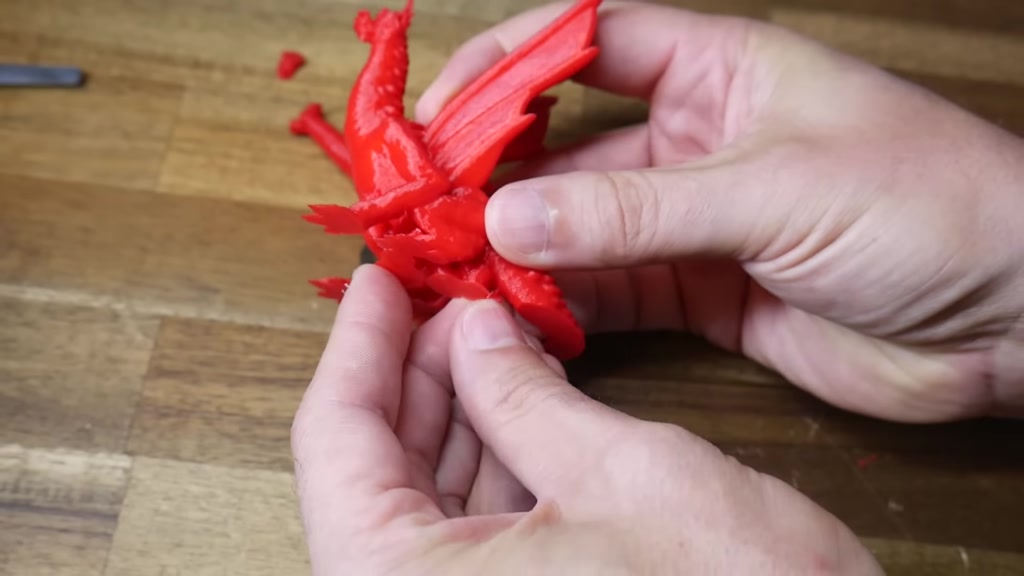
supports Contour nicely to this rounded
#
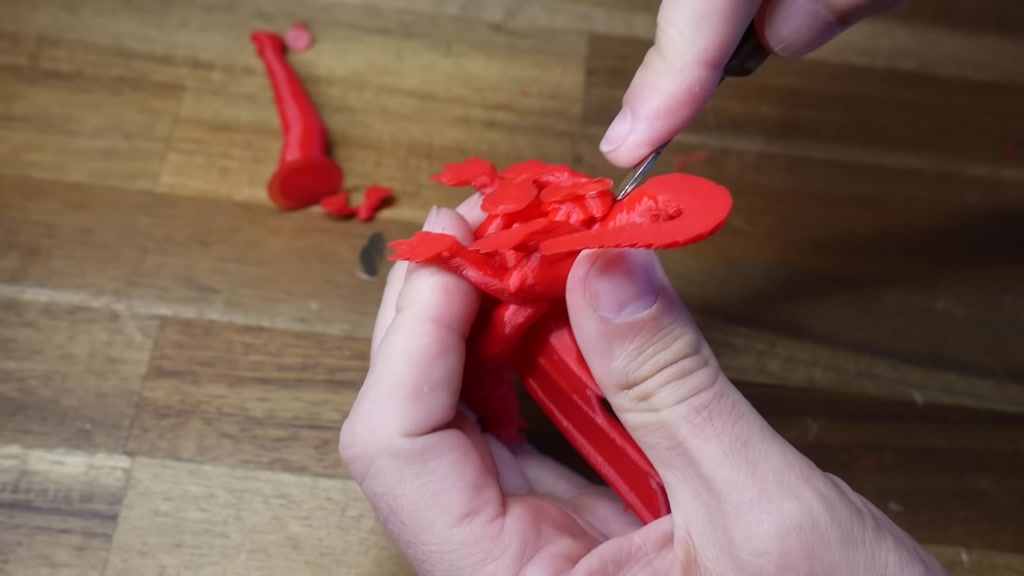
belly the hardest support to remove came
#
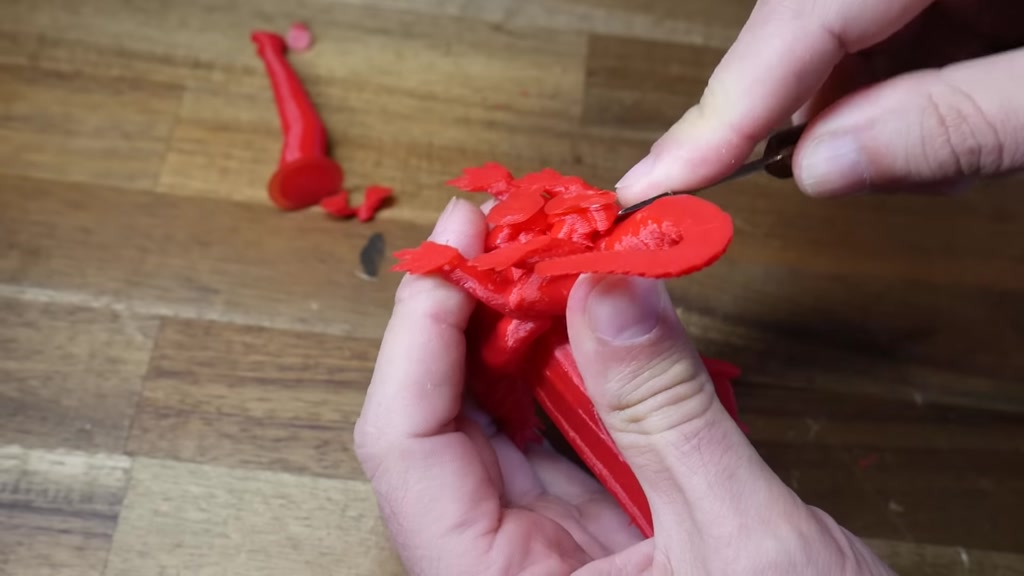
from this section but I didn't need my
#
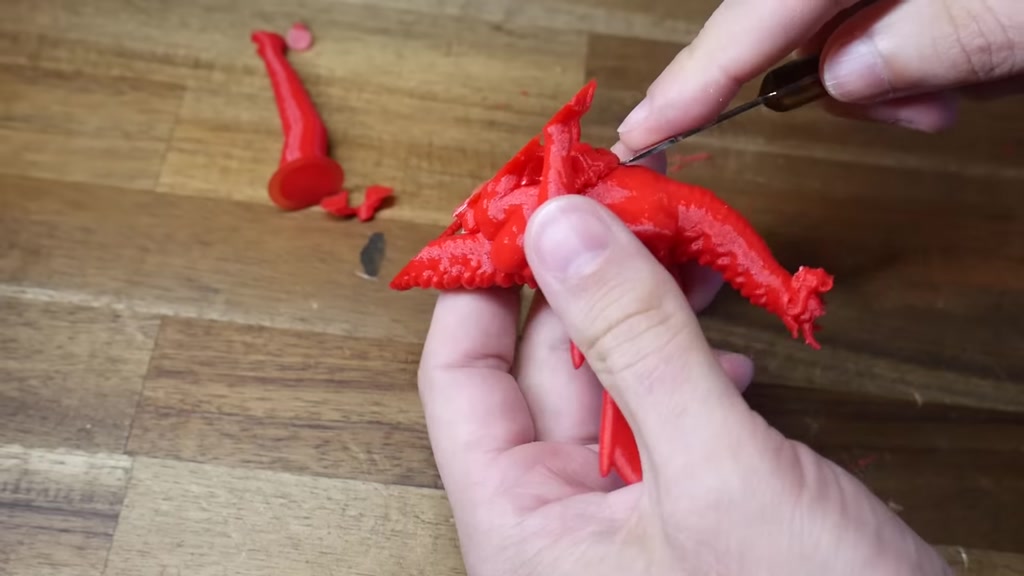
blade instead just my prying tool to
#
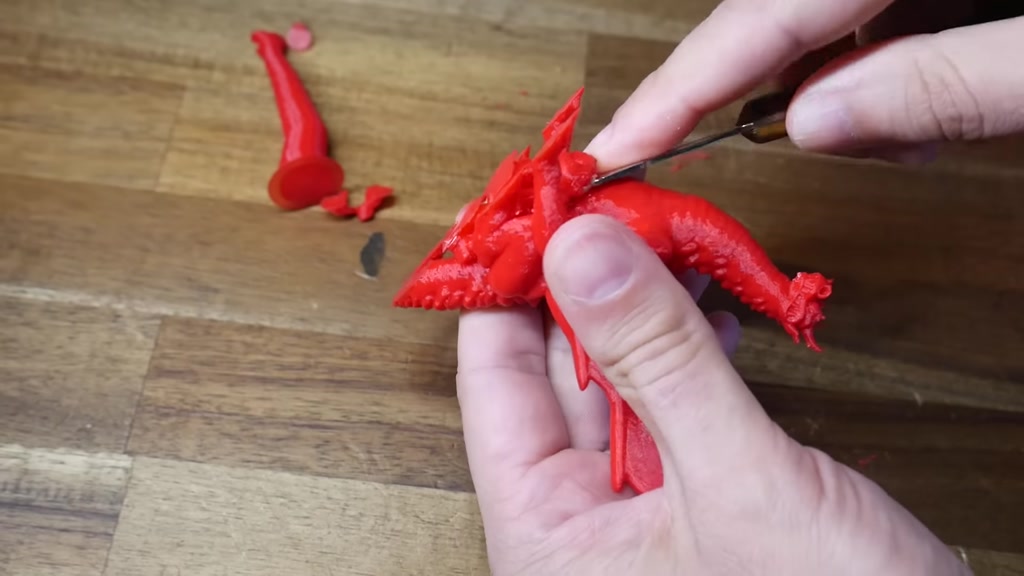
apply a little bit of pressure to each
#
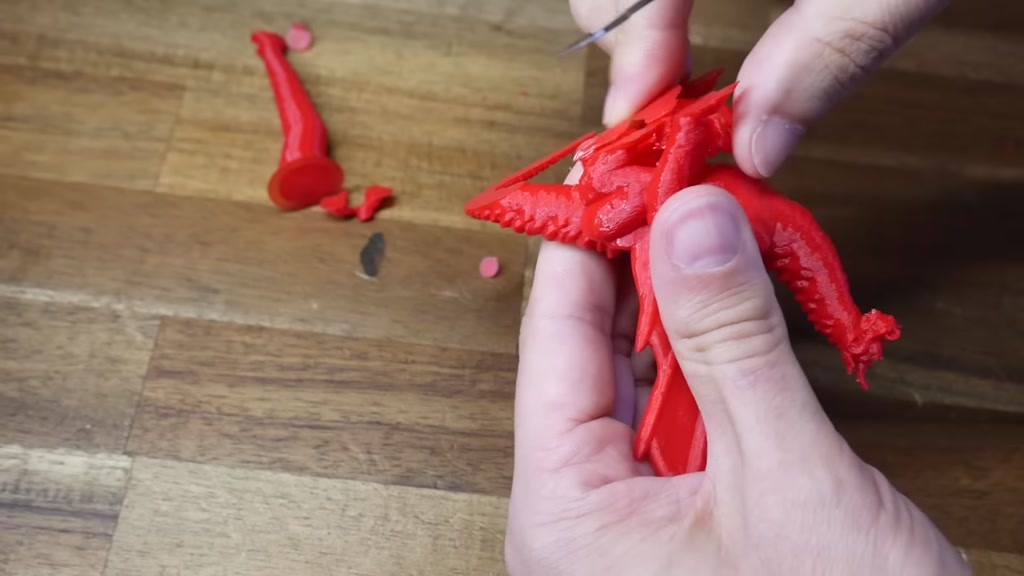
side of the support and then it just
#
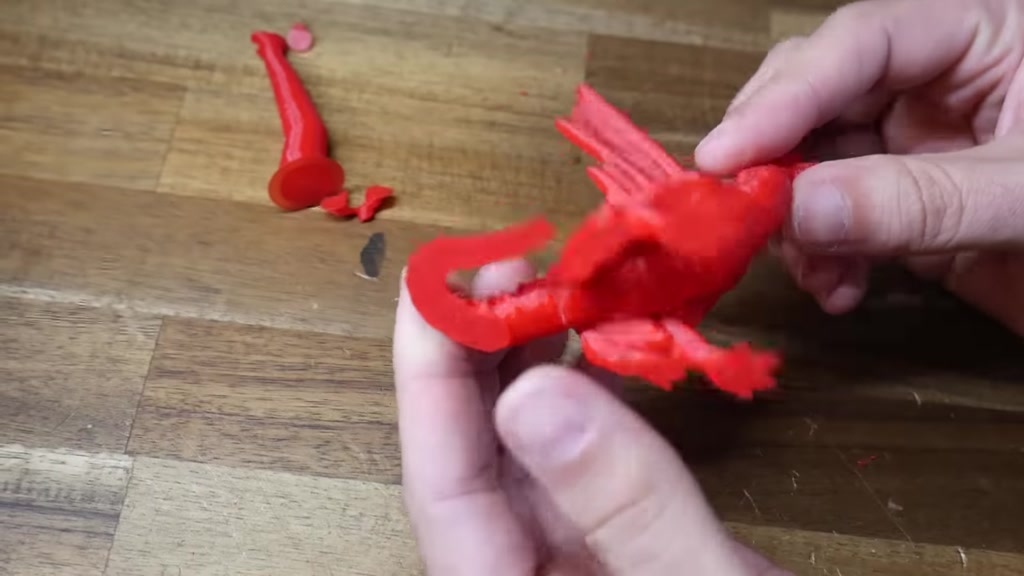
pops straight off the end result is a
#
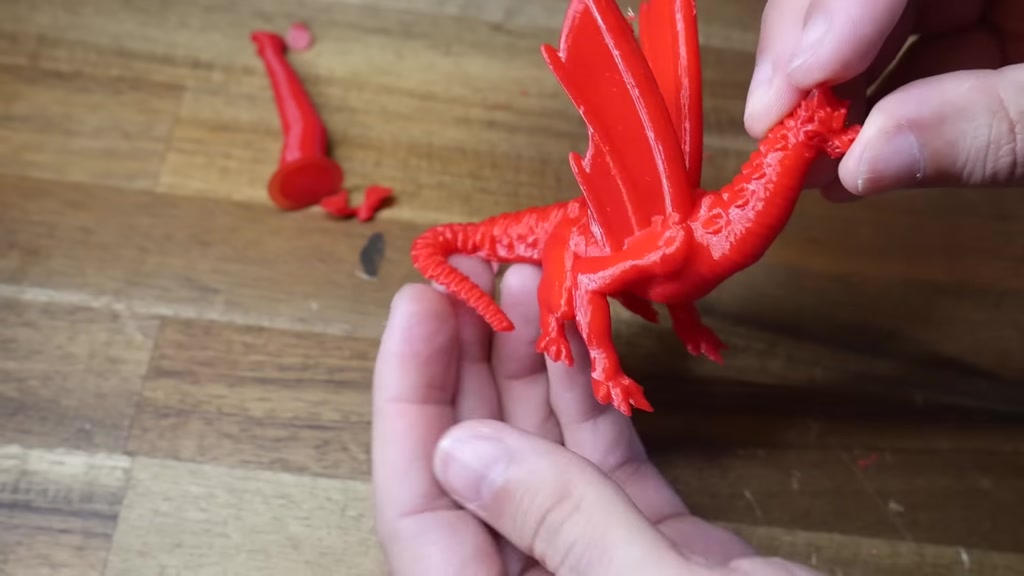
very clean Underside to the model
#
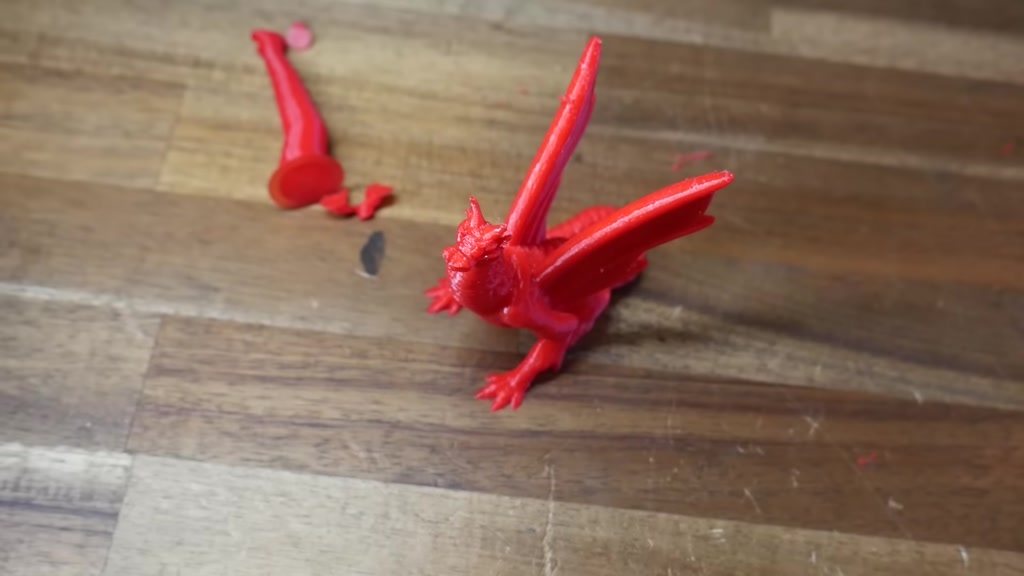
therefore I'm calling this one a success
#
tree or organic supports are a really
#

nice option depending on the model that
#
you're printing let's finish with using
#

support efficiently support material
#

takes up extra time and filament so how
#
can we be intelligent about applying it
#
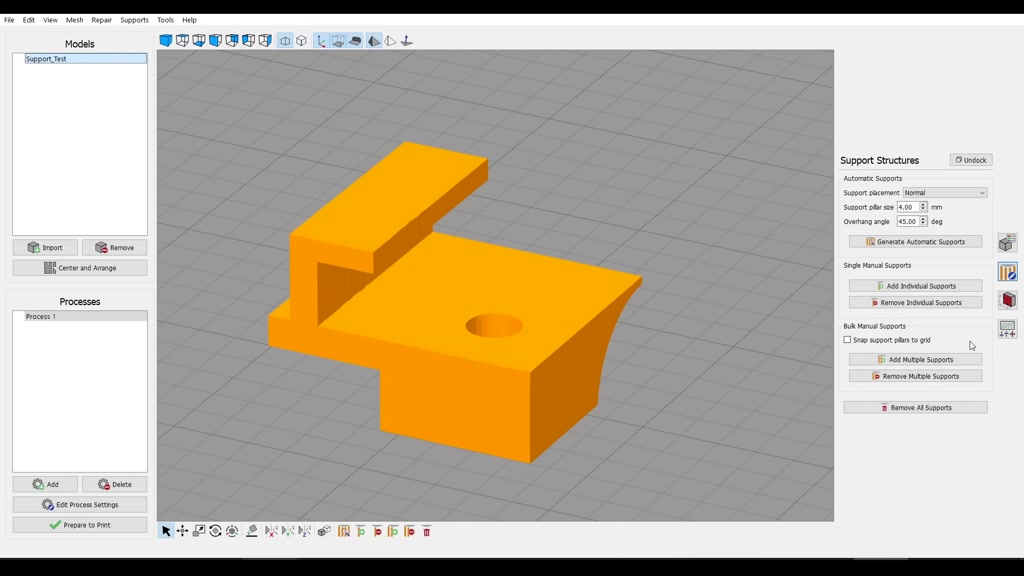
simplify 3D has a pop-out control panel
#
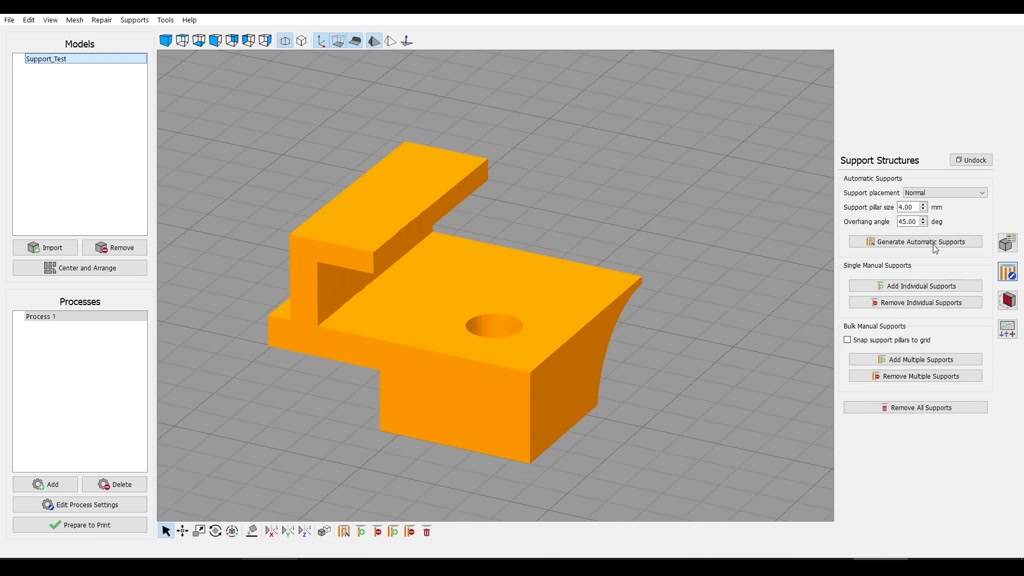
for support material and then we can
#

generate these automatically what's
#
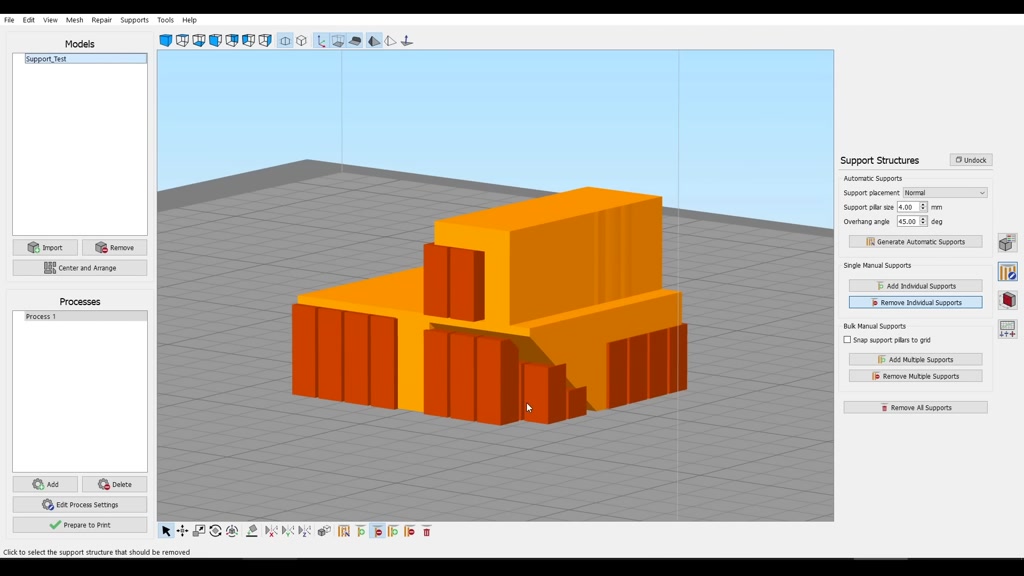
really nice now is that we can click to
#
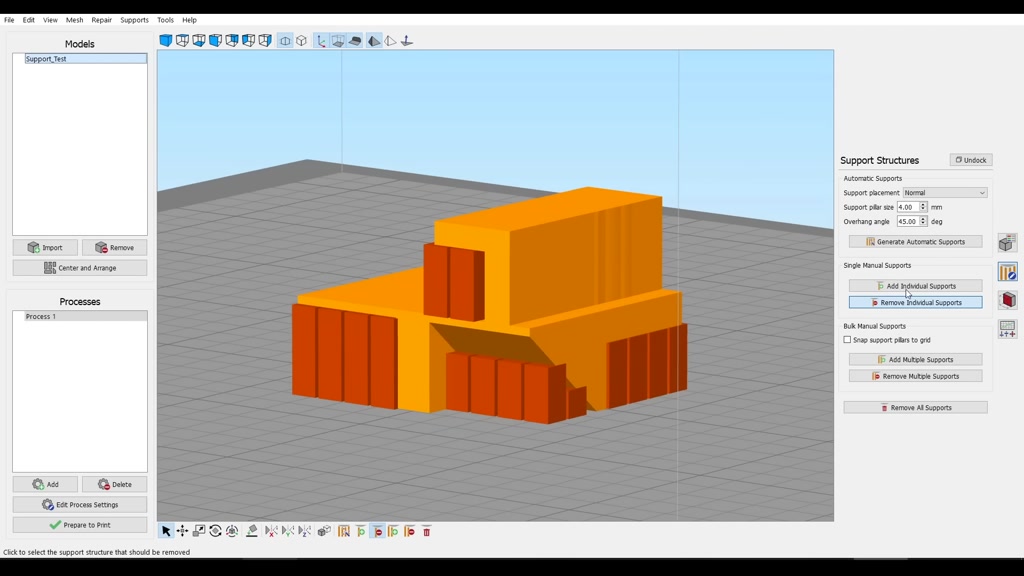
remove individual support sections and
#

we can also click to add them in
#
specifically Troublesome areas giving us
#
more control over where support material
#
is placed in Cura if we click on the
#
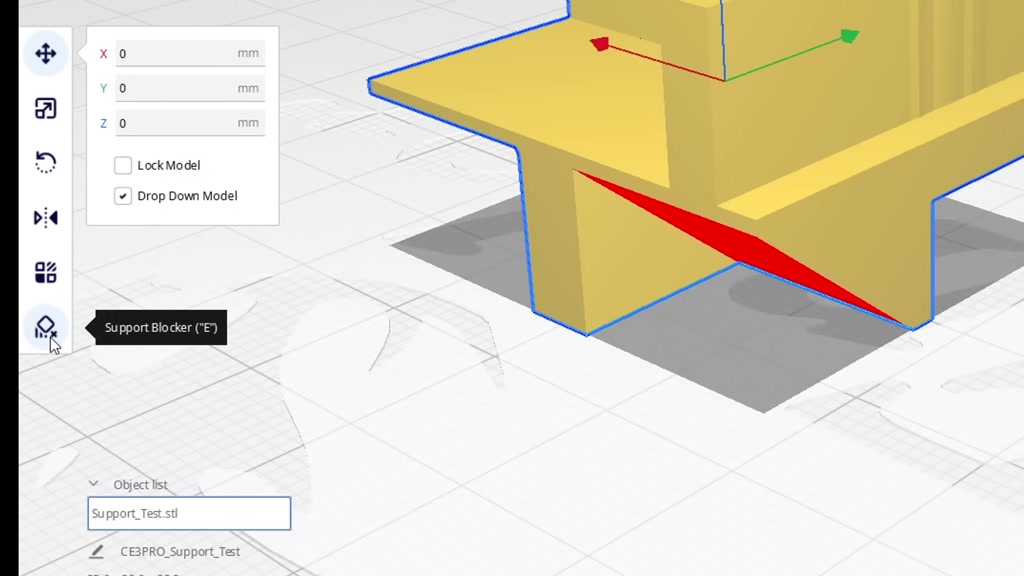
model we can then come down to the
#
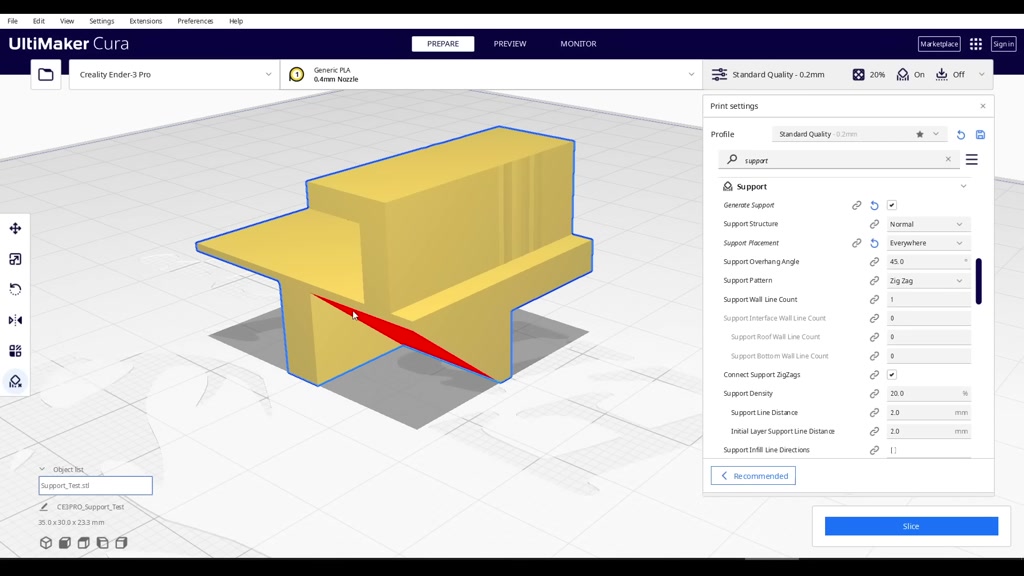
support blocker icon and then click
#
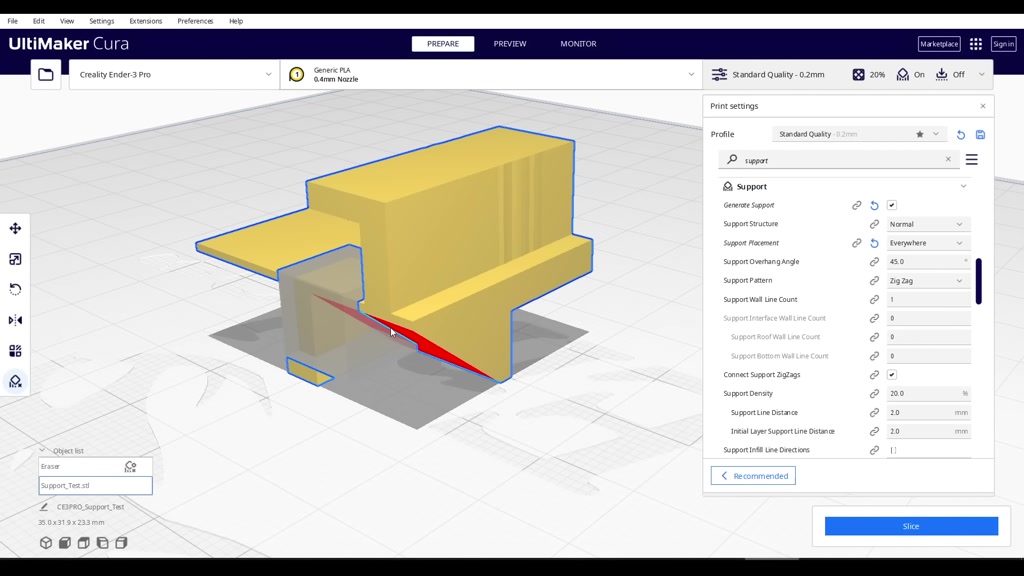
around the model to prevent support from
#
being added in those locations it can be
#
a little bit tricky to get to all of the
#
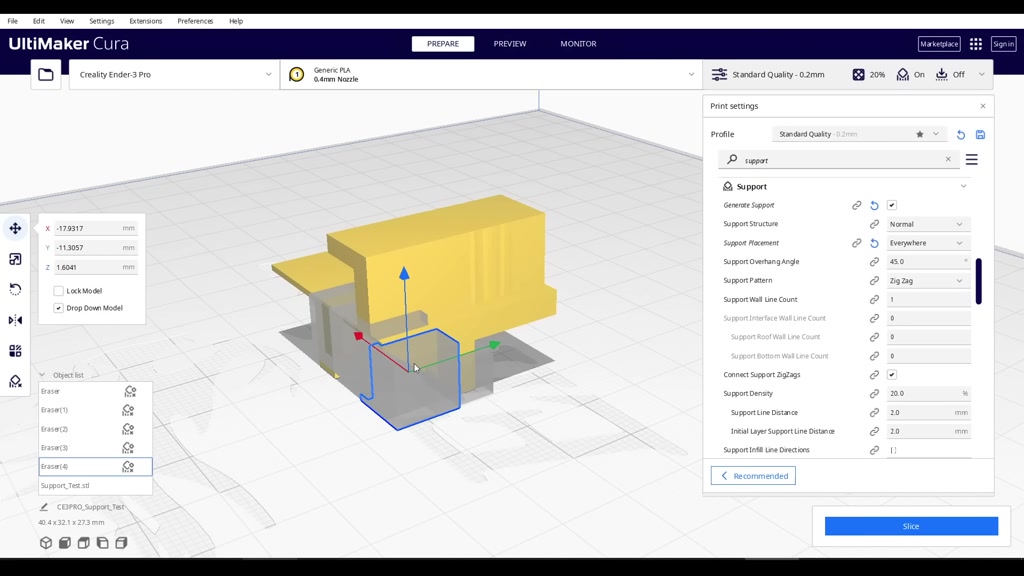
areas that you want so it's good to know
#
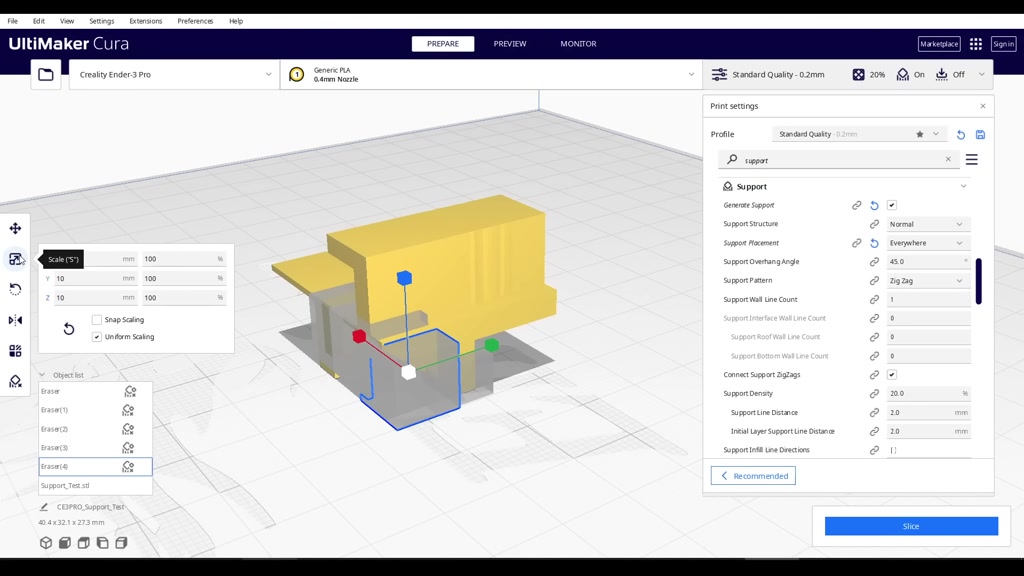
that you can click to select these
#
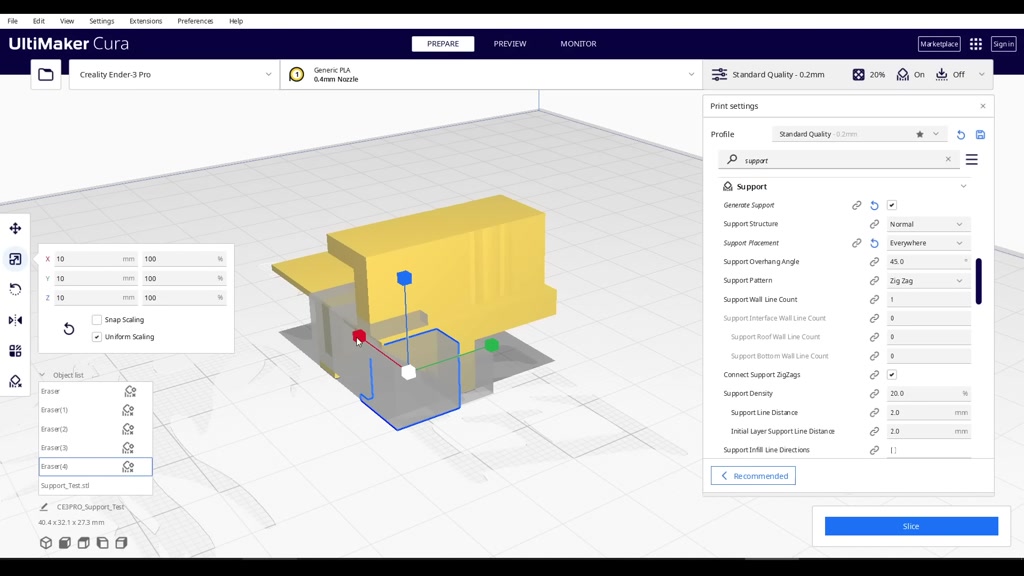
models and manipulate them like any
#
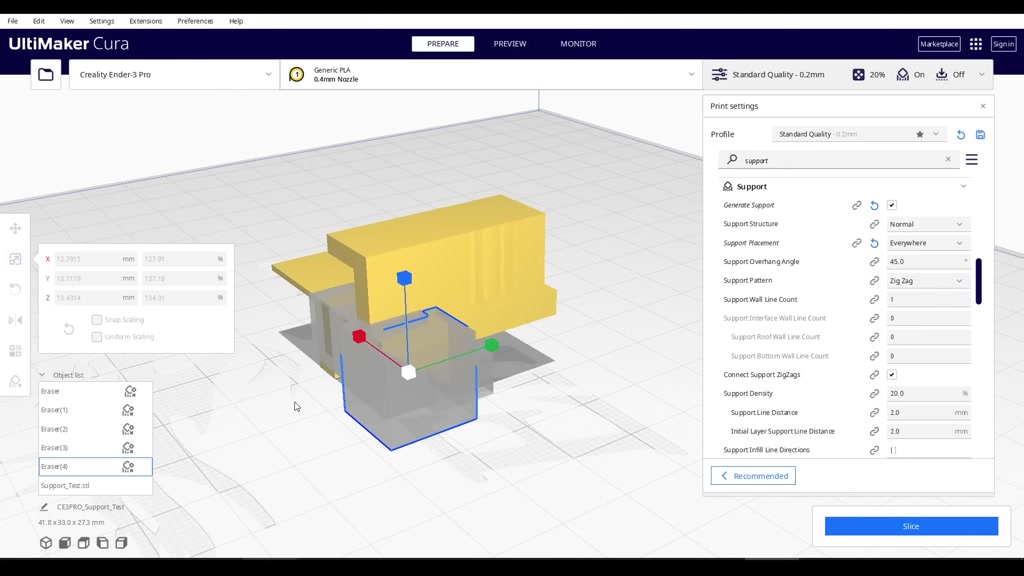
other 3D model you've imported scaling
#
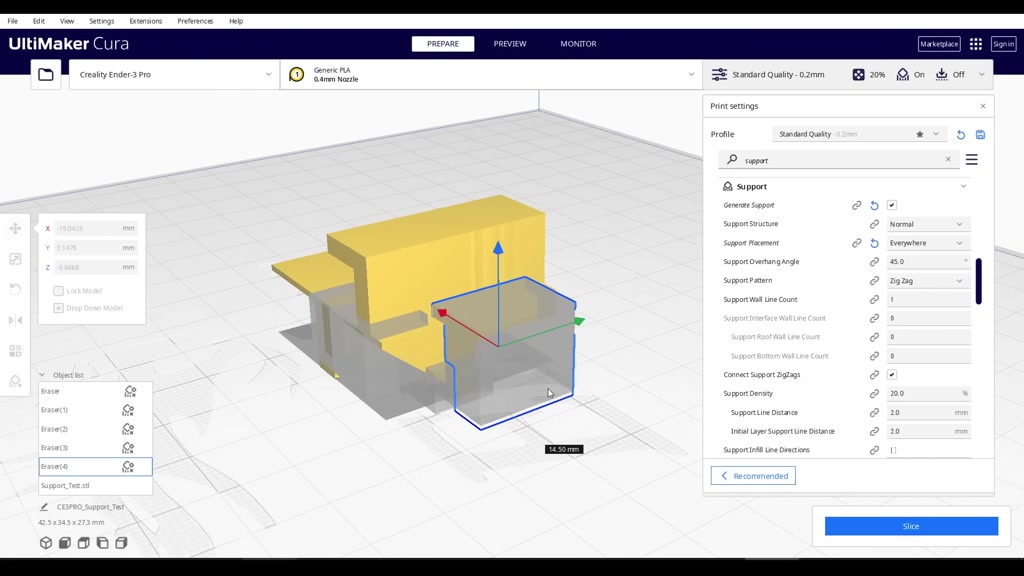
them and rotating them to suit and
#
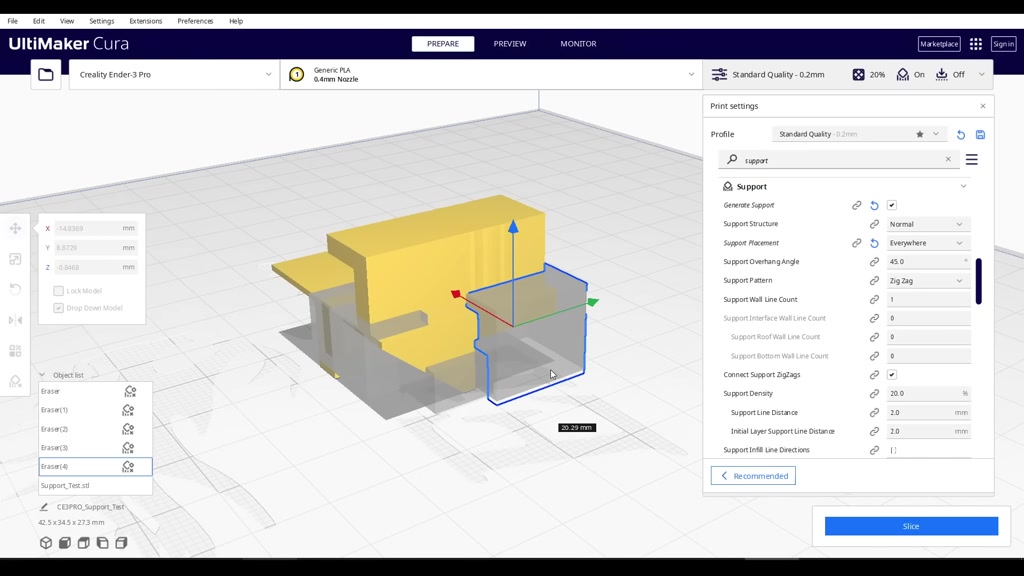
moving them into the ideal position for
#
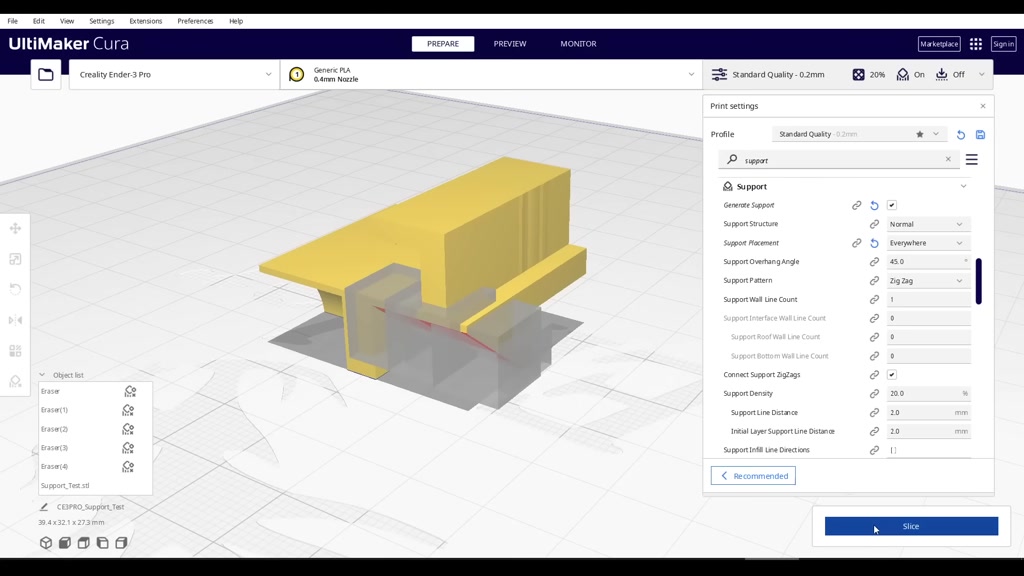
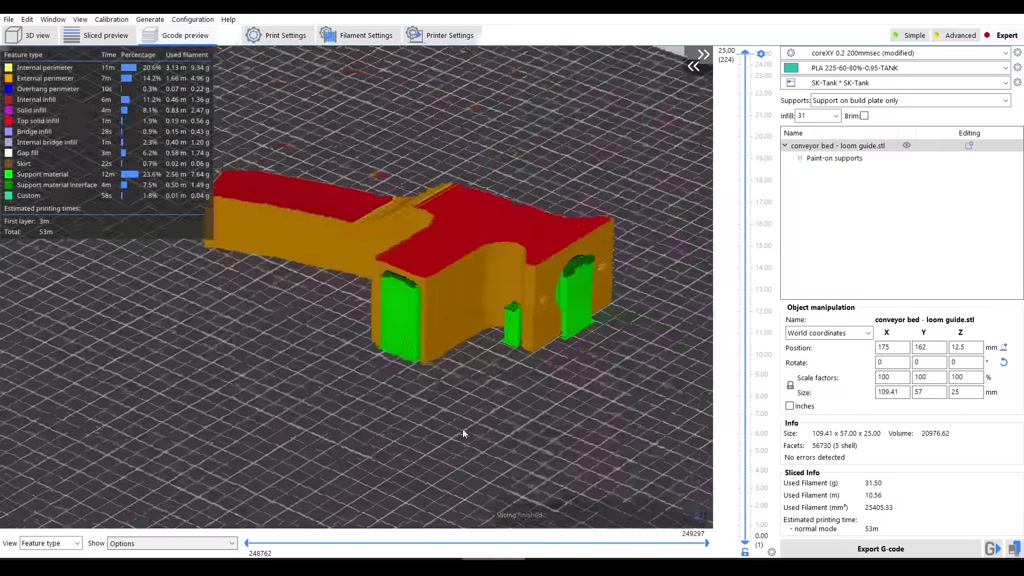
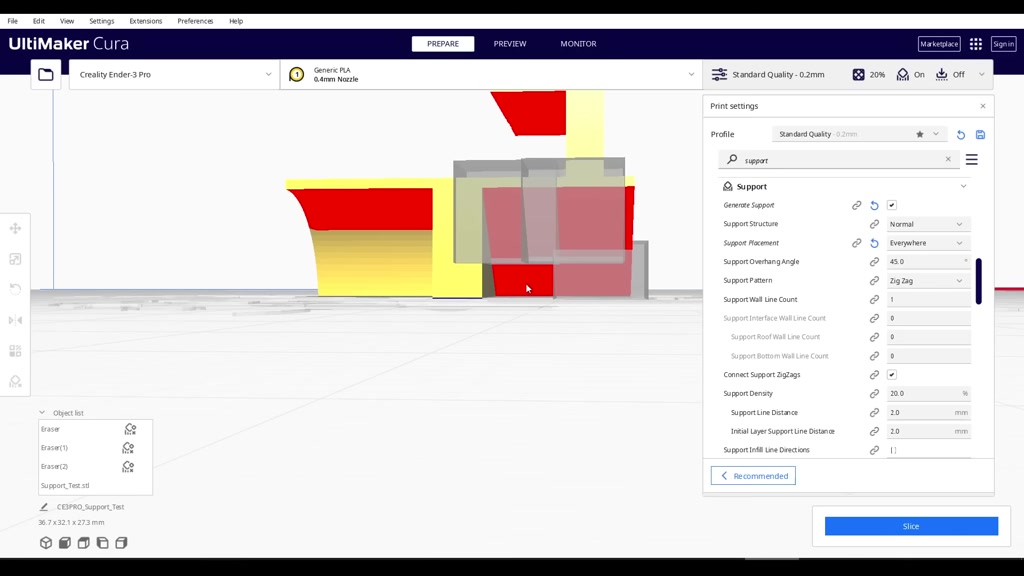
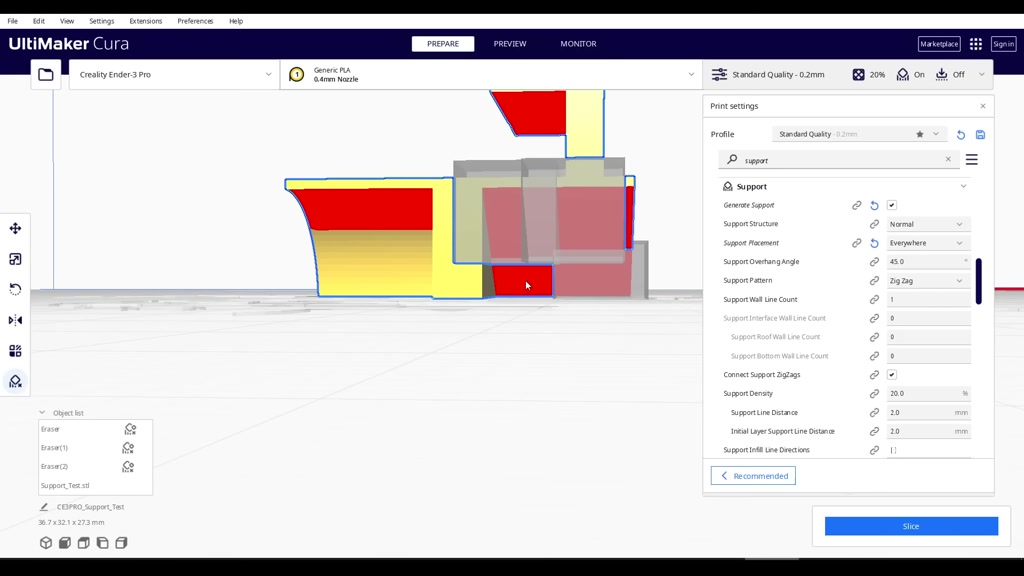
what you're trying to achieve now when
#
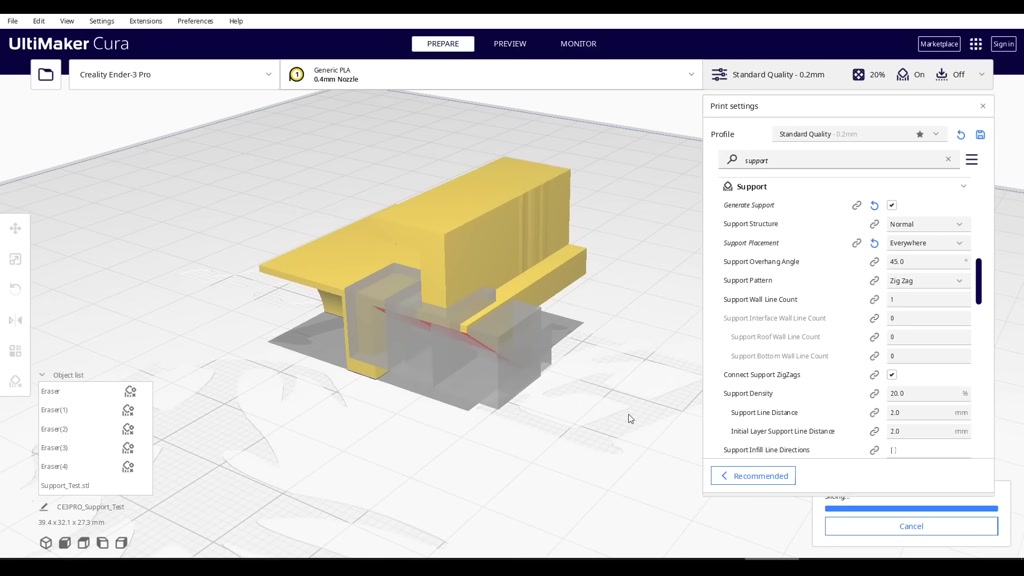
we slice we can see that for the most
#

part support material has been emitted
#
from any of these areas that these boxes
#

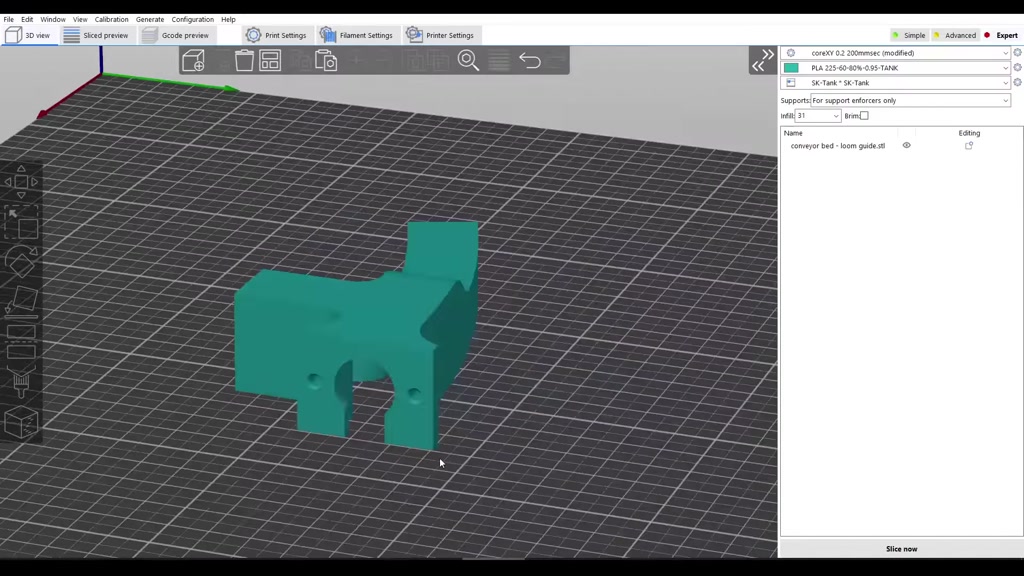
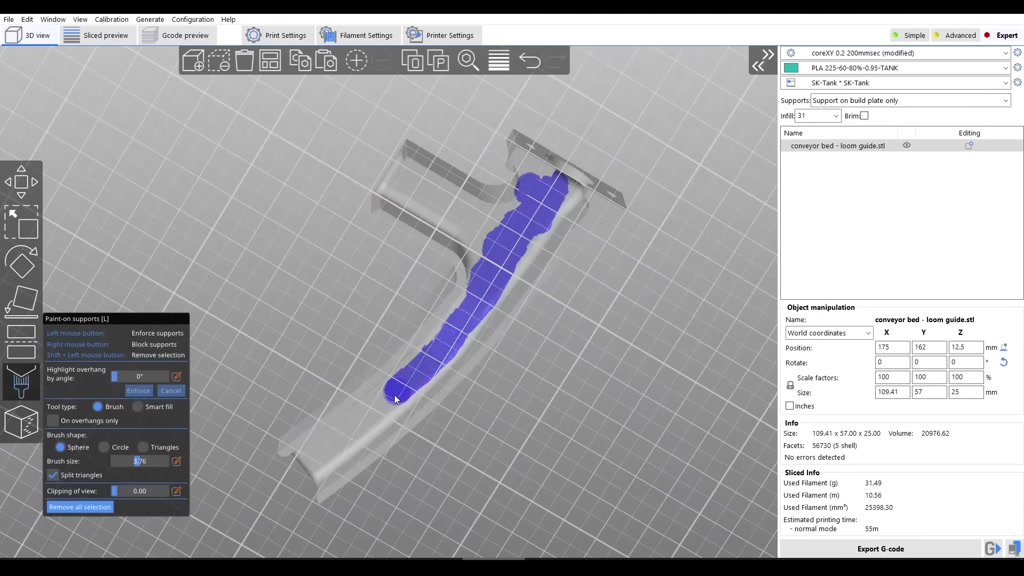
overlapped prusa slicer and derivatives
#

perhaps have the most control by
#
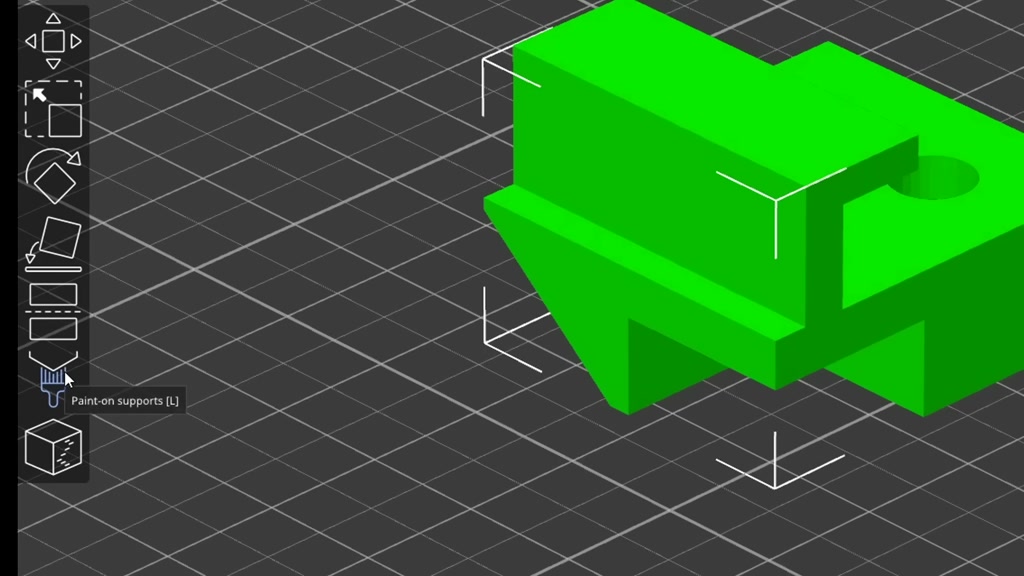
clicking on the object and then coming
#
to the paint on support tool we can use
#

the left Mouse button to paint surfaces
#
where we want support to be applied and
#
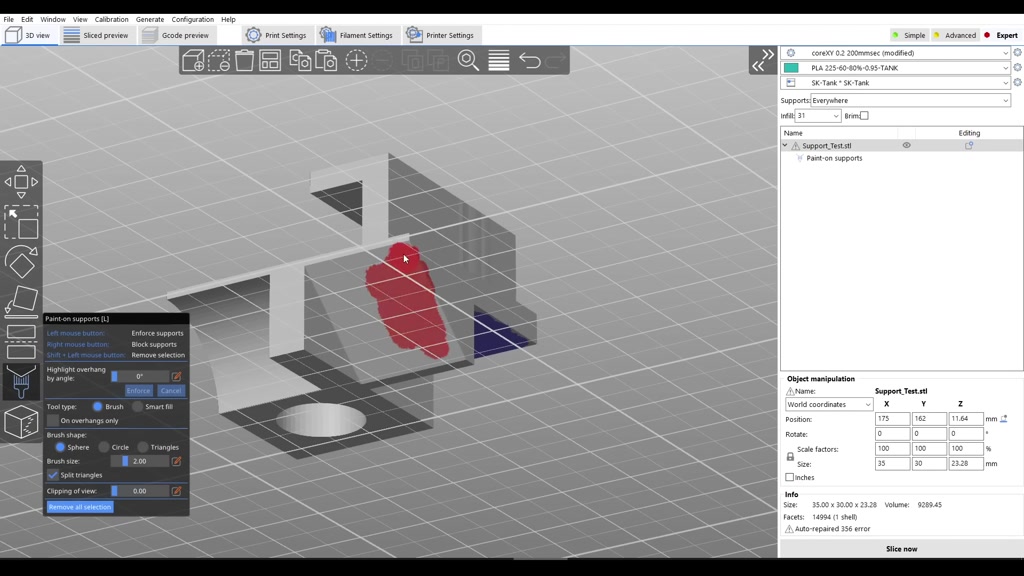
the right Mouse button to paint areas
#
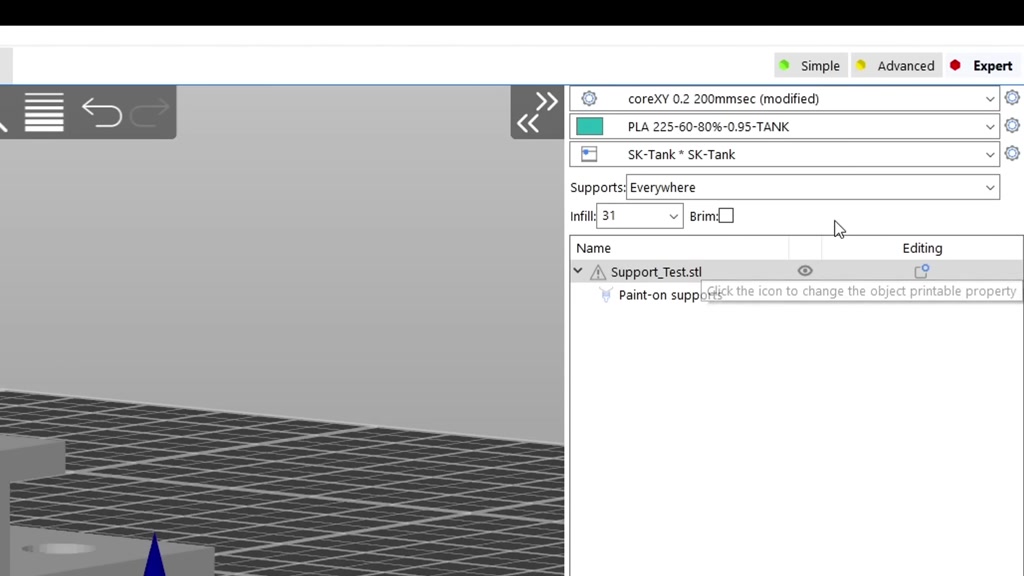
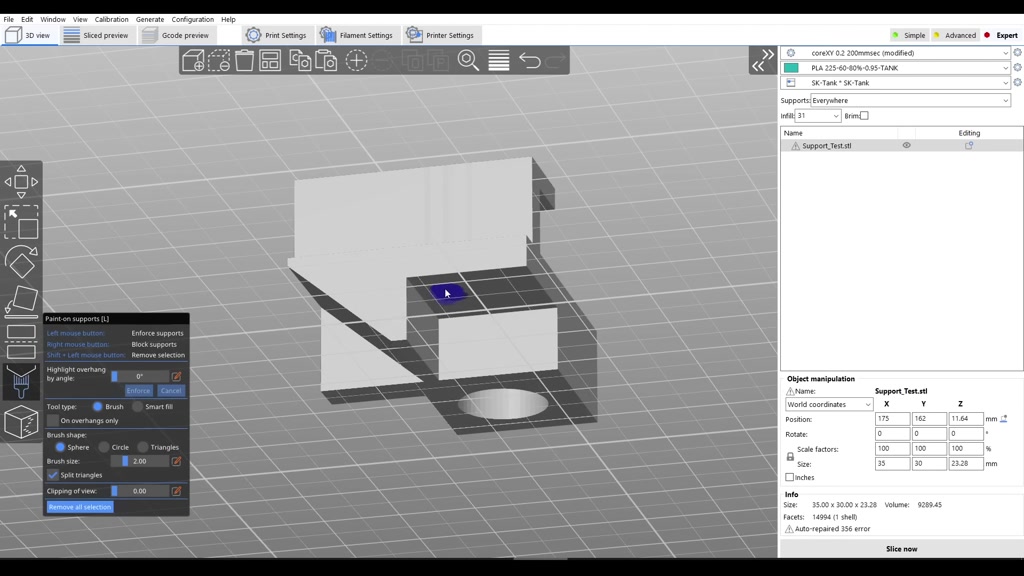
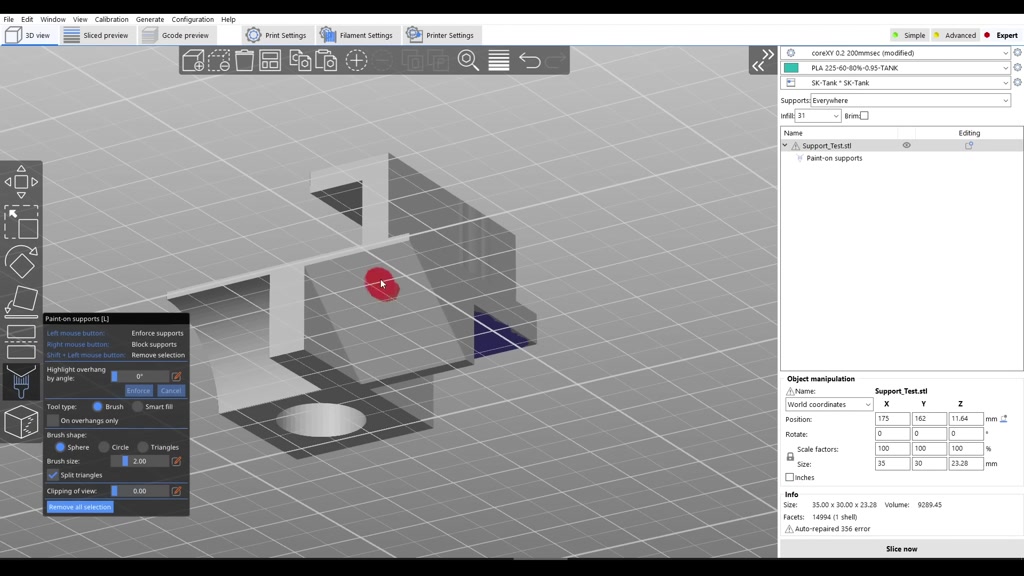
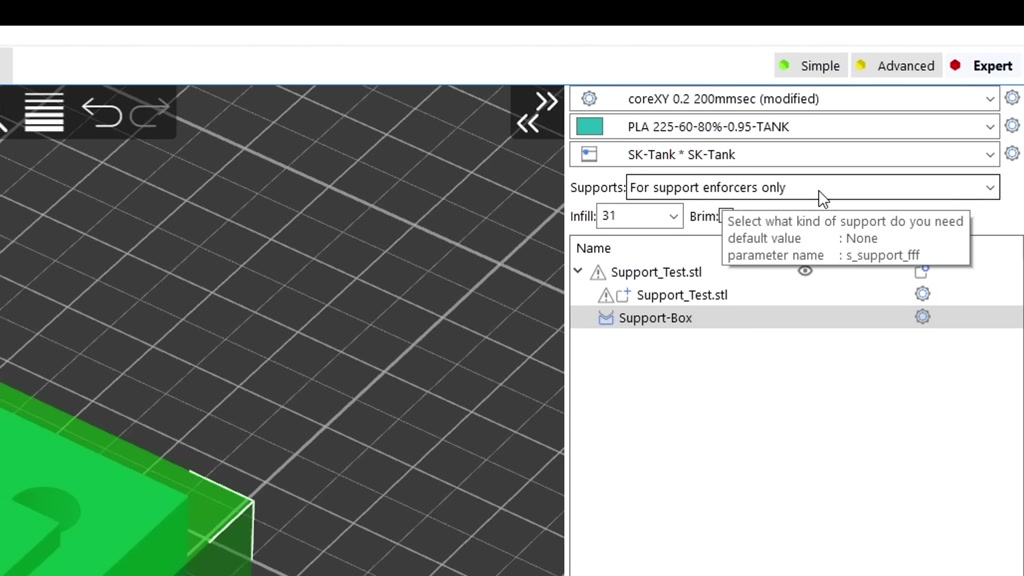
where we want support to be emitted we
#
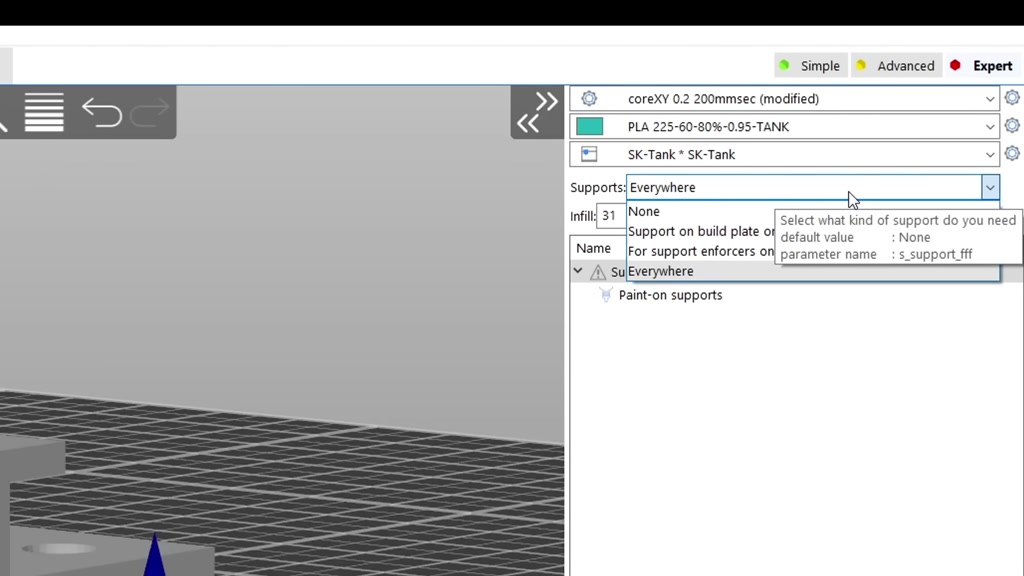
then change our supports from everywhere
#
to support enforcers only and we can see
#

that the whole model is ignored apart
#
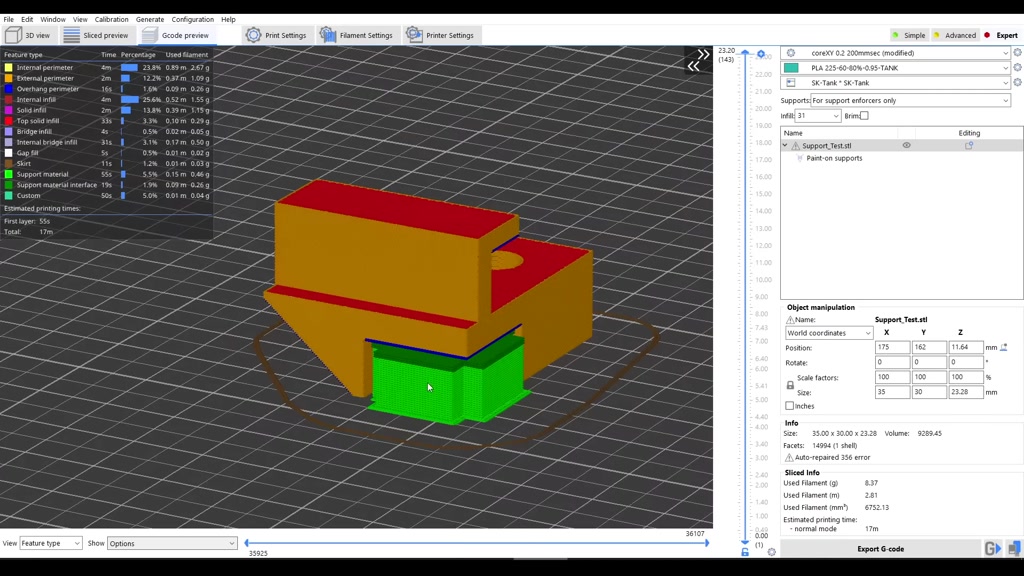
from where I painted that I wanted
#
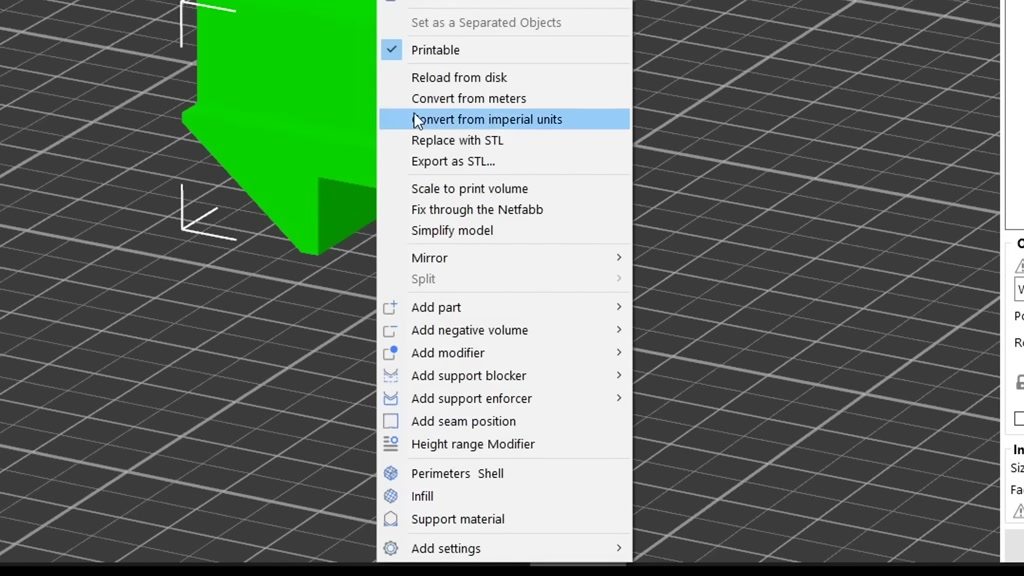
support we can also right click on the
#
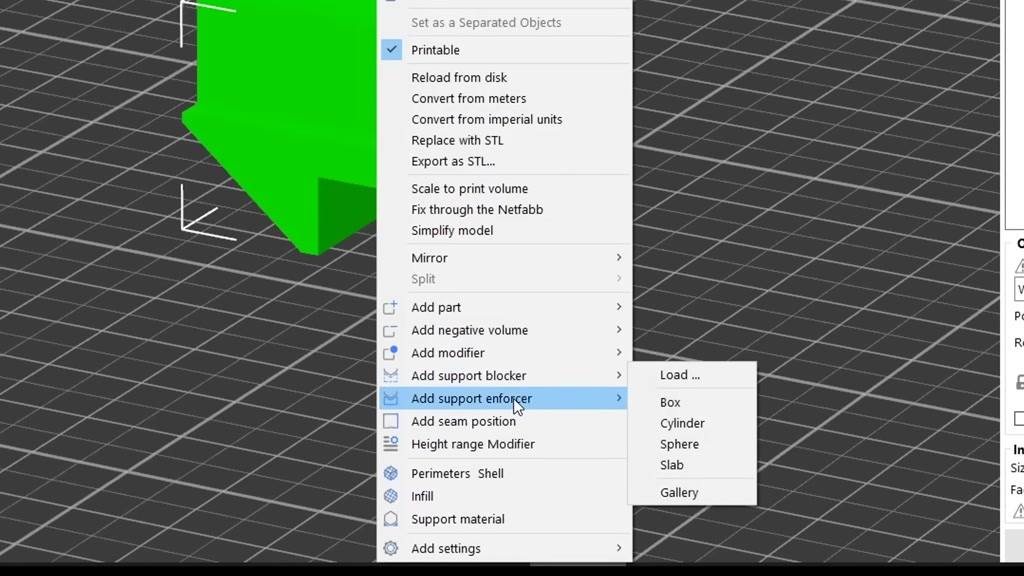
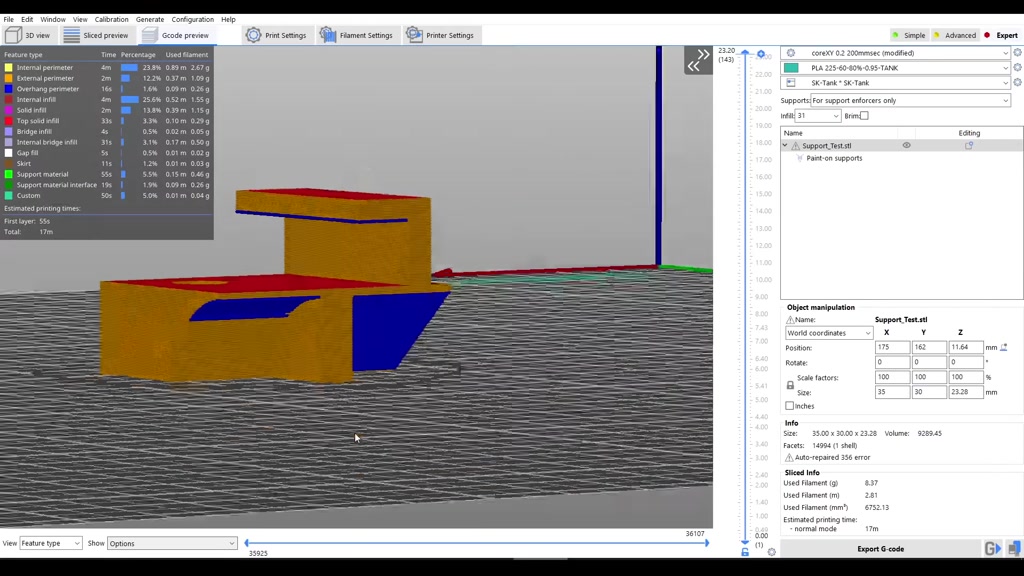
model and come to add support blocker or
#
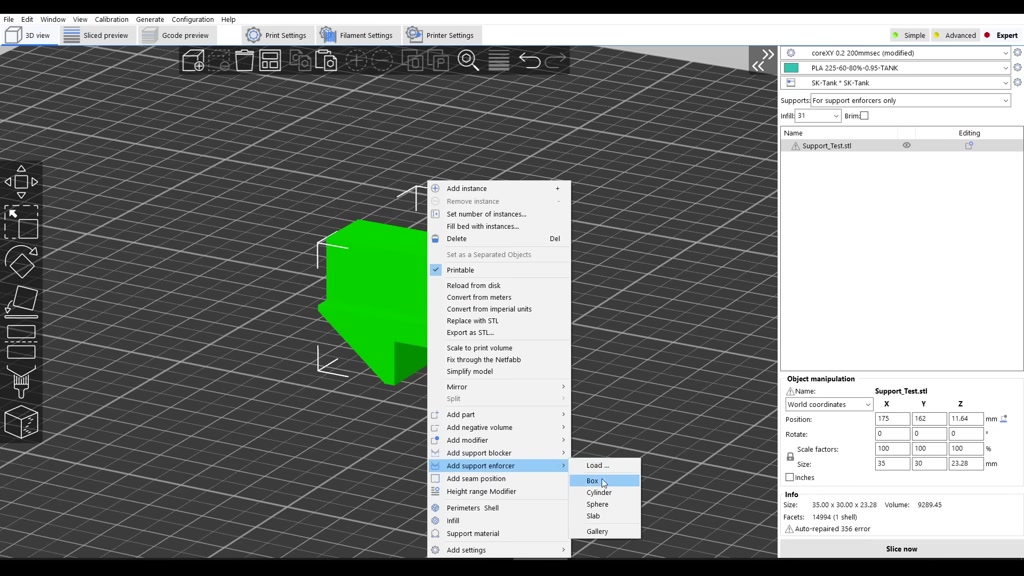
add support enforcer I'm going to add an
#
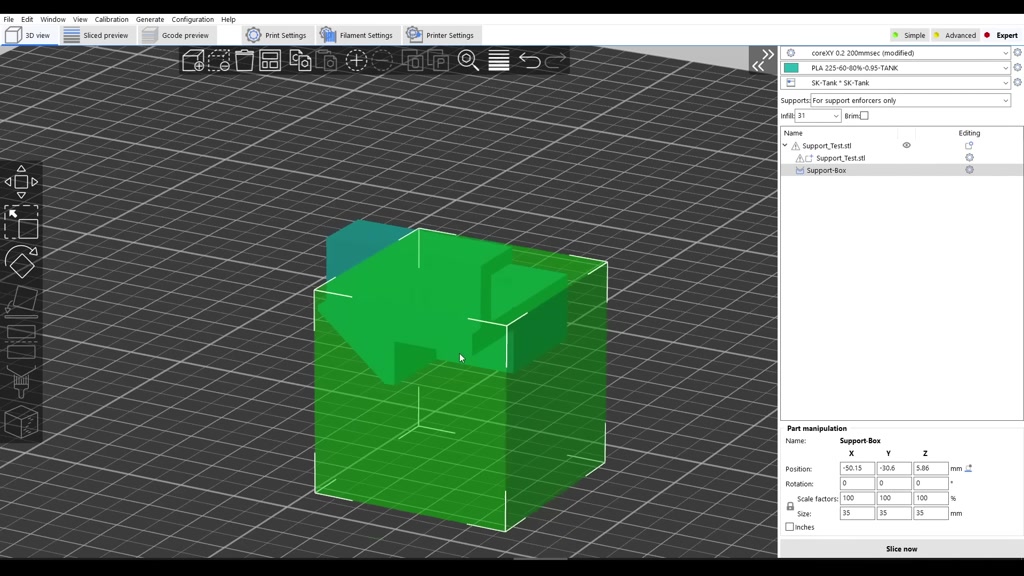
enforcing box and then move it into
#
position again if I have support set to
#
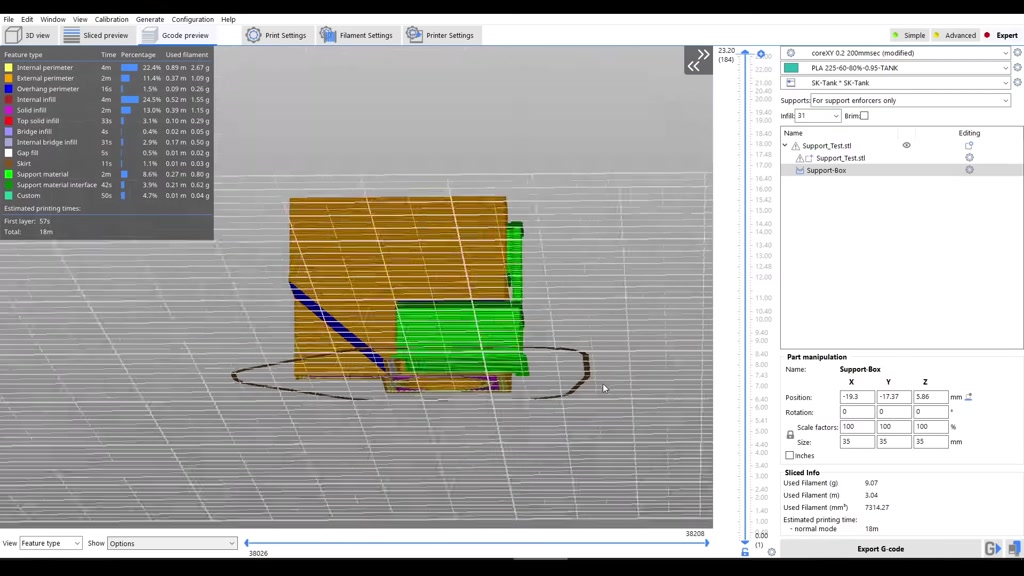
win forces only when I slice the model
#
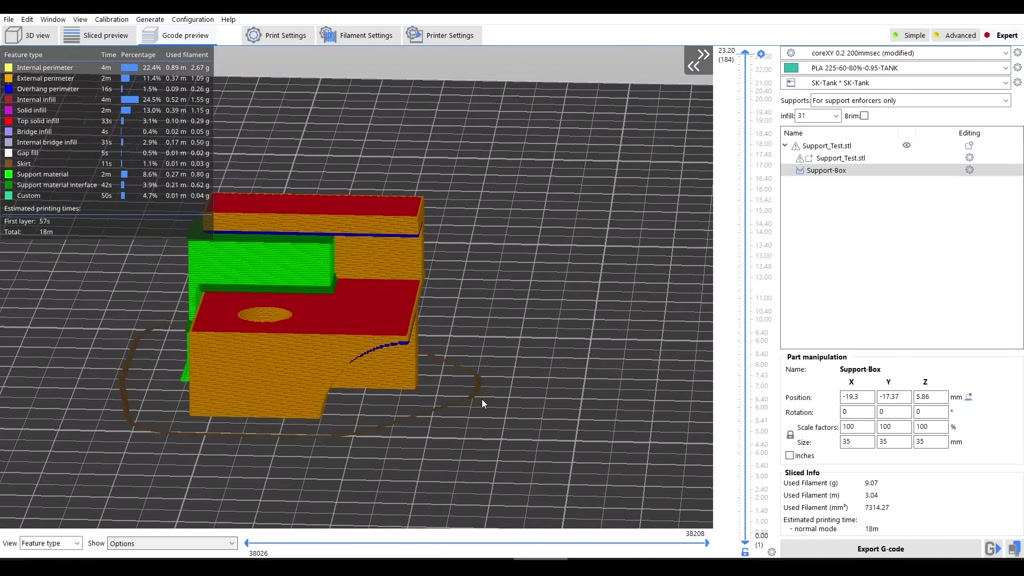
only the sections that overlap will have
#
support material applied let's consider
#
if we have a 3D printer with
#
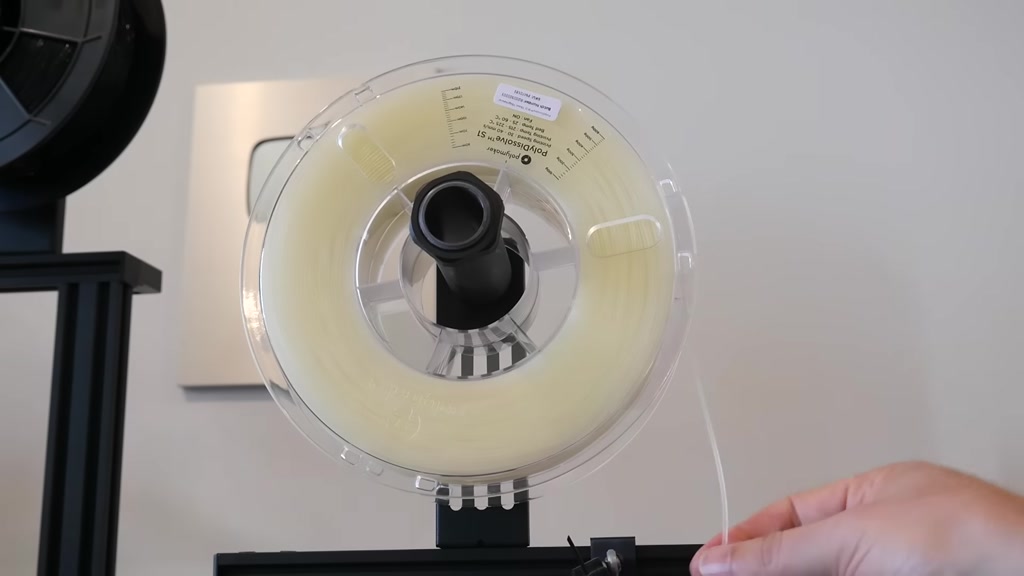
multi-material capabilities dissolvable
#
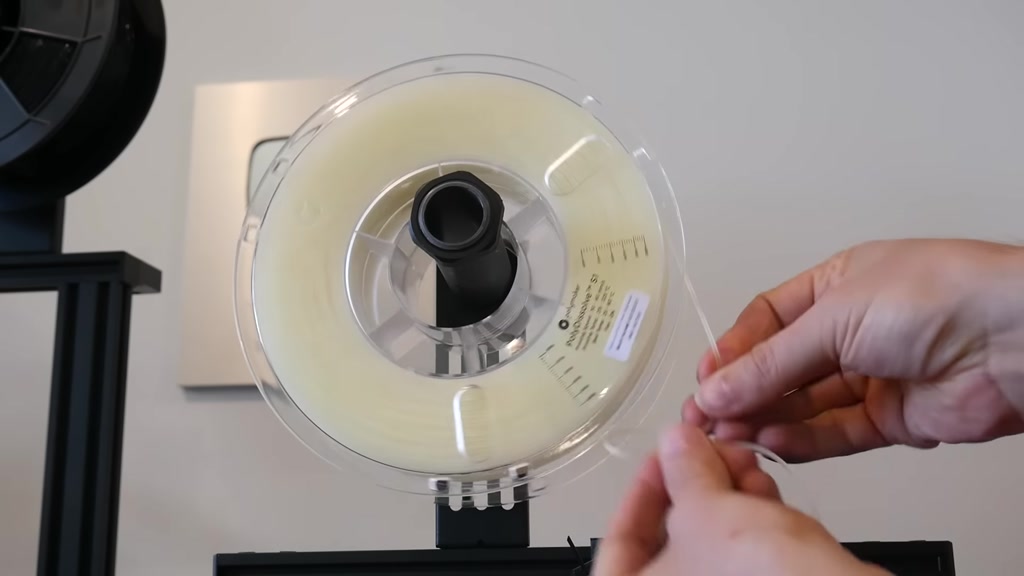
support material filament exists that is
#

soft and flexible just like TPU in these
#

cases we tilt the slicer to print the
#
support material with a different
#
filament we then pop the completed print
#
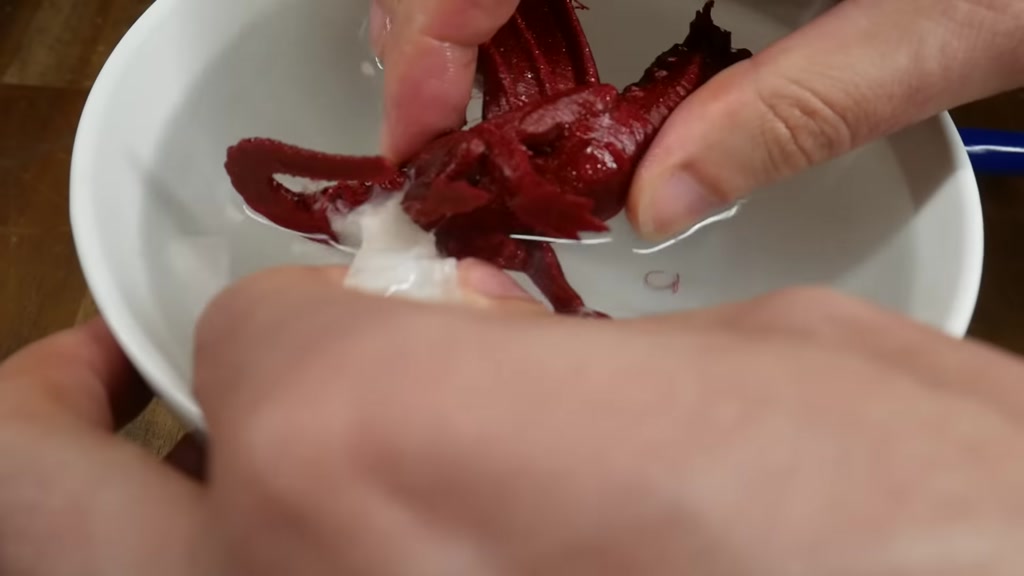
into some warm water something like 50
#
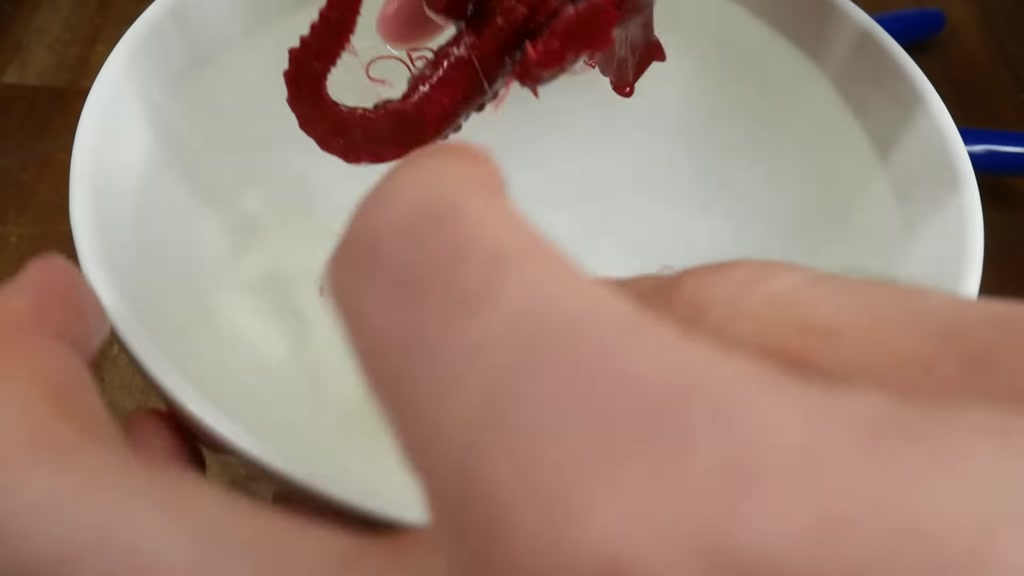
degree and after a few minutes it will
#
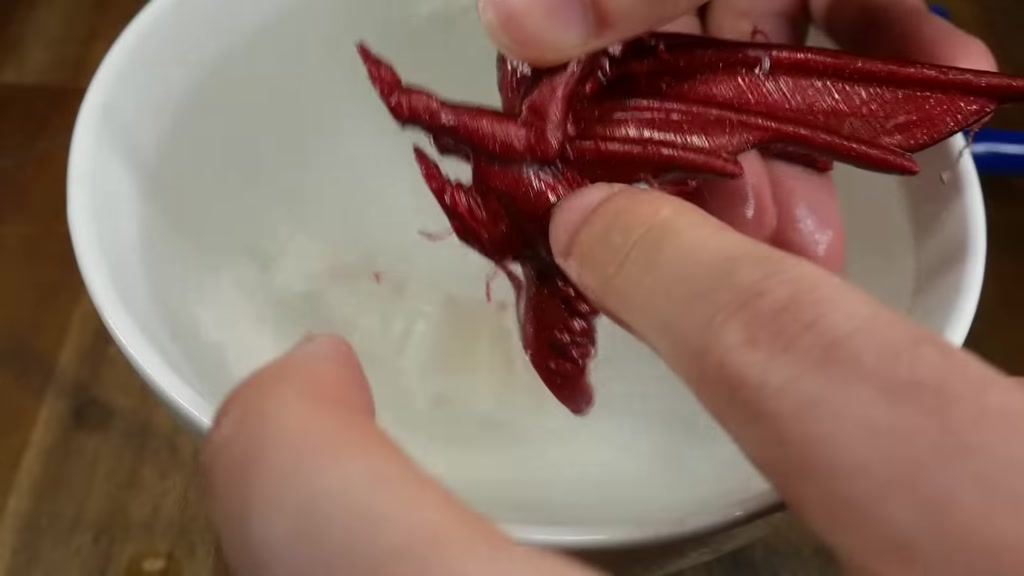
start to soften and should be very easy
#
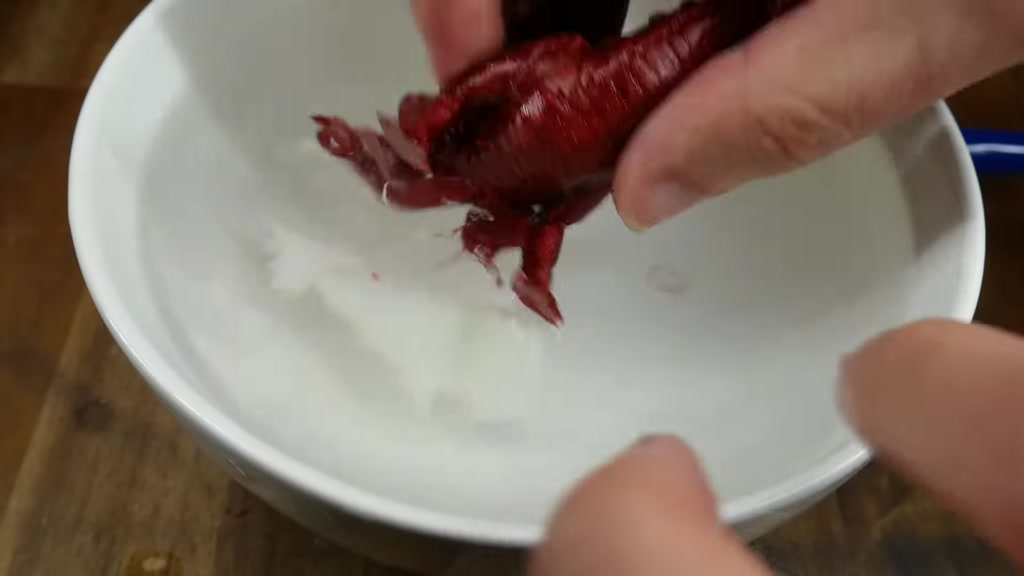
to remove you'll need to wash it to get
#
rid of all of the little bits of Gunk
#
but once you've done this the result
#
should be outstanding because you can
#
have a very tight Z Gap and that will
#
give you a very clean underside of the
#
model as if the support was never there
#
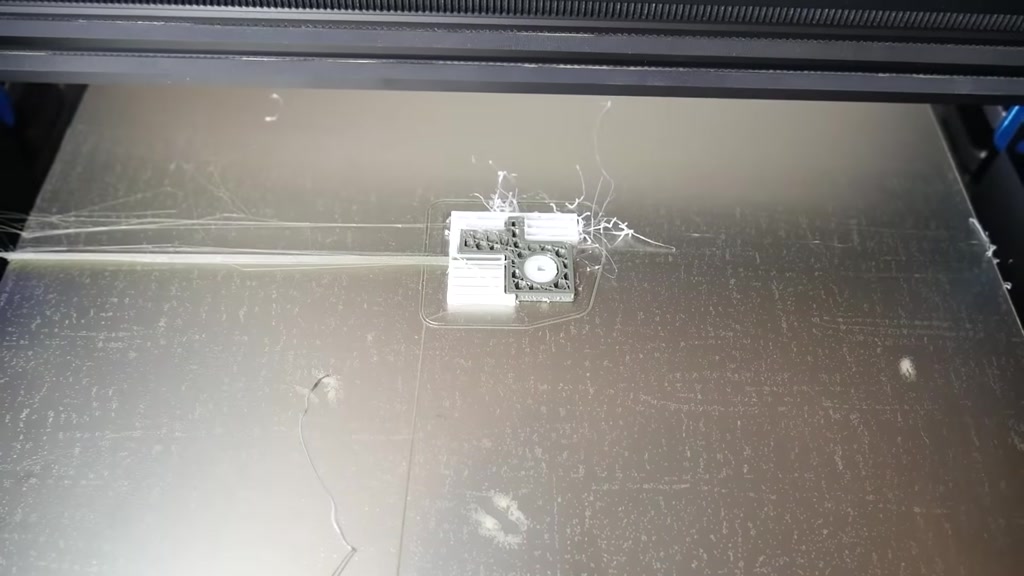
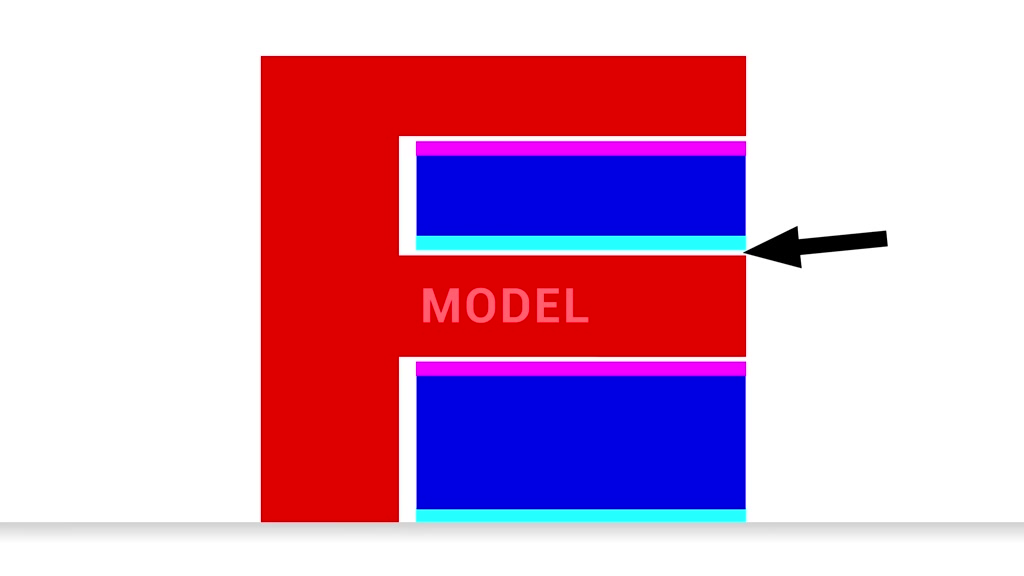
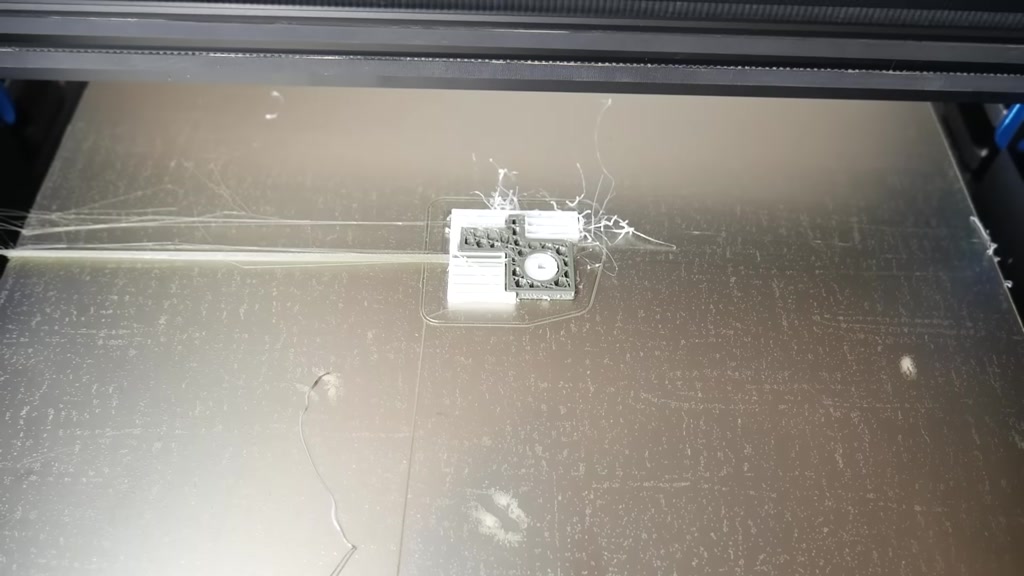
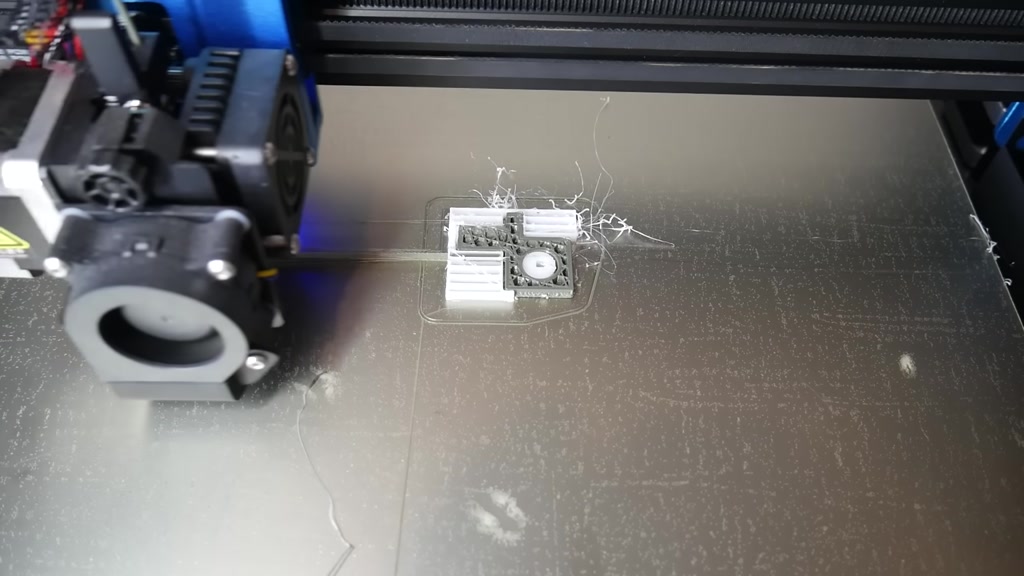
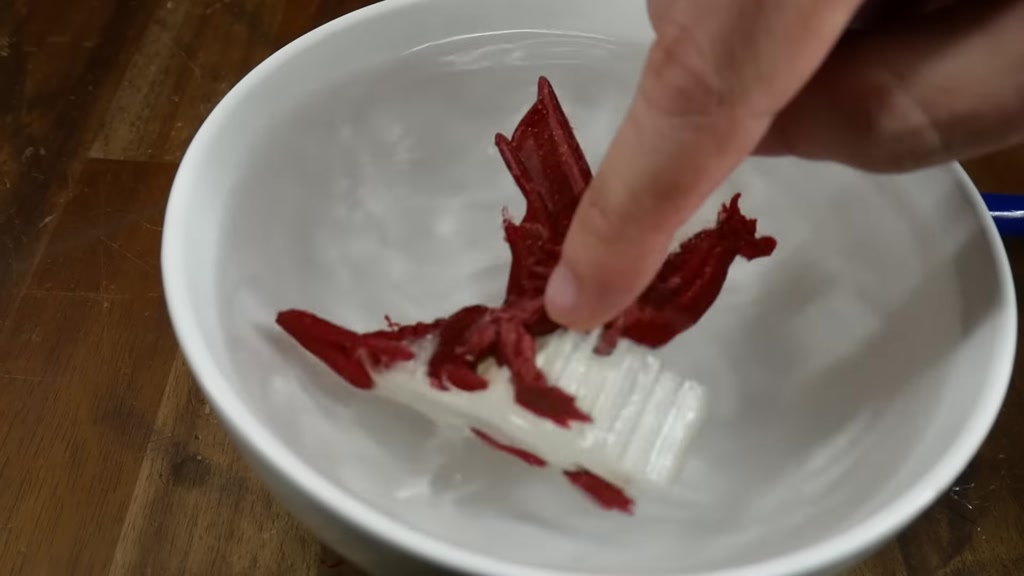
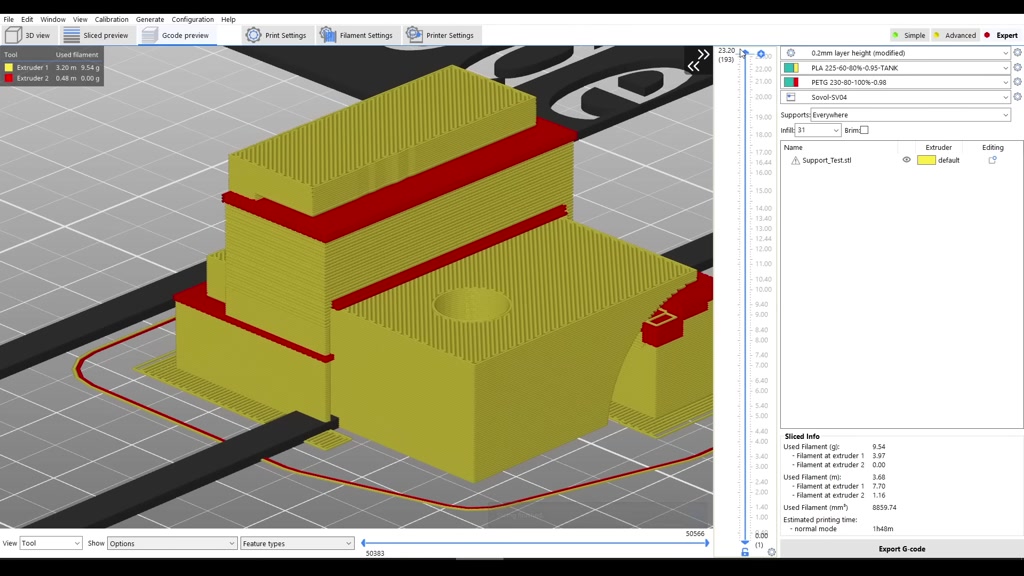
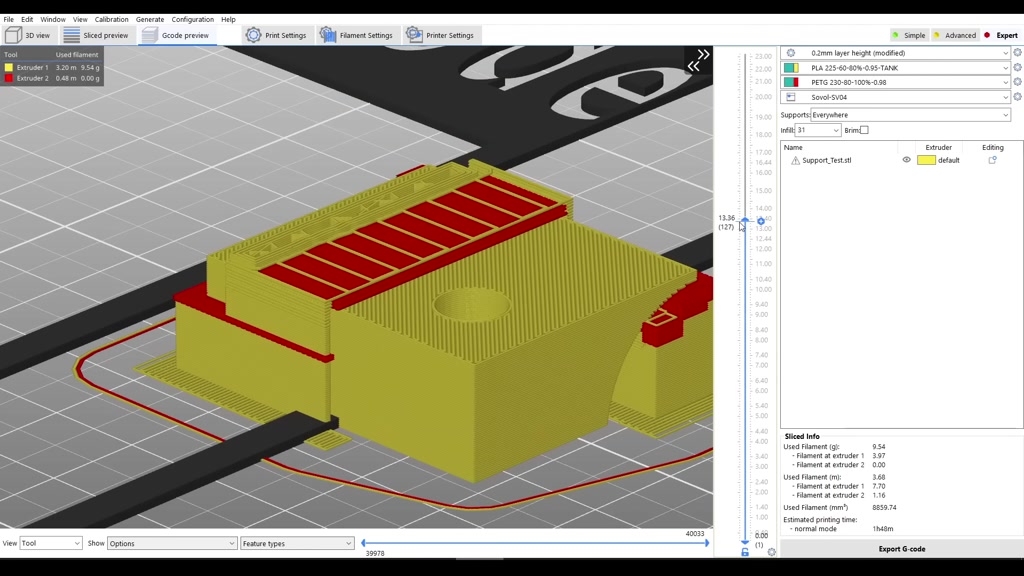
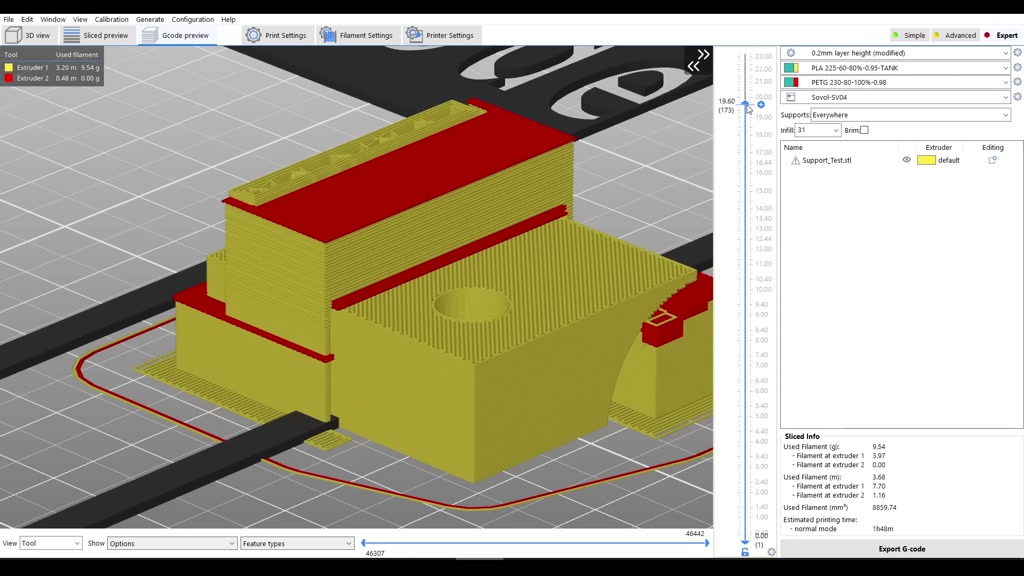
you can achieve a similar effect with
#
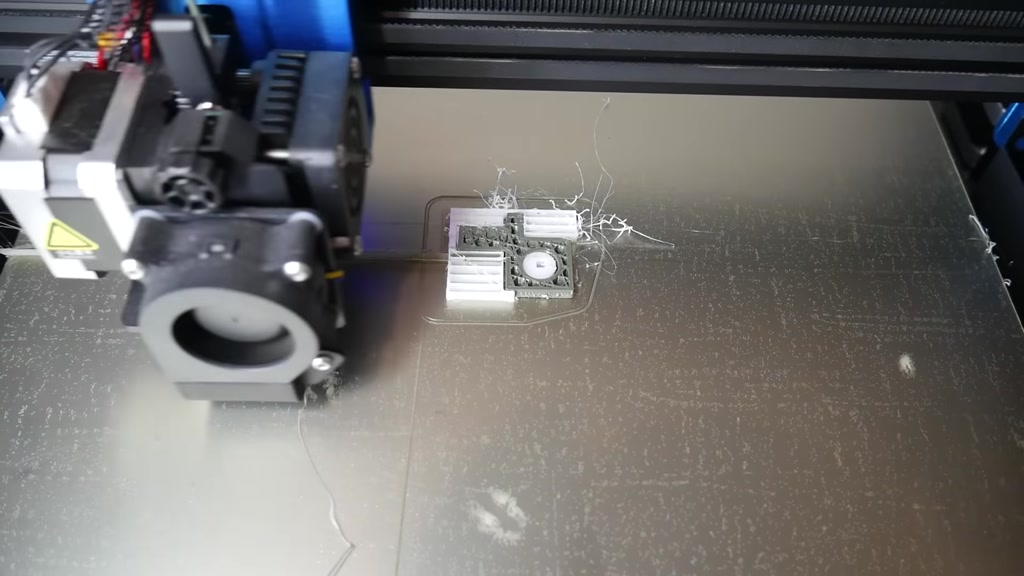
two filaments that don't bond to each
#
other such as pla here in dark green and
#
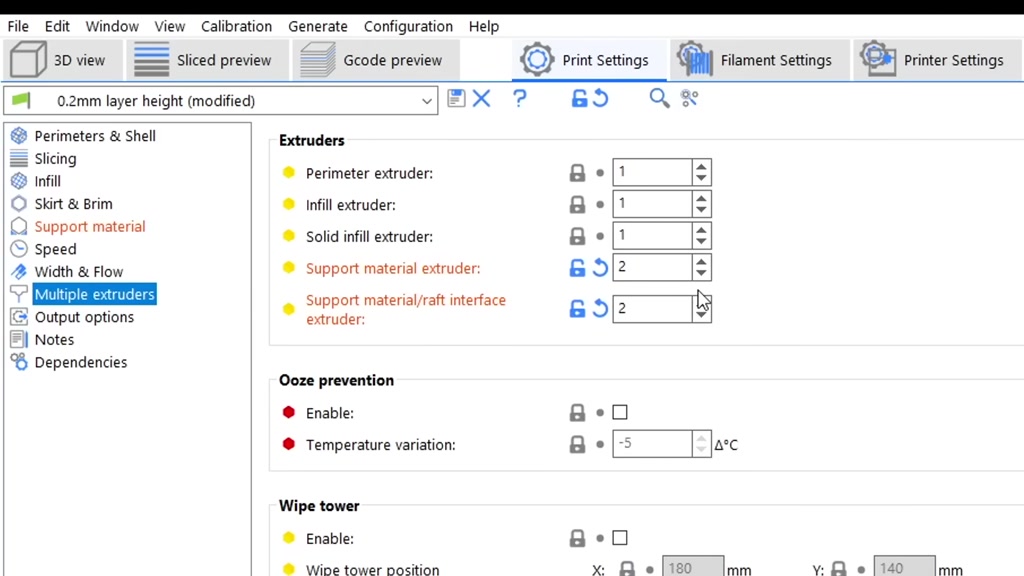
petg in white it's just a matter of
#
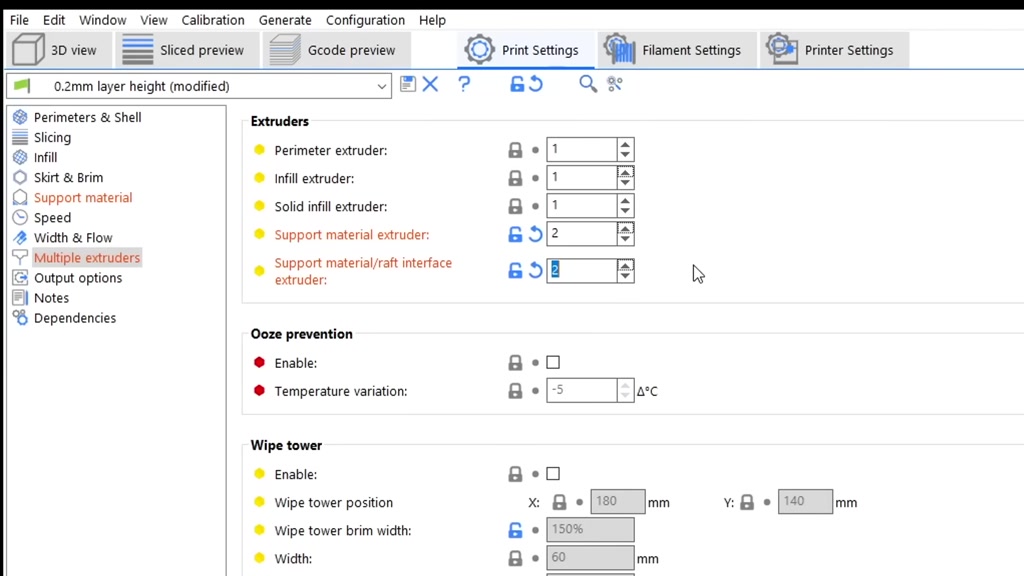
setting support and interface to a
#
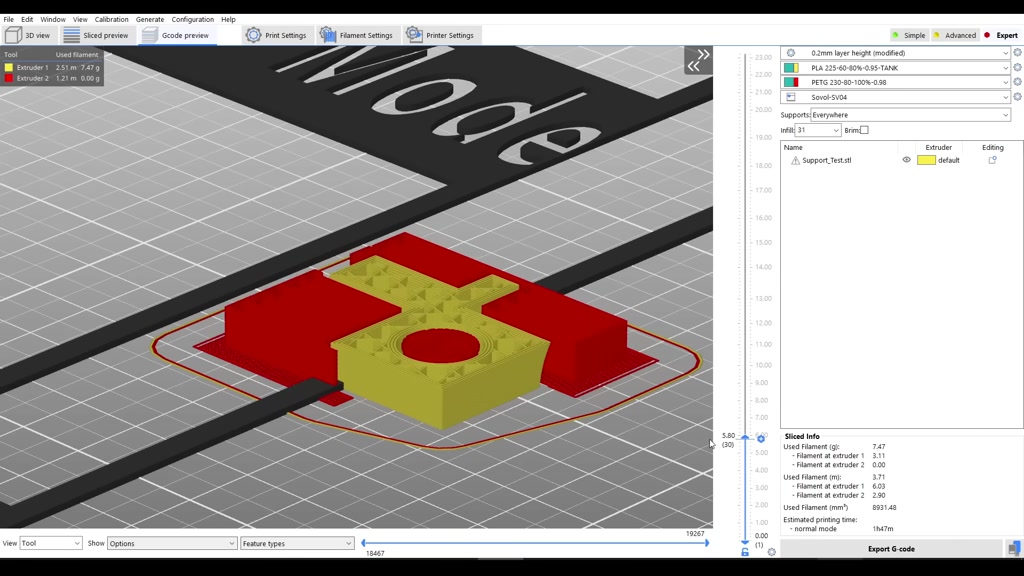
second extruder which will designate the
#
two materials accordingly this is the
#
first time I've tried these materials
#
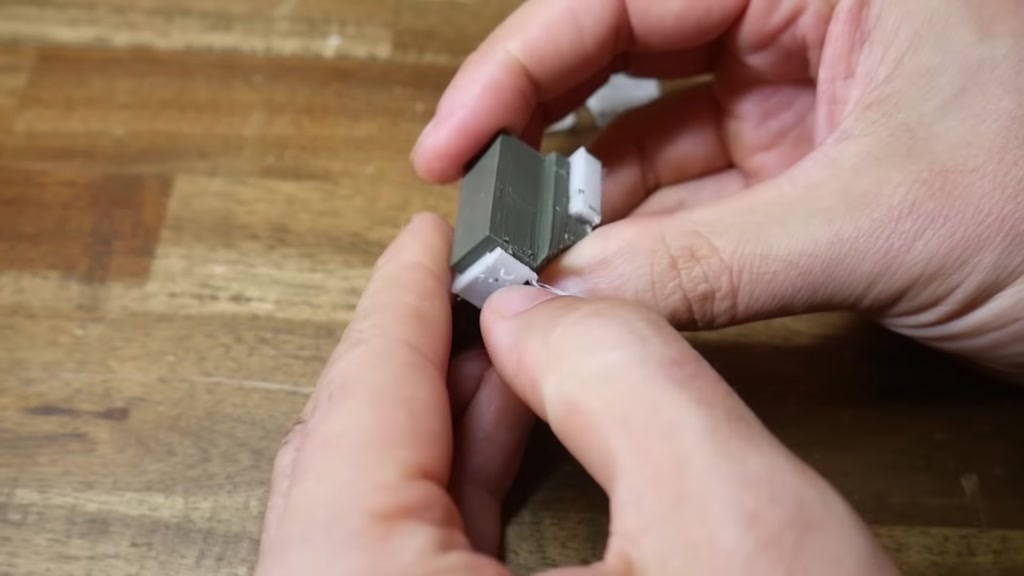
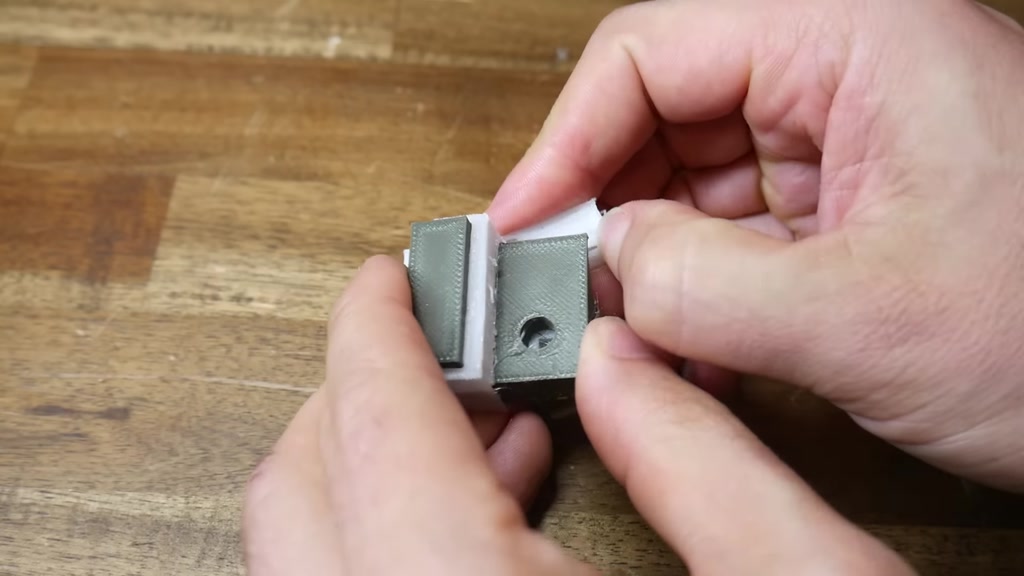
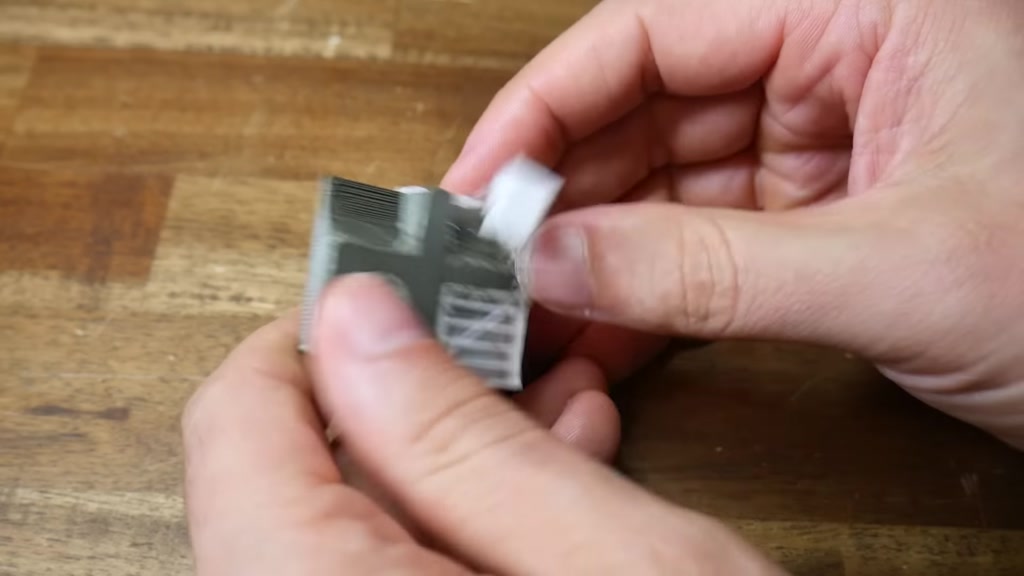
together and it works surprisingly well
#
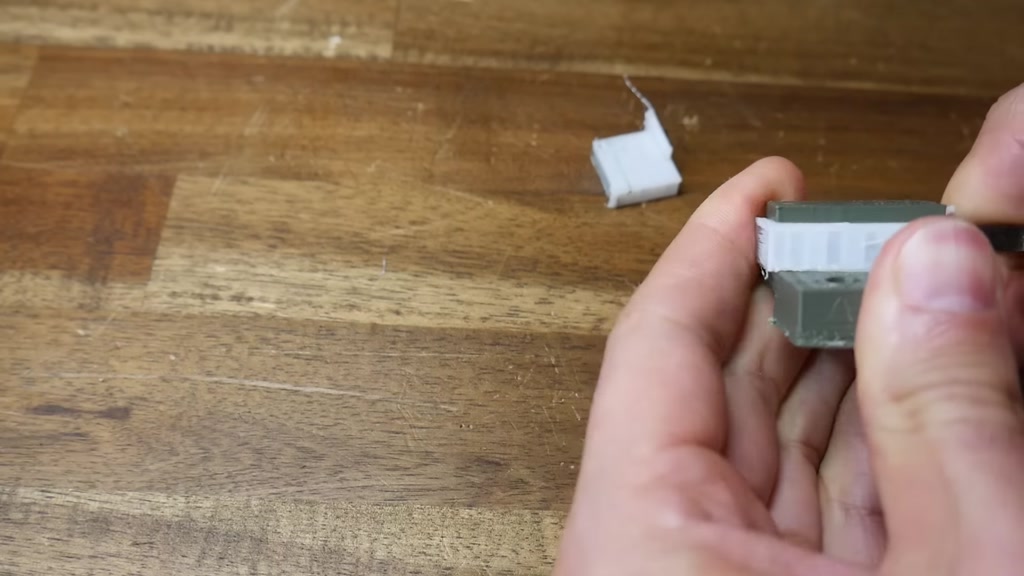
I only needed a little bit of massaging
#
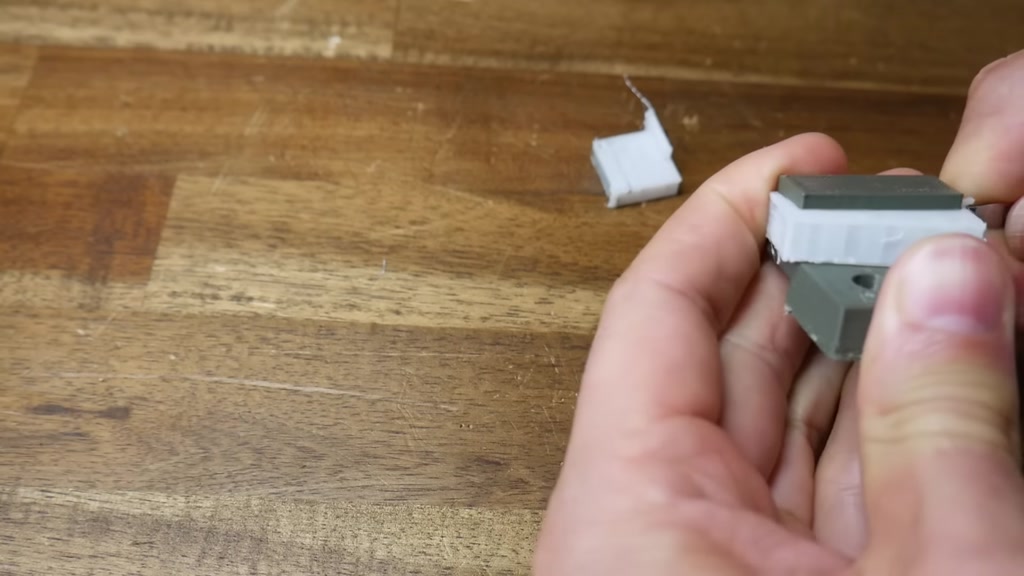
with my pry tool to remove the support
#
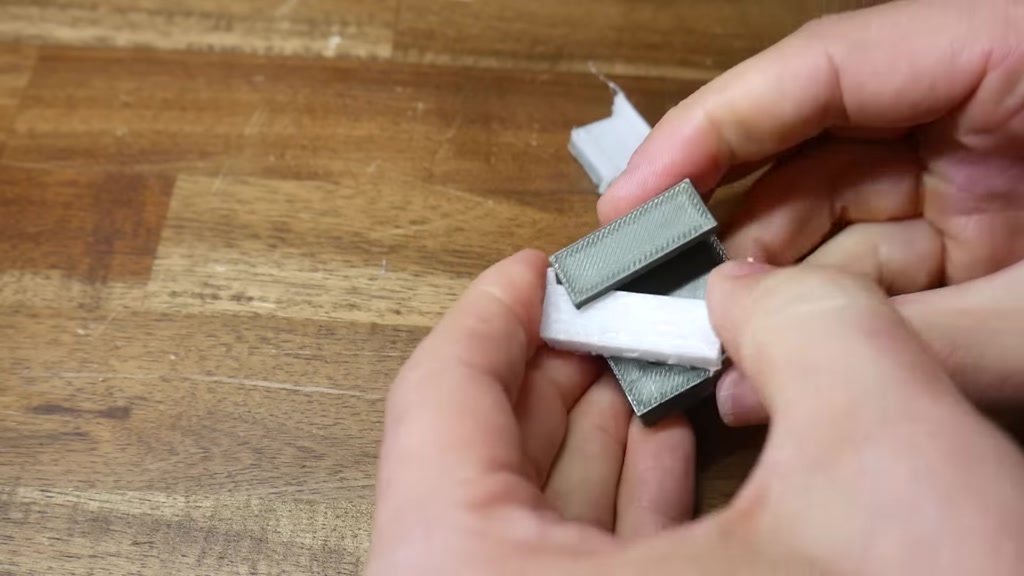
between the two halves of the model and
#
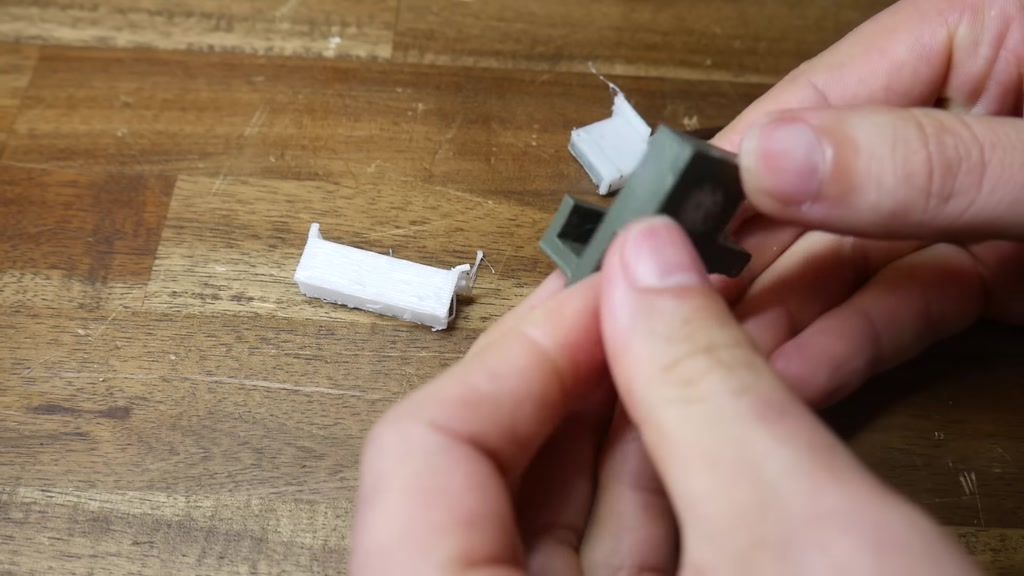
then the support slid on out giving me
#
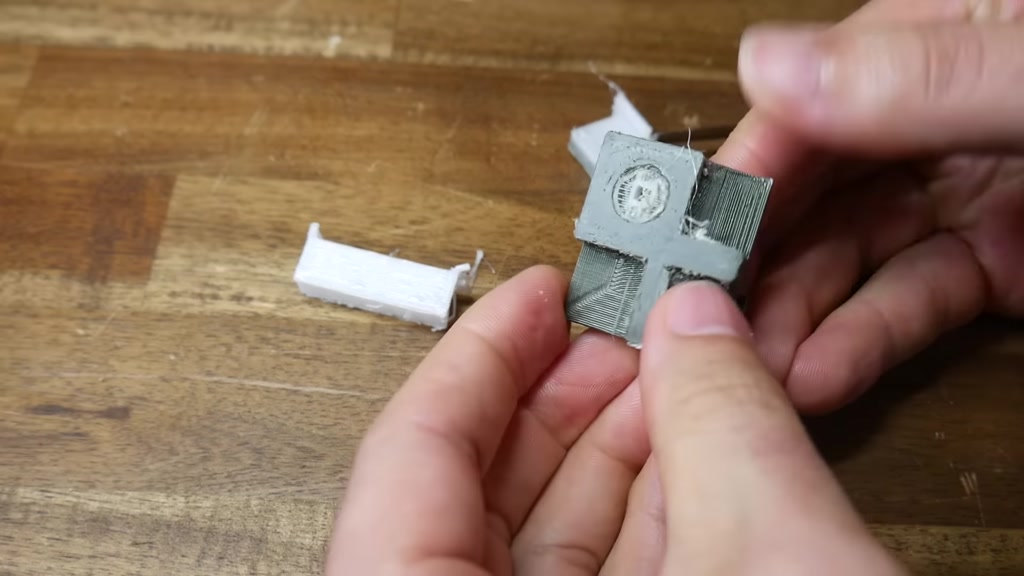
very clean undersides in fact the
#
horizontal undersides were better than
#

the angled overhangs on this model
#
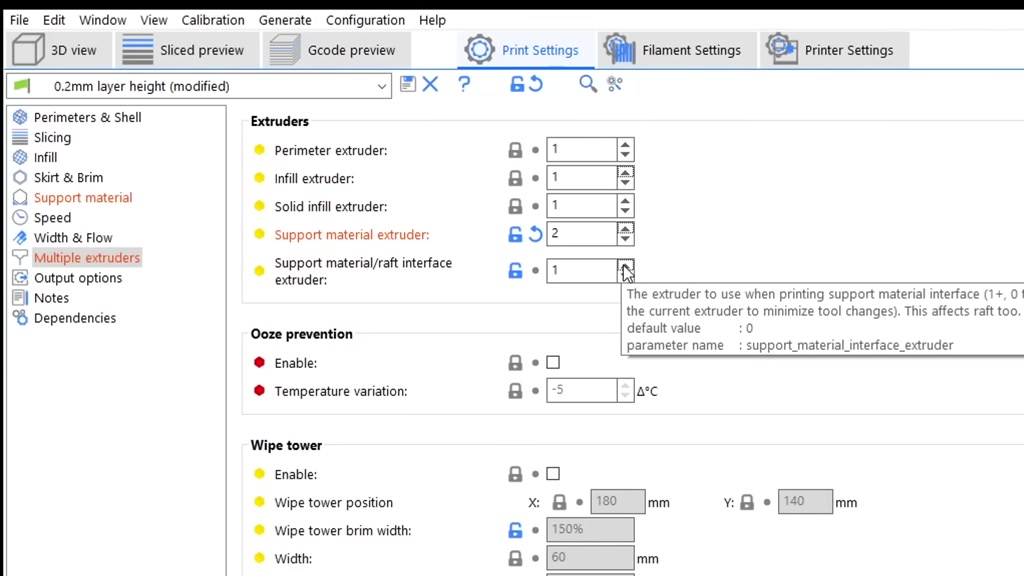
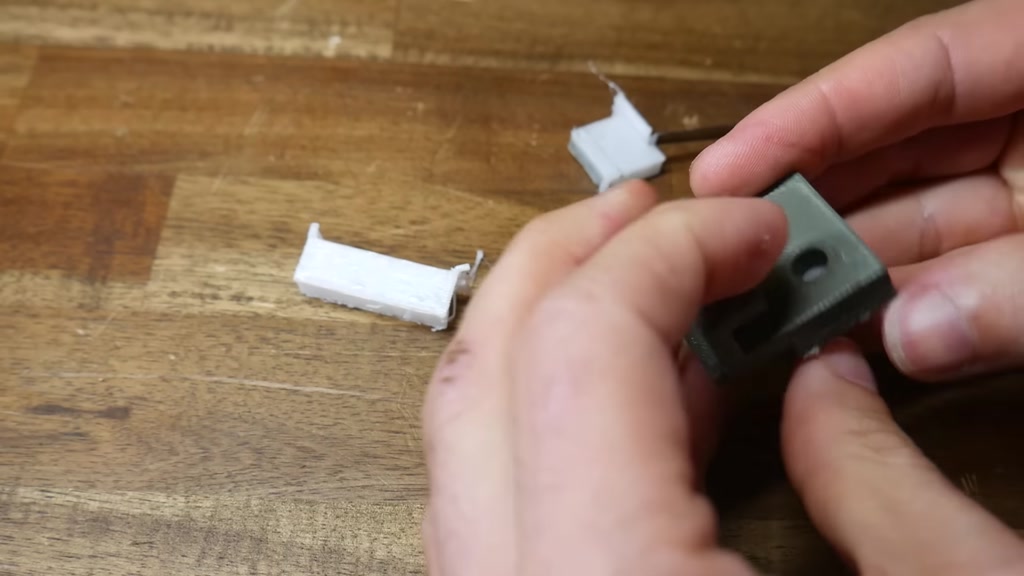
if the secondary filament you're using
#
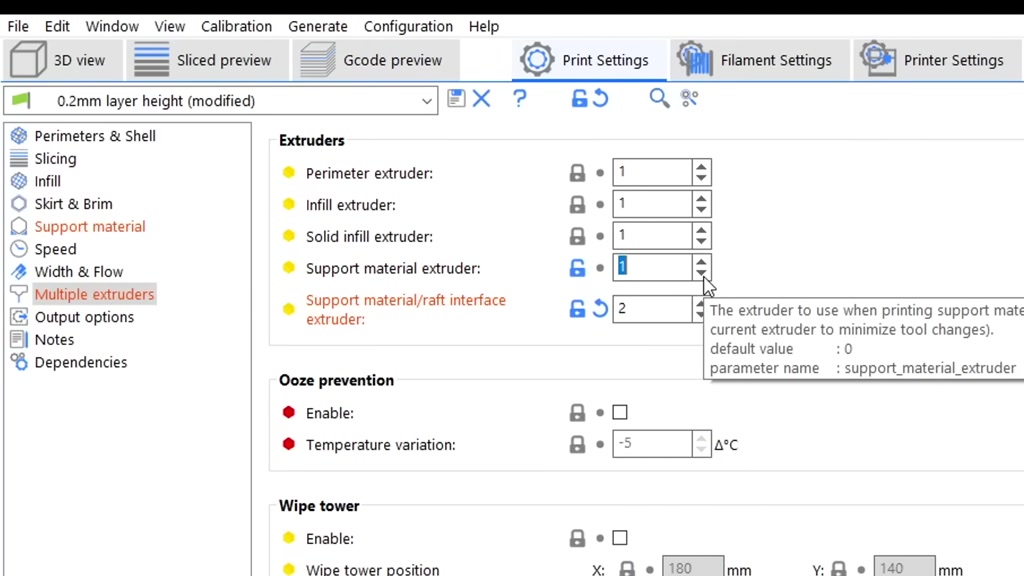
is expensive then you only need to print
#

the interface material using it that
#
means only the support material that
#
touches the model will be printed with
#
the other filament making the roll last
#

much longer
#

there are exciting developments on the
#
way to avoid support material altogether
#

as covered nicely by chiffon from CNC
#

kitchen but until these methods are
#

stable hopefully this video is of use
#
thank you to my patrons for requesting
#

this video thank you so much to you for
#

watching and until next time happy
#

g'day it's Michael again if you like the
#

video then please click like if you want
#

to see more content like this in future
#

click subscribe and make sure you click
#

on the Bell to receive every
#

notification if you really want to
#

support the channel and see exclusive
#

content become a patron visit my patreon
#